

Kirby Kitchen Pizza Dough
Crisp edges. Chewy center. Built for serious pizza.
A slow-fermented pizza dough developed for the Kirby Kitchen around a balanced blend of bread flour and all-purpose flour. Designed to stretch cleanly, develop flavor over time, and work across a range of pizza sizes and cooking methods.
This recipe makes enough dough for two 16-inch pizzas or three 12-inch pizzas.
A good pizza starts with the dough.
There are plenty of pizza dough recipes out there, but the goal here isn't to make another generic dough.
The Kirby Kitchen version started with an appreciation for the approach used by Dave's Pizza Oven, whose pizza-making techniques helped inspire this formula. From that starting point, the dough was adapted into its own formula around the ingredients, equipment, and cooking methods used in the Kirby Kitchen.
A blend of bread flour and all-purpose flour gives the dough enough strength to stretch without becoming unnecessarily tough.
A small amount of honey provides subtle sweetness, while a long fermentation gives the dough time to develop flavor and texture.
The result is a versatile dough that can handle everything from a backyard pizza oven to a home oven with a preheated pizza steel.
🧪 In Testing — Kirby Kitchen Test Kitchen
This recipe is currently being tested.
The current version is being evaluated for dough handling, stretchability, fermentation time, crust texture, browning, chew, flavor development, and performance across different ovens and pizza equipment.
The formula is designed around a slow fermentation, but the final fermentation schedule may be adjusted as testing continues.
Once the recipe has been fully tested and the fermentation schedule is finalized, the In Testing label will be removed and the recipe will be updated.
Recipe at a Glance
Yield: 2 large 16-inch pizzas or 3 12-inch pizzas
Total Dough Weight: Approximately 850 g
Prep Time: About 30 minutes
Bulk Rest: 30–60 minutes
Cold Fermentation: 24–72 hours
Room-Temperature Proof: 2–3 hours
Bake Time: Varies by cooking method
Ingredients
375 g bread flour
125 g all-purpose flour
315 g cold water
12 g fine sea salt
1 g active dry yeast
8 g honey
12 g extra-virgin olive oil
Instructions
1. Prepare the Water
Reserve approximately 30 g of the 315 g water.
Warm that portion to approximately 105°F.
Add the active dry yeast and honey.
Stir gently and allow it to stand for 5–10 minutes, until the yeast begins to foam.
Keep the remaining 285 g water cold.
Kirby Rule: We're keeping most of the water cold to control the dough temperature while giving the active dry yeast a warm start.
2. Initial Mix
Add the following to the mixing bowl:
285 g cold water
30 g yeast and honey mixture
375 g bread flour
125 g all-purpose flour
Mix until all the flour is hydrated and a rough dough forms.
The dough does not need to be fully developed yet.
🌀 Spiral Mixer Method
Mix on low speed until the dough comes together.
Continue mixing while watching the dough temperature and gluten development rather than relying on a fixed mixing time.
Once the dough is beginning to develop strength and approaches approximately 60°F, stop mixing and cover.
⚙️ Standard Stand Mixer Method
Use the dough hook.
Mix on low speed until the ingredients are fully incorporated.
Continue on low to medium-low until the dough begins to develop structure and becomes noticeably smoother.
Avoid overheating the dough.
✋ Hand Method
Mix with a sturdy spoon or dough whisk until a shaggy dough forms.
Turn the dough onto a lightly floured surface.
Work the dough by hand until it becomes cohesive and begins developing elasticity.
3. Rest
Cover the dough and let it rest for 30 minutes.
This allows the flour to fully hydrate and gives the gluten time to begin developing without additional mixing.
4. Add the Salt
Add the 12 g fine sea salt.
Mix until the salt is fully incorporated.
Spiral Mixer
Mix on low for approximately 2–3 minutes.
Stand Mixer
Mix on low until the dough is smooth again.
By Hand
Fold and knead until the salt is evenly distributed.
5. Add the Olive Oil
Add 6 g olive oil.
Mix until completely absorbed.
Add the remaining 6 g and continue mixing until absorbed.
Once incorporated, the dough should become smooth and elastic.
Reduce the mixing speed if necessary.
Aim for a finished dough temperature of approximately 68–72°F, with 70°F being a good target.
Kirby Rule: Pizza dough doesn't need to be beaten into submission. Once the gluten is developed and the dough reaches the right temperature, stop mixing.
6. Rest Again
Cover and allow the dough to rest for another 30 minutes.
7. Stretch & Fold
Perform one complete set of stretch-and-folds.
Stretch one side of the dough upward.
Fold it over itself.
Rotate the dough and repeat on all four sides.
Cover and rest for 20 minutes.
If the dough still tears easily or hasn't developed enough strength, perform another stretch-and-fold.
8. Check the Dough
Take a small piece of dough and gently stretch it between your fingers.
The dough should stretch into a thin membrane before tearing.
This is the windowpane test.
If the dough is still tearing immediately, let it rest another 20 minutes and repeat a gentle stretch-and-fold.
9. Bulk Fermentation
After the final fold, cover the dough and allow it to rest at room temperature for approximately 30–60 minutes.
You're looking for the dough to relax and begin showing some fermentation activity.
It does not need to double in size.
10. Divide & Ball
Turn the dough onto a lightly floured work surface.
Divide according to the pizza size you want.
For Two 16-Inch Pizzas
Divide into:
2 × approximately 425 g dough balls
For Three 12-Inch Pizzas
Divide into:
3 × approximately 283 g dough balls
Shape each portion into a smooth, tight ball.
Place each dough ball into a lightly oiled dough container.
11. Cold Fermentation
Cover tightly and refrigerate.
Minimum
24 hours
Preferred
48 hours
Maximum for the Initial Test
72 hours
Longer fermentation generally provides more developed flavor and a more relaxed dough, but the dough should be evaluated as it ages.
12. Bring the Dough Back to Temperature
Remove the dough from the refrigerator approximately 2–3 hours before baking.
Keep the containers covered.
Allow the dough to warm and relax at room temperature.
The dough should become soft, slightly puffy, and easy to stretch.
13. Shape the Pizza
Lightly flour the work surface.
Place one dough ball onto the surface.
Press gently from the center outward, leaving a slightly thicker edge for the crust.
Continue stretching by hand until you reach your desired size.
Avoid using a rolling pin if you want a lighter, more open crust.
Kirby Rule: Push the dough outward, don't crush the air out of the edge.
🍕 Cooking Methods
The dough can be cooked in several ways.
🔥 Pizza Oven
Preheat your pizza oven according to the manufacturer's instructions.
For a traditional pizza-oven style bake, aim for approximately 700–850°F.
Launch the pizza onto a properly heated stone.
Bake until the crust is browned and the toppings are fully cooked, rotating as needed.
Typical bake times will be approximately 60–120 seconds, depending on oven temperature and pizza thickness.
🏠 Conventional Oven + Pizza Steel
Place a pizza steel on a rack toward the upper-middle portion of the oven.
Preheat the oven to its maximum temperature, preferably 500–550°F, for at least 45–60 minutes.
Build the pizza on a lightly floured peel.
Launch directly onto the hot steel.
Bake until the crust is deeply browned and the cheese is bubbling.
🌬️ Convection Oven + Pizza Steel
Place the pizza steel according to the oven manufacturer's recommendations.
Preheat thoroughly.
Use the oven's highest temperature appropriate for the pizza steel.
Because convection moves heat more aggressively across the surface, begin checking the pizza slightly earlier than with conventional baking.
The pizza should have deeply browned edges with a fully cooked center.
🔥 Grill Method
Preheat the grill with a pizza steel or stone in place.
Aim for approximately 500–550°F.
Allow the steel or stone to preheat thoroughly.
Launch the pizza and close the lid.
Cook until the crust is browned and the toppings are fully cooked.
Dough Handling Notes
Don't Over-Flour
Use just enough flour to keep the dough from sticking.
Excess flour can burn during baking and create a bitter taste on the bottom of the crust.
Don't Rush the Fermentation
The dough doesn't need to double during cold fermentation.
Look for gradual expansion, bubbles, and a relaxed texture.
Give the Dough Time to Warm Up
Cold dough tends to resist stretching.
Allowing the dough to warm for 2–3 hours before shaping makes it much easier to work with.
Let the Dough Tell You When It's Ready
Temperature and time are useful guides, but dough behavior is the final judge.
A properly fermented dough should stretch without immediately snapping back.
Make It Your Own
More Chew: Increase the bread flour slightly while reducing the all-purpose flour.
More Tender: Increase the all-purpose flour slightly.
More Flavor: Push the cold fermentation toward 48–72 hours.
Crispier Crust: Stretch the center thinner and bake on a thoroughly preheated steel.
Softer Crust: Leave the center slightly thicker.
More Color: Increase the oven temperature or use a longer bake at a slightly lower temperature.
Garlic Crust: Brush the finished crust lightly with garlic-infused butter or olive oil.
Fuel Profile — Estimated Per Serving
Calories: ~285 kcal | Protein: ~8 g | Carbohydrates: ~49 g | Net Carbs: ~47 g | Fiber: ~2 g | Fat: ~6 g
Based on approximately 6 servings of dough from the full recipe, before adding sauce, cheese, or toppings. Nutrition is estimated and will vary depending on the flour, olive oil, honey, and ingredient brands used.
Storage
Refrigerator
Keep dough balls tightly covered in the refrigerator for up to 3 days.
Freezer
After balling the dough, place each portion in a freezer-safe container and freeze for up to 3 months.
Transfer to the refrigerator to thaw approximately 24 hours before use.
Allow the dough to come to room temperature for 2–3 hours before shaping.
Kitchen Wisdom
“Good pizza starts long before the oven gets hot. Give the dough time, and let the heat finish the work.”
Southern Homestead Chicken & Dumplings
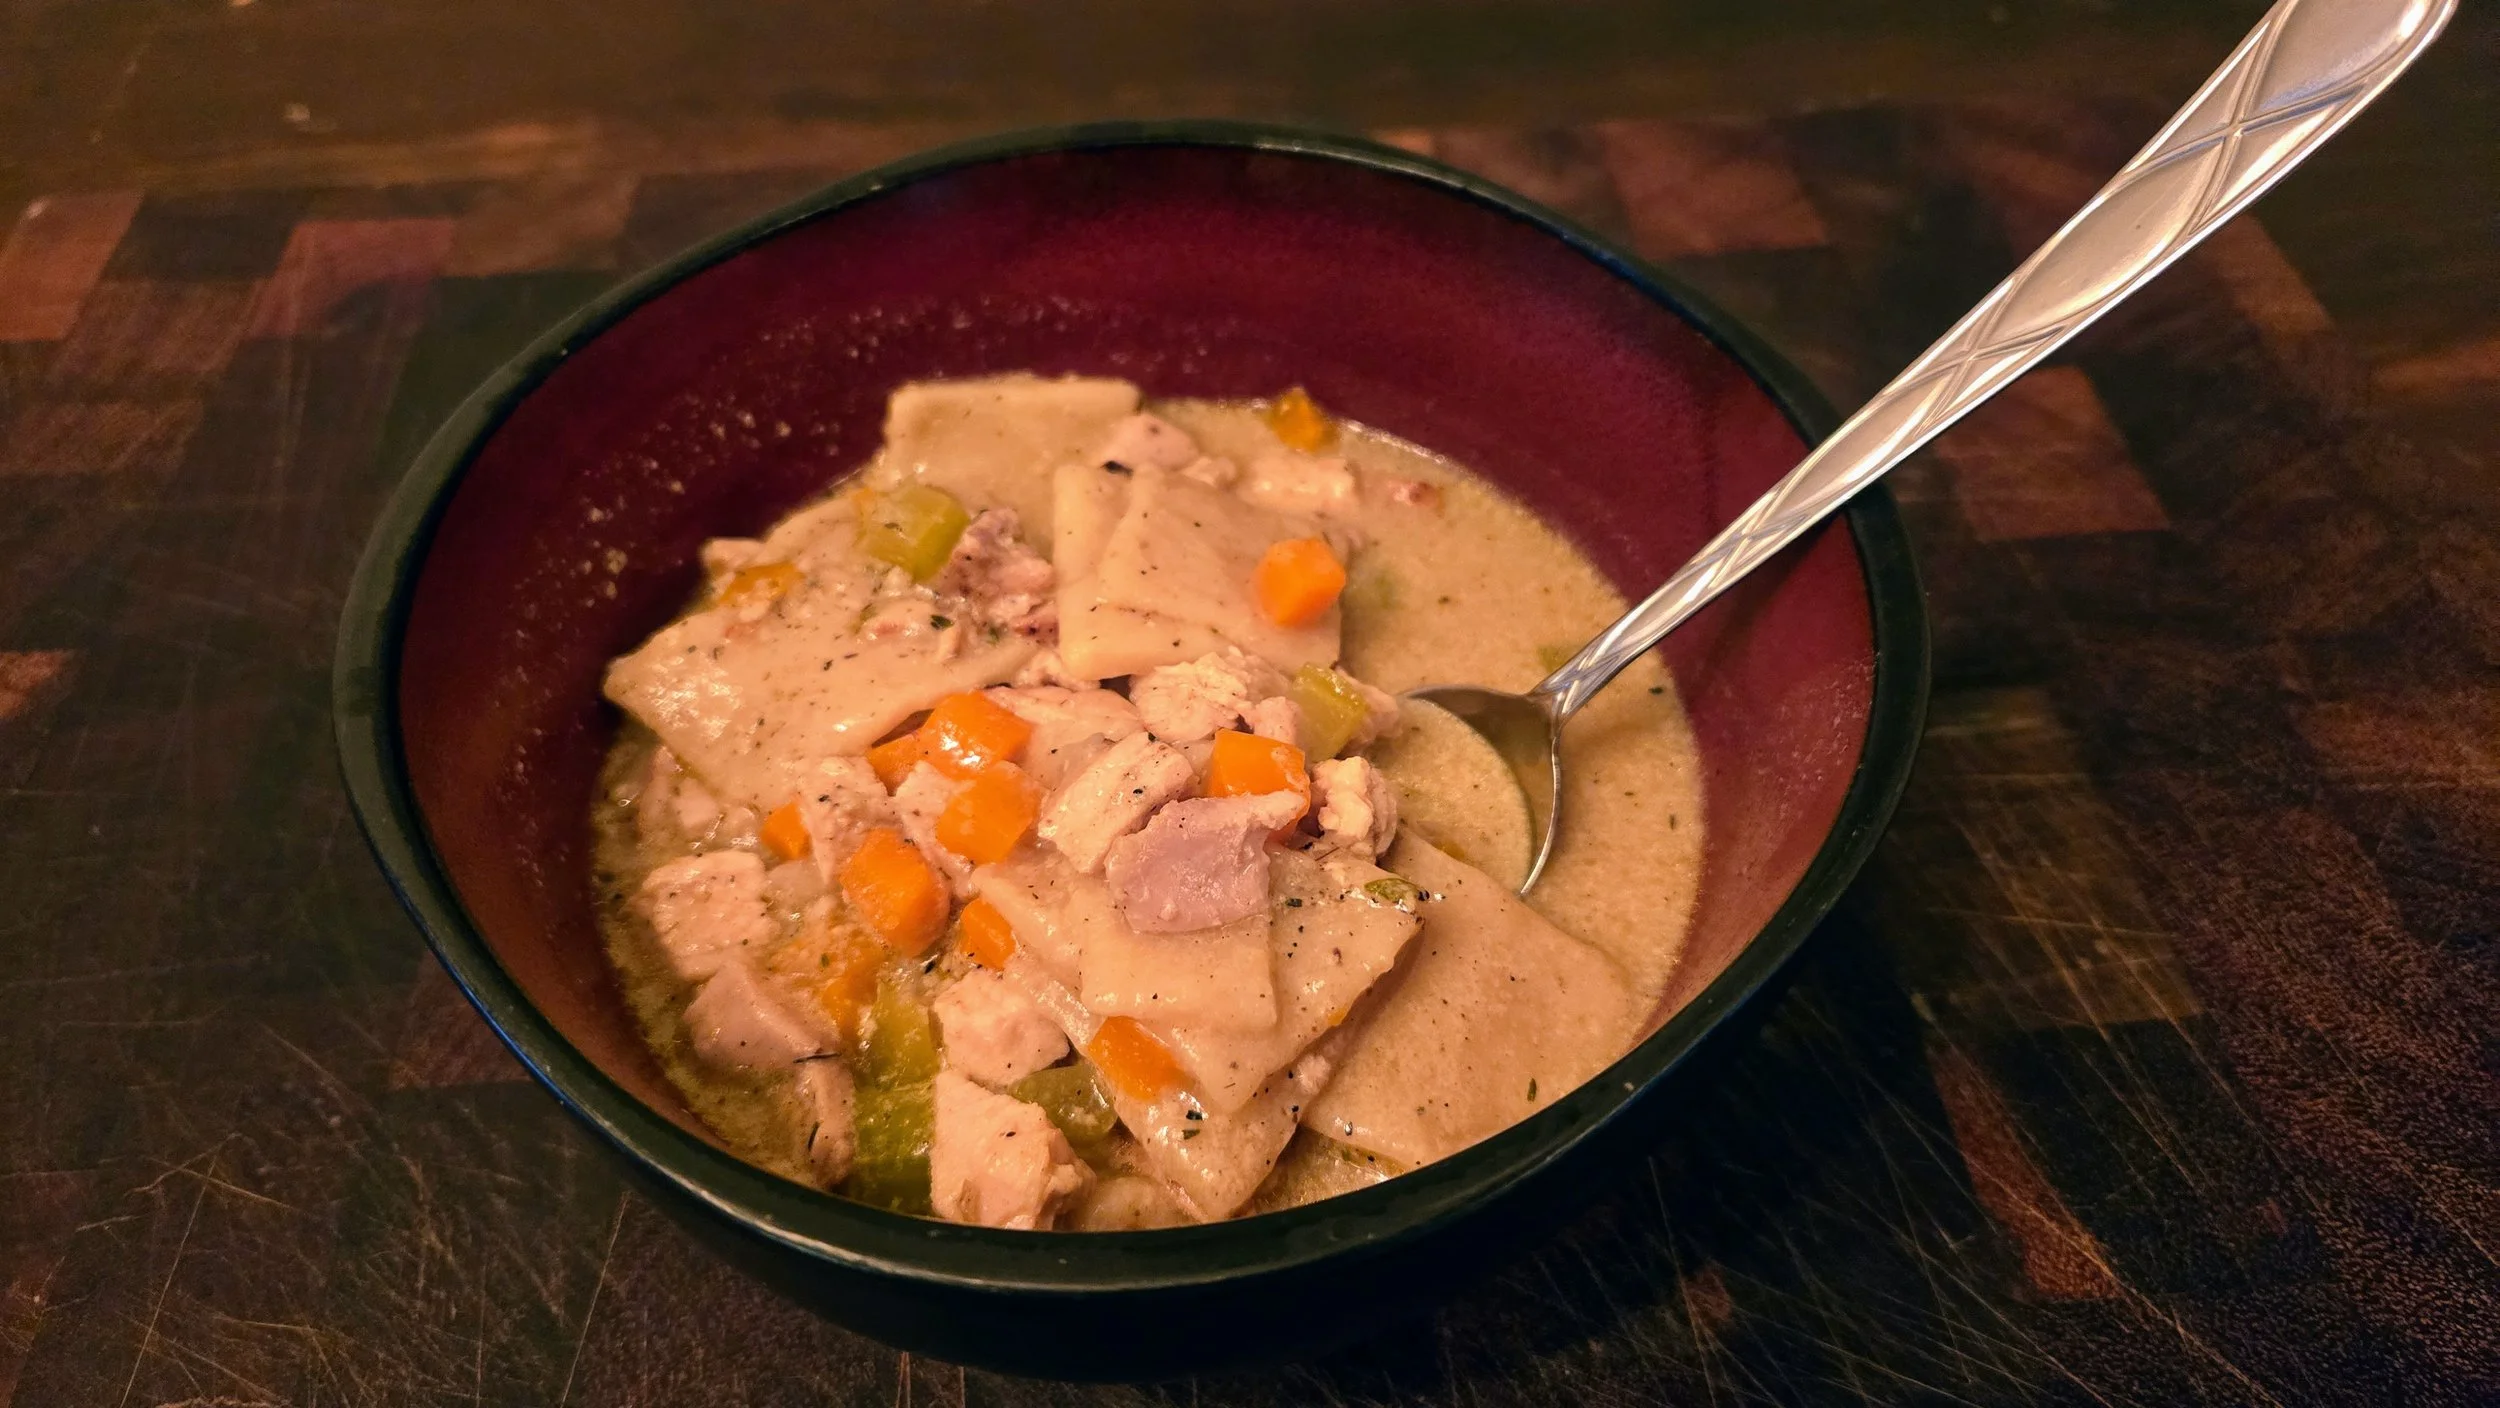
Tender chicken. Rich, peppery broth. Hand-rolled dumplings. Southern comfort by the bowlful.
A from-scratch Southern chicken and dumplings made with tender chicken breast and thighs, Homestead Poultry Seasoning, vegetables, a rich creamy chicken broth, and hand-rolled buttermilk dumplings.
No canned biscuits. No condensed soup.
Just chicken, broth, dumplings, and enough time to let everything come together.
Some recipes don't need reinventing.
Chicken and dumplings is Southern comfort food for a reason.
The goal here isn't to turn it into something unrecognizable just to improve the nutrition numbers. Instead, we're changing the balance.
Plenty of chicken gives each bowl a strong protein foundation. Chicken thighs bring richness and deeper chicken flavor, while chicken breast keeps the dish from becoming unnecessarily heavy.
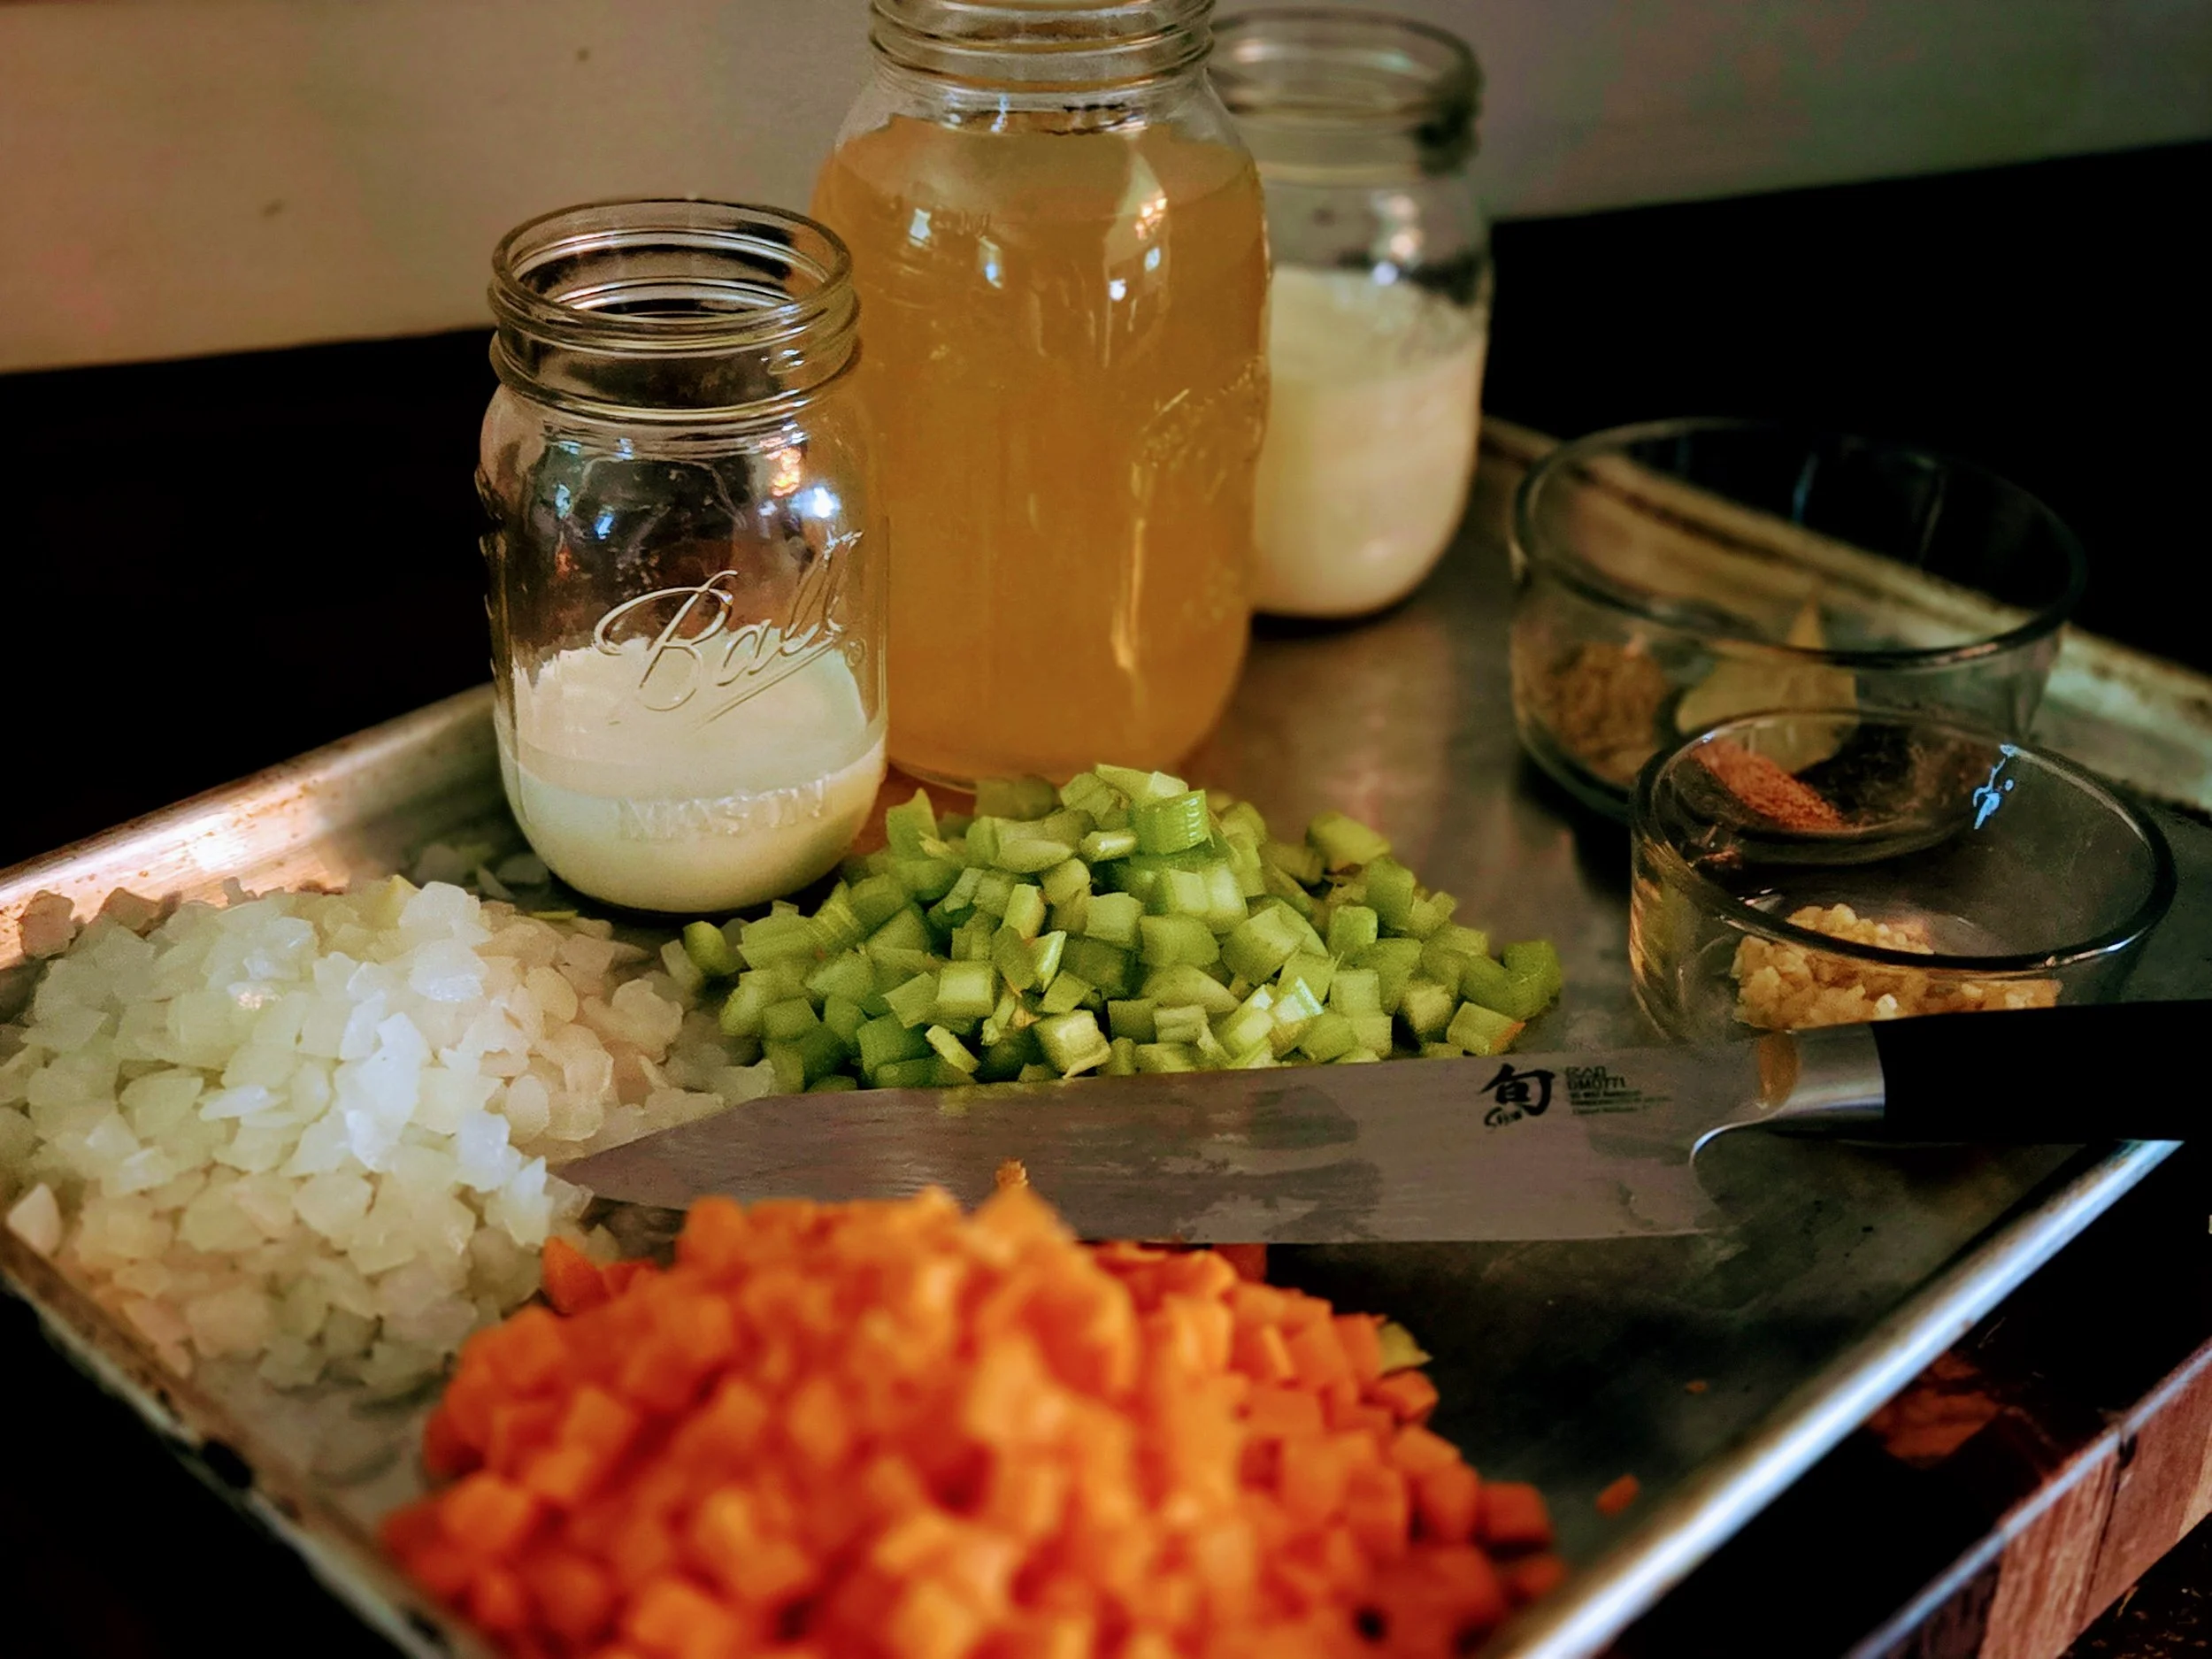
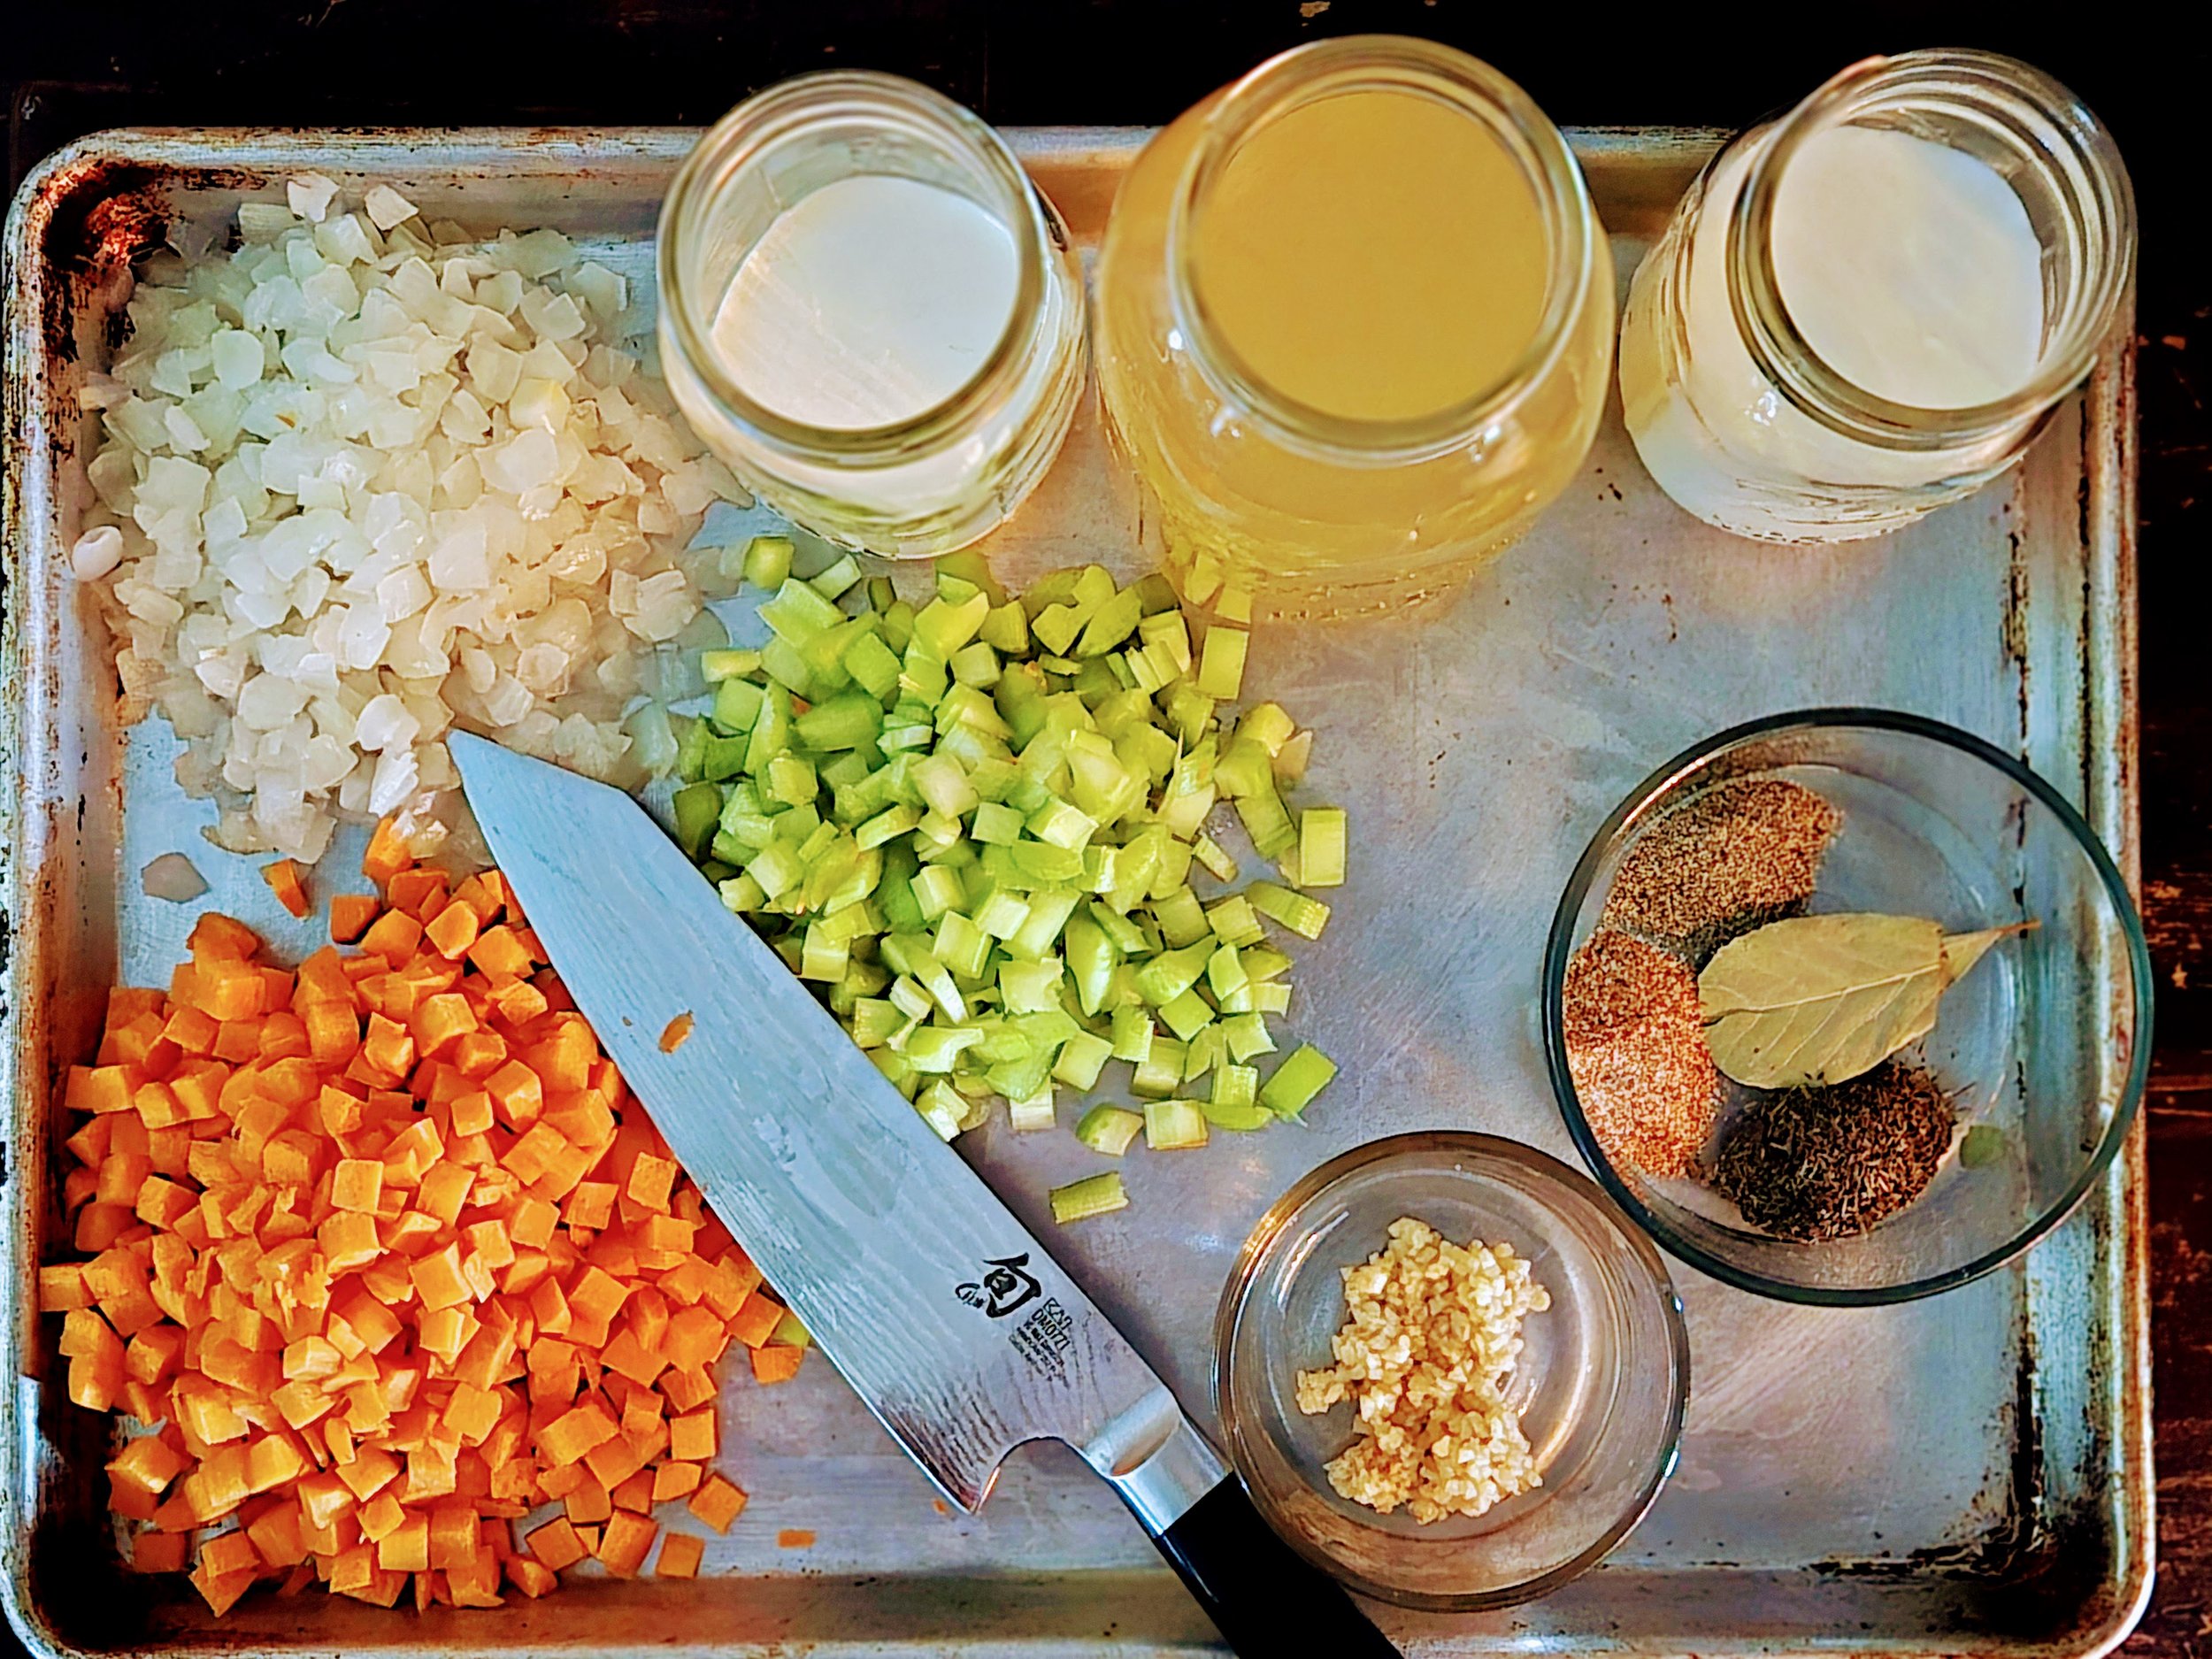
The broth gets its flavor from onion, celery, carrots, garlic, black pepper, thyme, and Homestead Poultry Seasoning. Fairlife 2% milk and a little heavy cream provide richness, while a cornstarch slurry gives the broth the thicker consistency this dish deserves.
And the dumplings?
Those stay dumplings.
Flour, cold butter, buttermilk, and a rolling pin.
Because some things are worth doing the old-fashioned way.
Recipe at a Glance
Yield: About 8 servings
Serving Size: About 1½–2 cups
Prep Time: 30 minutes
Cook Time: About 1 hour
Total Time: About 1½ hours
Ingredients
🍗 Chicken
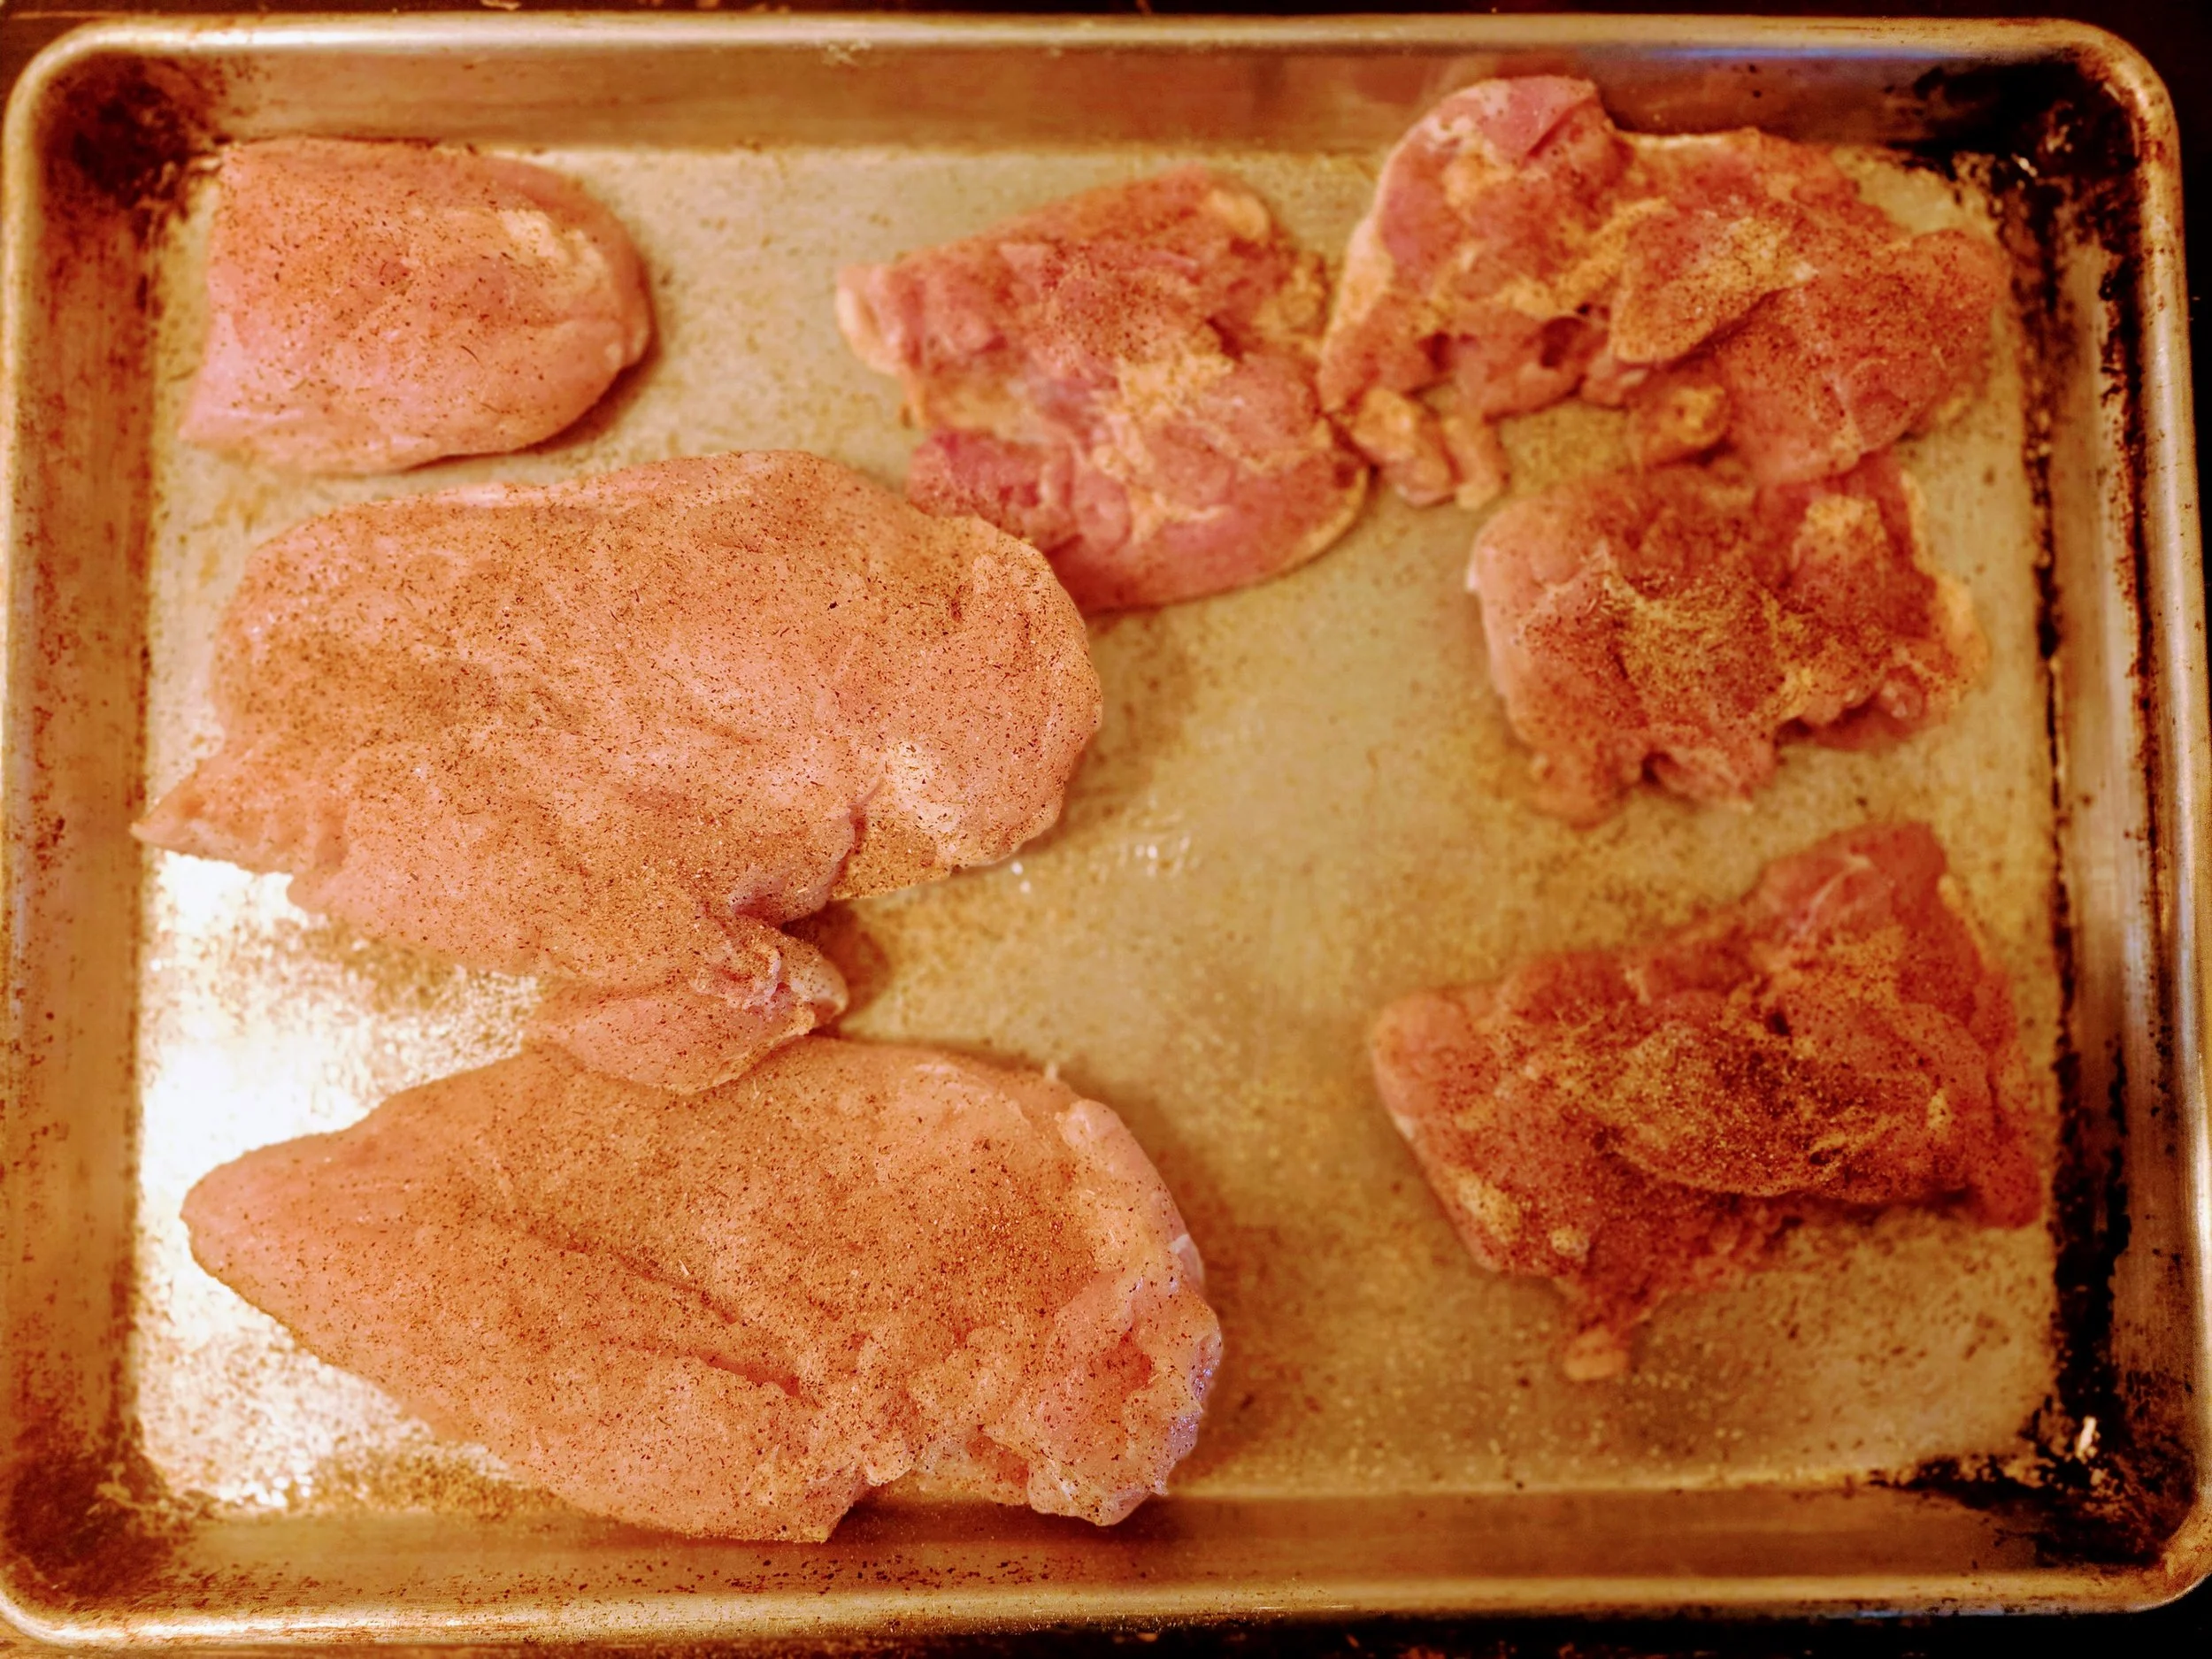
2 lbs boneless, skinless chicken breast
1 lb boneless, skinless chicken thighs
1 Tbsp Homestead Poultry Seasoning
1 tsp coarse-ground black pepper
1 Tbsp avocado oil or beef tallow
🥕 Broth & Vegetables
1 large yellow onion, diced
3 celery stalks, diced
2 medium carrots, diced
4 garlic cloves, minced
8 cups low-sodium chicken stock
2 bay leaves
1 tsp dried thyme
1 tsp Homestead Poultry Seasoning
½ tsp coarse-ground black pepper
1 cup Fairlife 2% milk
½ cup heavy cream
Final Seasoning
1 tsp Homestead Poultry Seasoning
1 tsp kosher salt
🥟 Southern Rolled Dumplings
250 g all-purpose flour
1 tsp baking powder
½ tsp kosher salt
½ tsp coarse-ground black pepper
30 g cold unsalted butter, cubed
120–140 g buttermilk, as needed
Additional flour for rolling
For Thickening
2 Tbsp cornstarch
2 Tbsp cold water
Instructions
1. Season the Chicken
Pat the chicken breasts and thighs dry.
Season evenly with:
1 Tbsp Homestead Poultry Seasoning
1 tsp coarse-ground black pepper
Let the chicken sit while you prepare the vegetables.
Kirby Rule: Season the chicken itself. A flavorful broth shouldn't be responsible for doing all the work.
2. Brown the Chicken
Heat the avocado oil or beef tallow in a large Dutch oven over medium-high heat.
Working in batches if necessary, add the chicken.
Brown for approximately 2–3 minutes per side.
The chicken does not need to cook completely at this stage.
Transfer to a plate.
3. Build the Vegetable Base
Reduce the heat to medium.
Add the onion, celery, and carrots to the same Dutch oven.
Cook for 5–7 minutes, stirring occasionally, until the vegetables begin to soften.
Add the garlic and cook for another 30–60 seconds.
4. Build the Broth
Add:
Chicken stock
Bay leaves
Thyme
1 tsp Homestead Poultry Seasoning
½ tsp coarse-ground black pepper
Scrape the bottom of the Dutch oven to release the browned bits left behind by the chicken.
Return the chicken and any accumulated juices to the pot.
Bring everything to a gentle simmer.
5. Cook the Chicken
Partially cover the Dutch oven and gently simmer for approximately 20–25 minutes, or until the chicken reaches an internal temperature of at least 165°F and is tender.
Avoid a hard boil.
Remove the chicken and transfer it to a cutting board or large bowl.
6. Shred the Chicken
Allow the chicken to cool just enough to handle safely.
Shred or roughly chop into bite-sized pieces.
Mix the breast and thigh meat together and set aside.
Make the Dumplings
7. Mix the Dry Ingredients
In a large bowl, whisk together:
250 g all-purpose flour
1 tsp baking powder
½ tsp kosher salt
½ tsp coarse-ground black pepper
8. Cut in the Butter
Add the 30 g cold cubed butter.
Use a pastry cutter, fork, or clean fingertips to work the butter into the flour until the mixture resembles coarse crumbs.
Small pieces of butter should still be visible.
9. Add the Buttermilk
Start with 120 g buttermilk.
Gently mix until the dough begins to come together.
If dry flour remains, add additional buttermilk a little at a time, up to approximately 140 g total.
The dough should be soft enough to roll but shouldn't be wet or excessively sticky.
Kirby Rule: Work dumpling dough as little as possible. Overworking develops gluten and turns tender dumplings into something considerably tougher.
10. Roll & Cut the Dumplings
Turn the dough onto a generously floured work surface.
Lightly dust the top with additional flour.
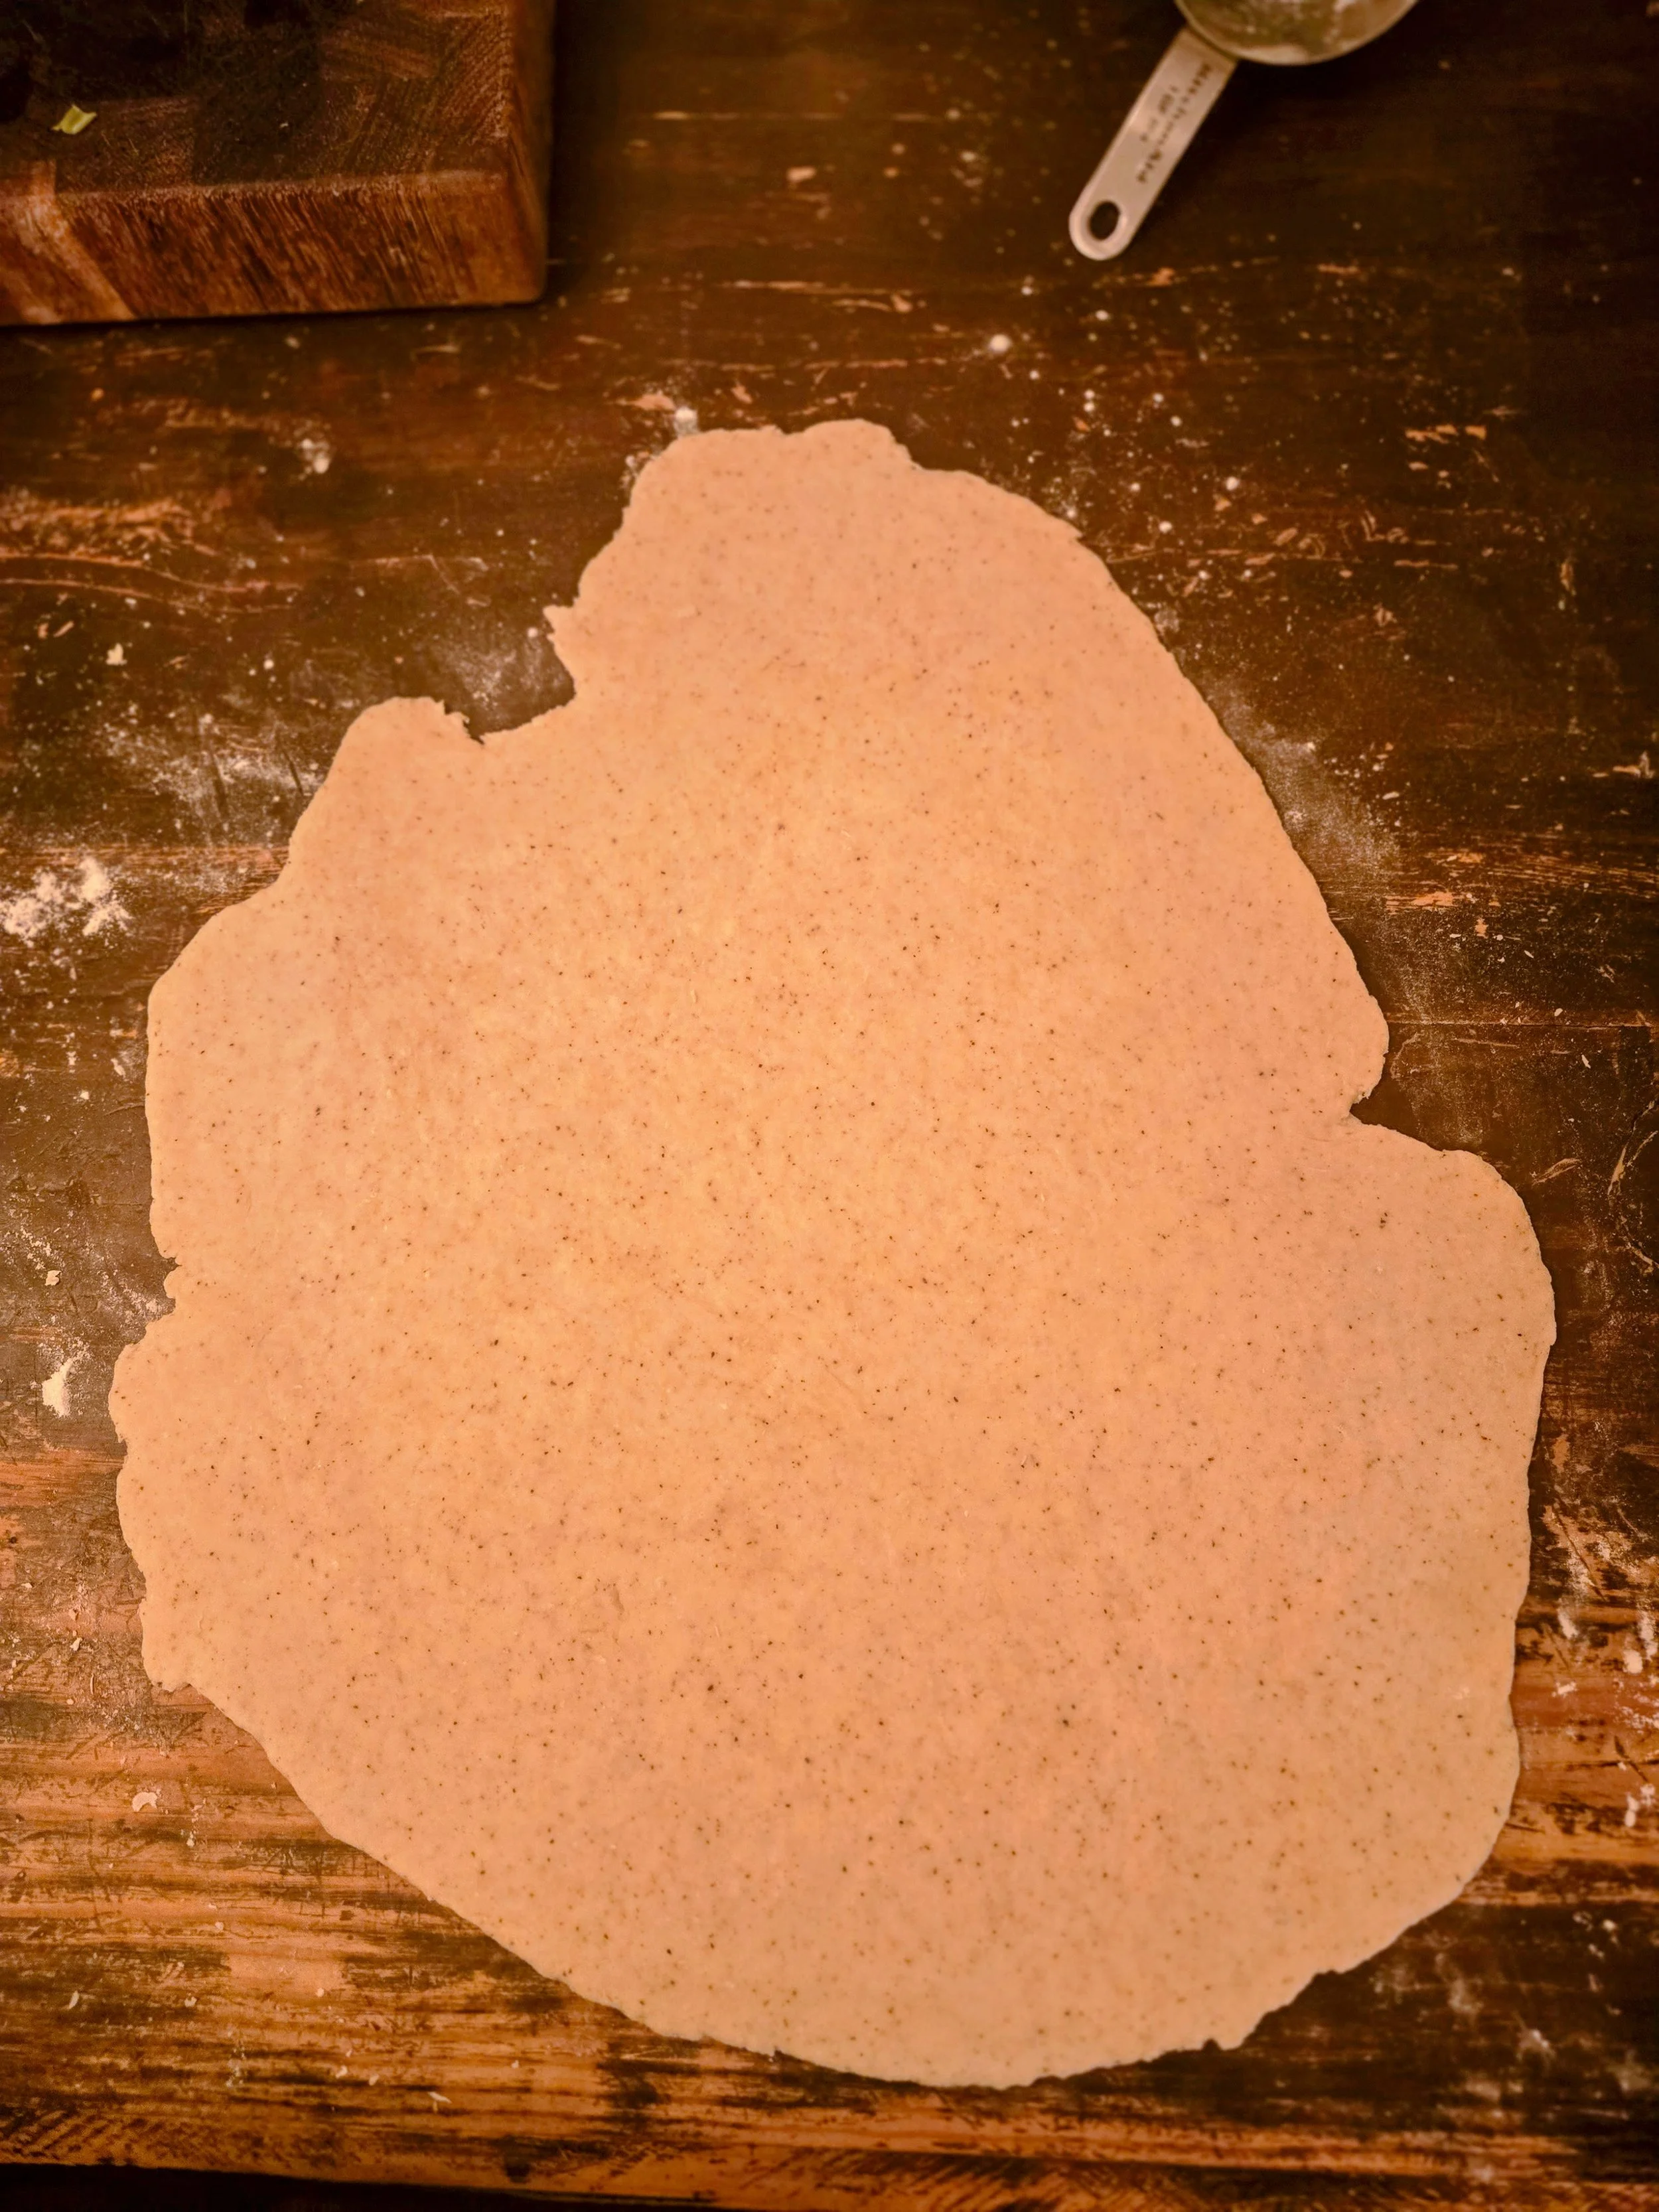
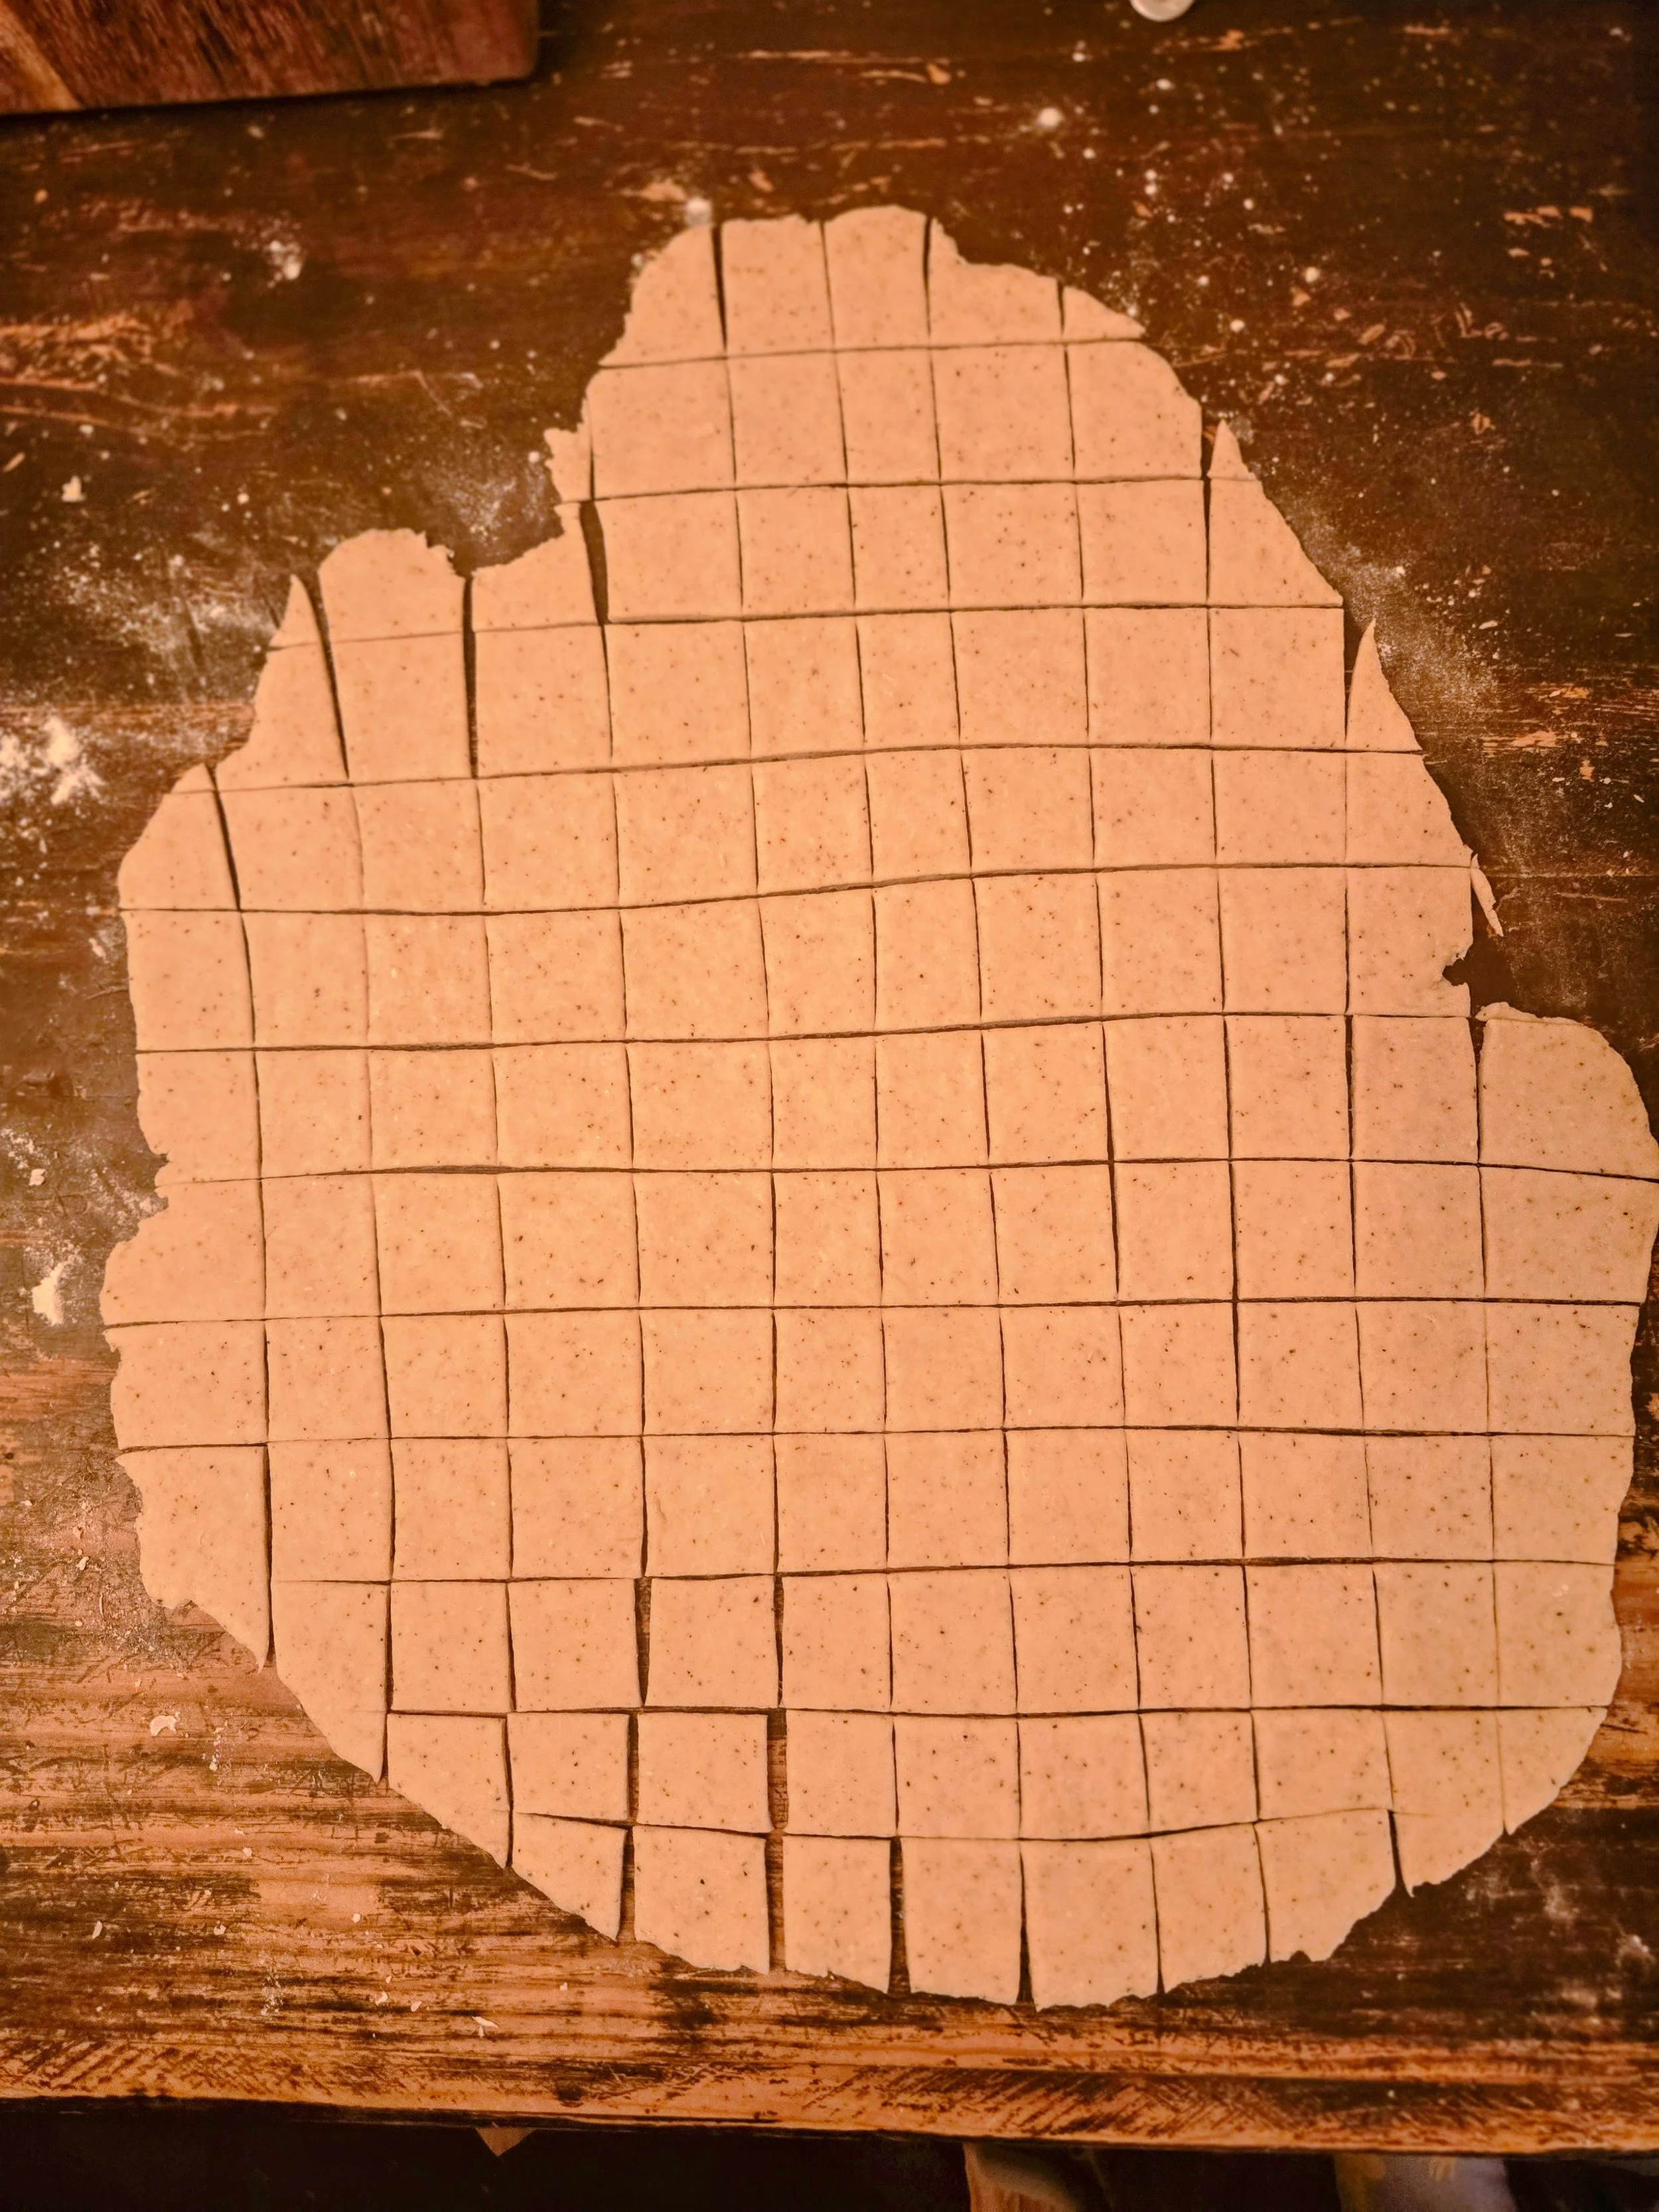
Roll the dough to approximately ⅛-inch thick.
Cut into rustic strips or rectangles approximately 1 × 2 inches.
The dumplings don't need to look identical.
A little flour remaining on their surfaces is perfectly fine and will provide a small amount of additional body to the broth.
Bring Everything Together
11. Finish & Season the Broth
Remove the bay leaves.
Stir in:
1 cup Fairlife 2% milk
½ cup heavy cream
1 tsp Homestead Poultry Seasoning
1 tsp kosher salt
Bring the broth back to a gentle simmer.
Do not allow the dairy mixture to reach a hard boil.
Taste and adjust the black pepper if desired.
12. Thicken the Broth
In a small bowl, whisk together:
2 Tbsp cornstarch
2 Tbsp cold water
Whisk until completely smooth.
Slowly pour the slurry into the gently simmering broth while stirring.
Simmer for 2–3 minutes, stirring occasionally, until the broth begins to noticeably thicken.
Kirby Rule: Don't try to reach the final thickness with cornstarch alone. The slurry starts the job, the dumplings continue it, and the resting time finishes it.
13. Add the Dumplings
Keep the broth at a gentle simmer.
Add the rolled dumplings one at a time, gently stirring between batches to prevent them from sticking together.
Once all of the dumplings have been added, reduce the heat to medium-low.
Partially cover the Dutch oven.
Simmer for approximately 12–15 minutes, stirring gently every few minutes.
The dumplings should become tender while releasing a little additional flour into the broth.
14. Return the Chicken
Add the shredded chicken back to the Dutch oven.
Gently fold everything together so the chicken is evenly distributed without breaking apart the dumplings.
Continue cooking over low heat for approximately 5–10 minutes, until the chicken is heated through and the broth is creamy and thick.
15. Rest
Remove the Dutch oven from the heat.
Let the Chicken & Dumplings rest for 10–15 minutes before serving.
The broth will continue to thicken as it rests.
Taste one final time and adjust salt or freshly cracked black pepper only if needed.
16. Serve
Ladle into bowls, making sure every serving gets plenty of chicken, vegetables, rolled dumplings, and creamy broth.
Finish with freshly cracked black pepper if desired.
Serve hot.
Performance Notes
🍗 Breast + Thigh
Using both cuts gives us something neither can accomplish quite as well alone.
Chicken breast provides a large amount of lean protein.
Chicken thighs contribute richer chicken flavor and enough fat to keep the dish from tasting like diet food.
The ratio deliberately favors chicken breast while keeping a full pound of thighs for flavor and richness.
🐔 Layer the Homestead
Homestead Poultry Seasoning is used at multiple stages instead of relying on one large addition.
The chicken gets seasoned before browning, the broth gets another layer while simmering, and a final teaspoon goes in with the dairy.
That builds the thyme, sage, garlic, onion, smoked paprika, and pepper gradually throughout the dish.
🥛 Creamy Without a Can
There's no condensed cream-of-chicken soup here.
Fairlife 2% milk provides the primary dairy component, while ½ cup heavy cream across the entire pot provides additional richness.
A cornstarch slurry gives the broth the thicker consistency expected from a hearty bowl of chicken and dumplings.
🥣 Why Cornstarch?
The dumplings naturally release some flour into the broth, but testing showed that wasn't enough to produce the thicker consistency we wanted.
A 2-tablespoon cornstarch slurry provides additional body without requiring more flour in the dumpling dough or broth.
Adding it before the dumplings also means the broth can be thickened without aggressively stirring around fully cooked dumplings later.
🥟 Dumplings Stay Dumplings
We're not replacing the flour with protein powder.
We're not trying to turn them into a high-protein baking experiment.
And we're definitely not replacing them with cauliflower.
The nutrition improvement comes from building the dish around plenty of chicken and keeping the dumpling-to-chicken ratio reasonable.
🌶️ Don't Be Afraid of Black Pepper
Chicken and dumplings should have a noticeable peppery warmth.
The recipe builds black pepper into both the chicken and dumplings, but freshly cracked black pepper over the finished bowl is highly encouraged.
Make It Your Own
Richer: Add a little additional heavy cream.
Thicker: Allow the finished pot to rest the full 15 minutes before deciding it needs additional thickening.
Thinner: Add chicken stock a little at a time until the broth reaches your preferred consistency.
More Dumplings: Increase the dumpling recipe by 50% for a more dumpling-heavy version.
More Vegetables: Increase the carrots and celery.
More Pepper: Finish each bowl generously with freshly cracked black pepper.
Fuel Profile — Estimated Per Serving
Calories: ~505 kcal | Protein: ~55 g | Carbohydrates: ~37 g | Net Carbs: ~34 g | Fiber: ~3 g | Fat: ~17 g
Based on approximately 8 servings using 2 pounds chicken breast, 1 pound chicken thighs, Fairlife 2% milk, heavy cream, one batch of rolled buttermilk dumplings, and the cornstarch slurry. Nutrition is estimated and will vary depending on the chicken, stock, dairy, flour, and ingredient brands used.
Storage & Reheating
Refrigerator
Store in an airtight container in the refrigerator for up to 4 days.
The dumplings will continue absorbing some of the broth while refrigerated, so leftovers will become thicker.
Reheating
Reheat gently on the stovetop over medium-low heat.
Add a splash of chicken stock or Fairlife 2% milk as needed to loosen the broth.
Stir gently to avoid breaking apart the dumplings.
Kitchen Wisdom
“Some Southern recipes don't need reinventing. They just need good ingredients, enough chicken, and time on the stove.”
Pitmaster Pork Shank & Oxtail Stew
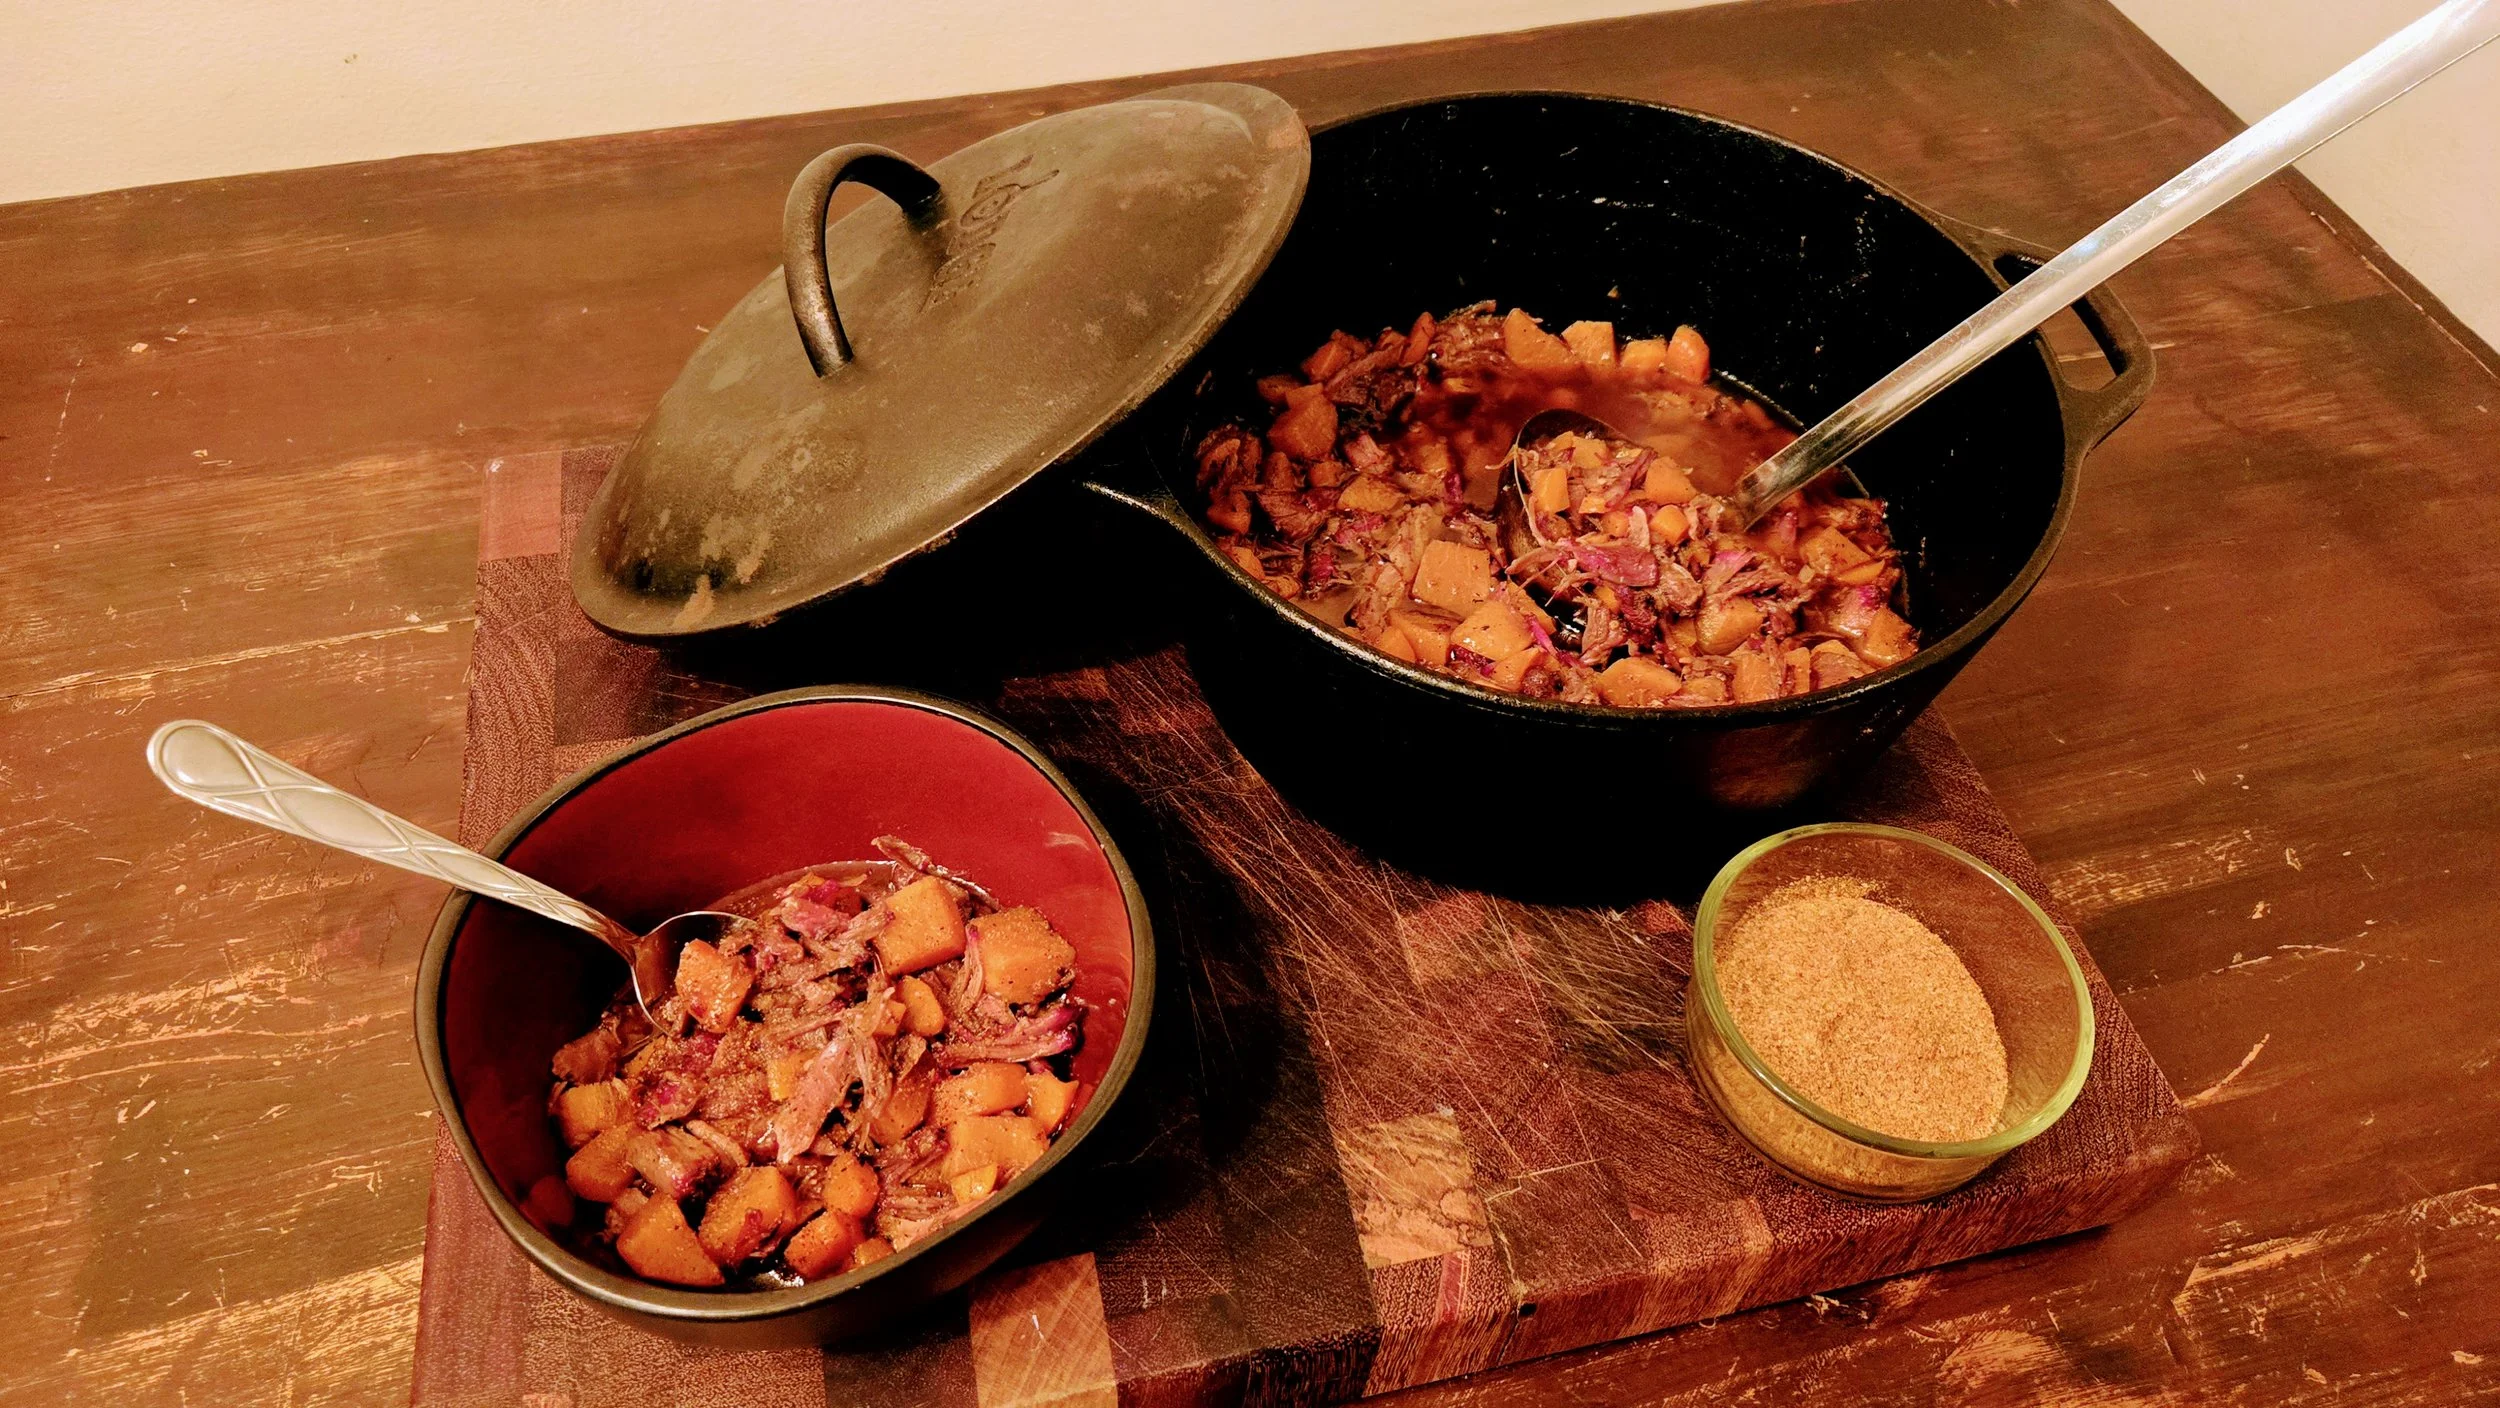
Real smoke. Two slow-cooked meats. One seriously rich pot of stew.
Smoked pork shanks and oxtail slowly braised with Yukon Gold potatoes, carrots, onion, garlic, herbs, and rich beef broth until the meat falls from the bone and the broth becomes naturally thick and silky.
This is the kind of stew built for a cold evening, a Dutch oven, and enough time to let tough cuts turn into something worth waiting for.
Smoke first. Braise second. Let time do the rest.
Pork shanks and oxtail have something important in common: neither one wants to be rushed.
Both cuts contain plenty of connective tissue that slowly breaks down during a long cook. Oxtail brings deep beef flavor and collagen that gives the broth body, while pork shanks provide another layer of richness and plenty of tender meat.
Instead of simply dropping everything into a pot, the meat gets seasoned with Firehouse Seasoning and smoked first.
Then it moves into a Dutch oven with beef stock, aromatics, herbs, potatoes, and carrots to slowly braise until everything becomes tender.
The result is a hearty, smoke-forward stew with fall-apart meat, creamy potatoes, and the kind of broth that can only come from giving collagen-rich cuts enough time to do their thing.
Recipe at a Glance
Yield: Approximately 8 servings
Serving Size: About 1½–2 cups
Prep Time: 20 minutes
Smoke Time: 1½–2 hours
Braise Time: Approximately 3–3½ hours
Total Time: About 5–6 hours
Smoker Temperature: 250°F
Braising Temperature: 300°F
Ingredients
🥩 Meat
2½ lbs pork shanks
2 lbs oxtail
2 Tbsp Firehouse Seasoning, divided
Coarse-ground black pepper, to taste
🥕 Vegetables
500 g Yukon Gold potatoes, cut into roughly 1½-inch chunks
300 g carrots, cut into large pieces
1 large yellow onion, diced
4–6 garlic cloves, minced
🍲 Braising Liquid
4 cups low-sodium beef stock, plus more as needed
3 Tbsp ketchup
1 Tbsp Worcestershire sauce
Apple cider vinegar, up to 1 Tbsp as needed at the finish
🌿 Seasonings & Herbs
2 bay leaves
1 tsp dried thyme
or 4–5 sprigs fresh thyme
1 tsp smoked paprika
½ tsp crushed red pepper flakes, optional
Kosher salt, only if needed after cooking
Instructions
1. Preheat the Smoker
Preheat the smoker to 250°F.
Pecan or oak are excellent choices for this stew.
Hickory also works if you prefer a stronger smoke profile.
2. Season the Meat
Pat the pork shanks and oxtails dry.
Season all sides with approximately 1½ tablespoons Firehouse Seasoning.
Finish with coarse-ground black pepper to taste.
Let the meat sit while the smoker finishes preheating.
Kirby Rule: Season before smoking. We're building flavor in layers rather than trying to fix everything once it reaches the Dutch oven.
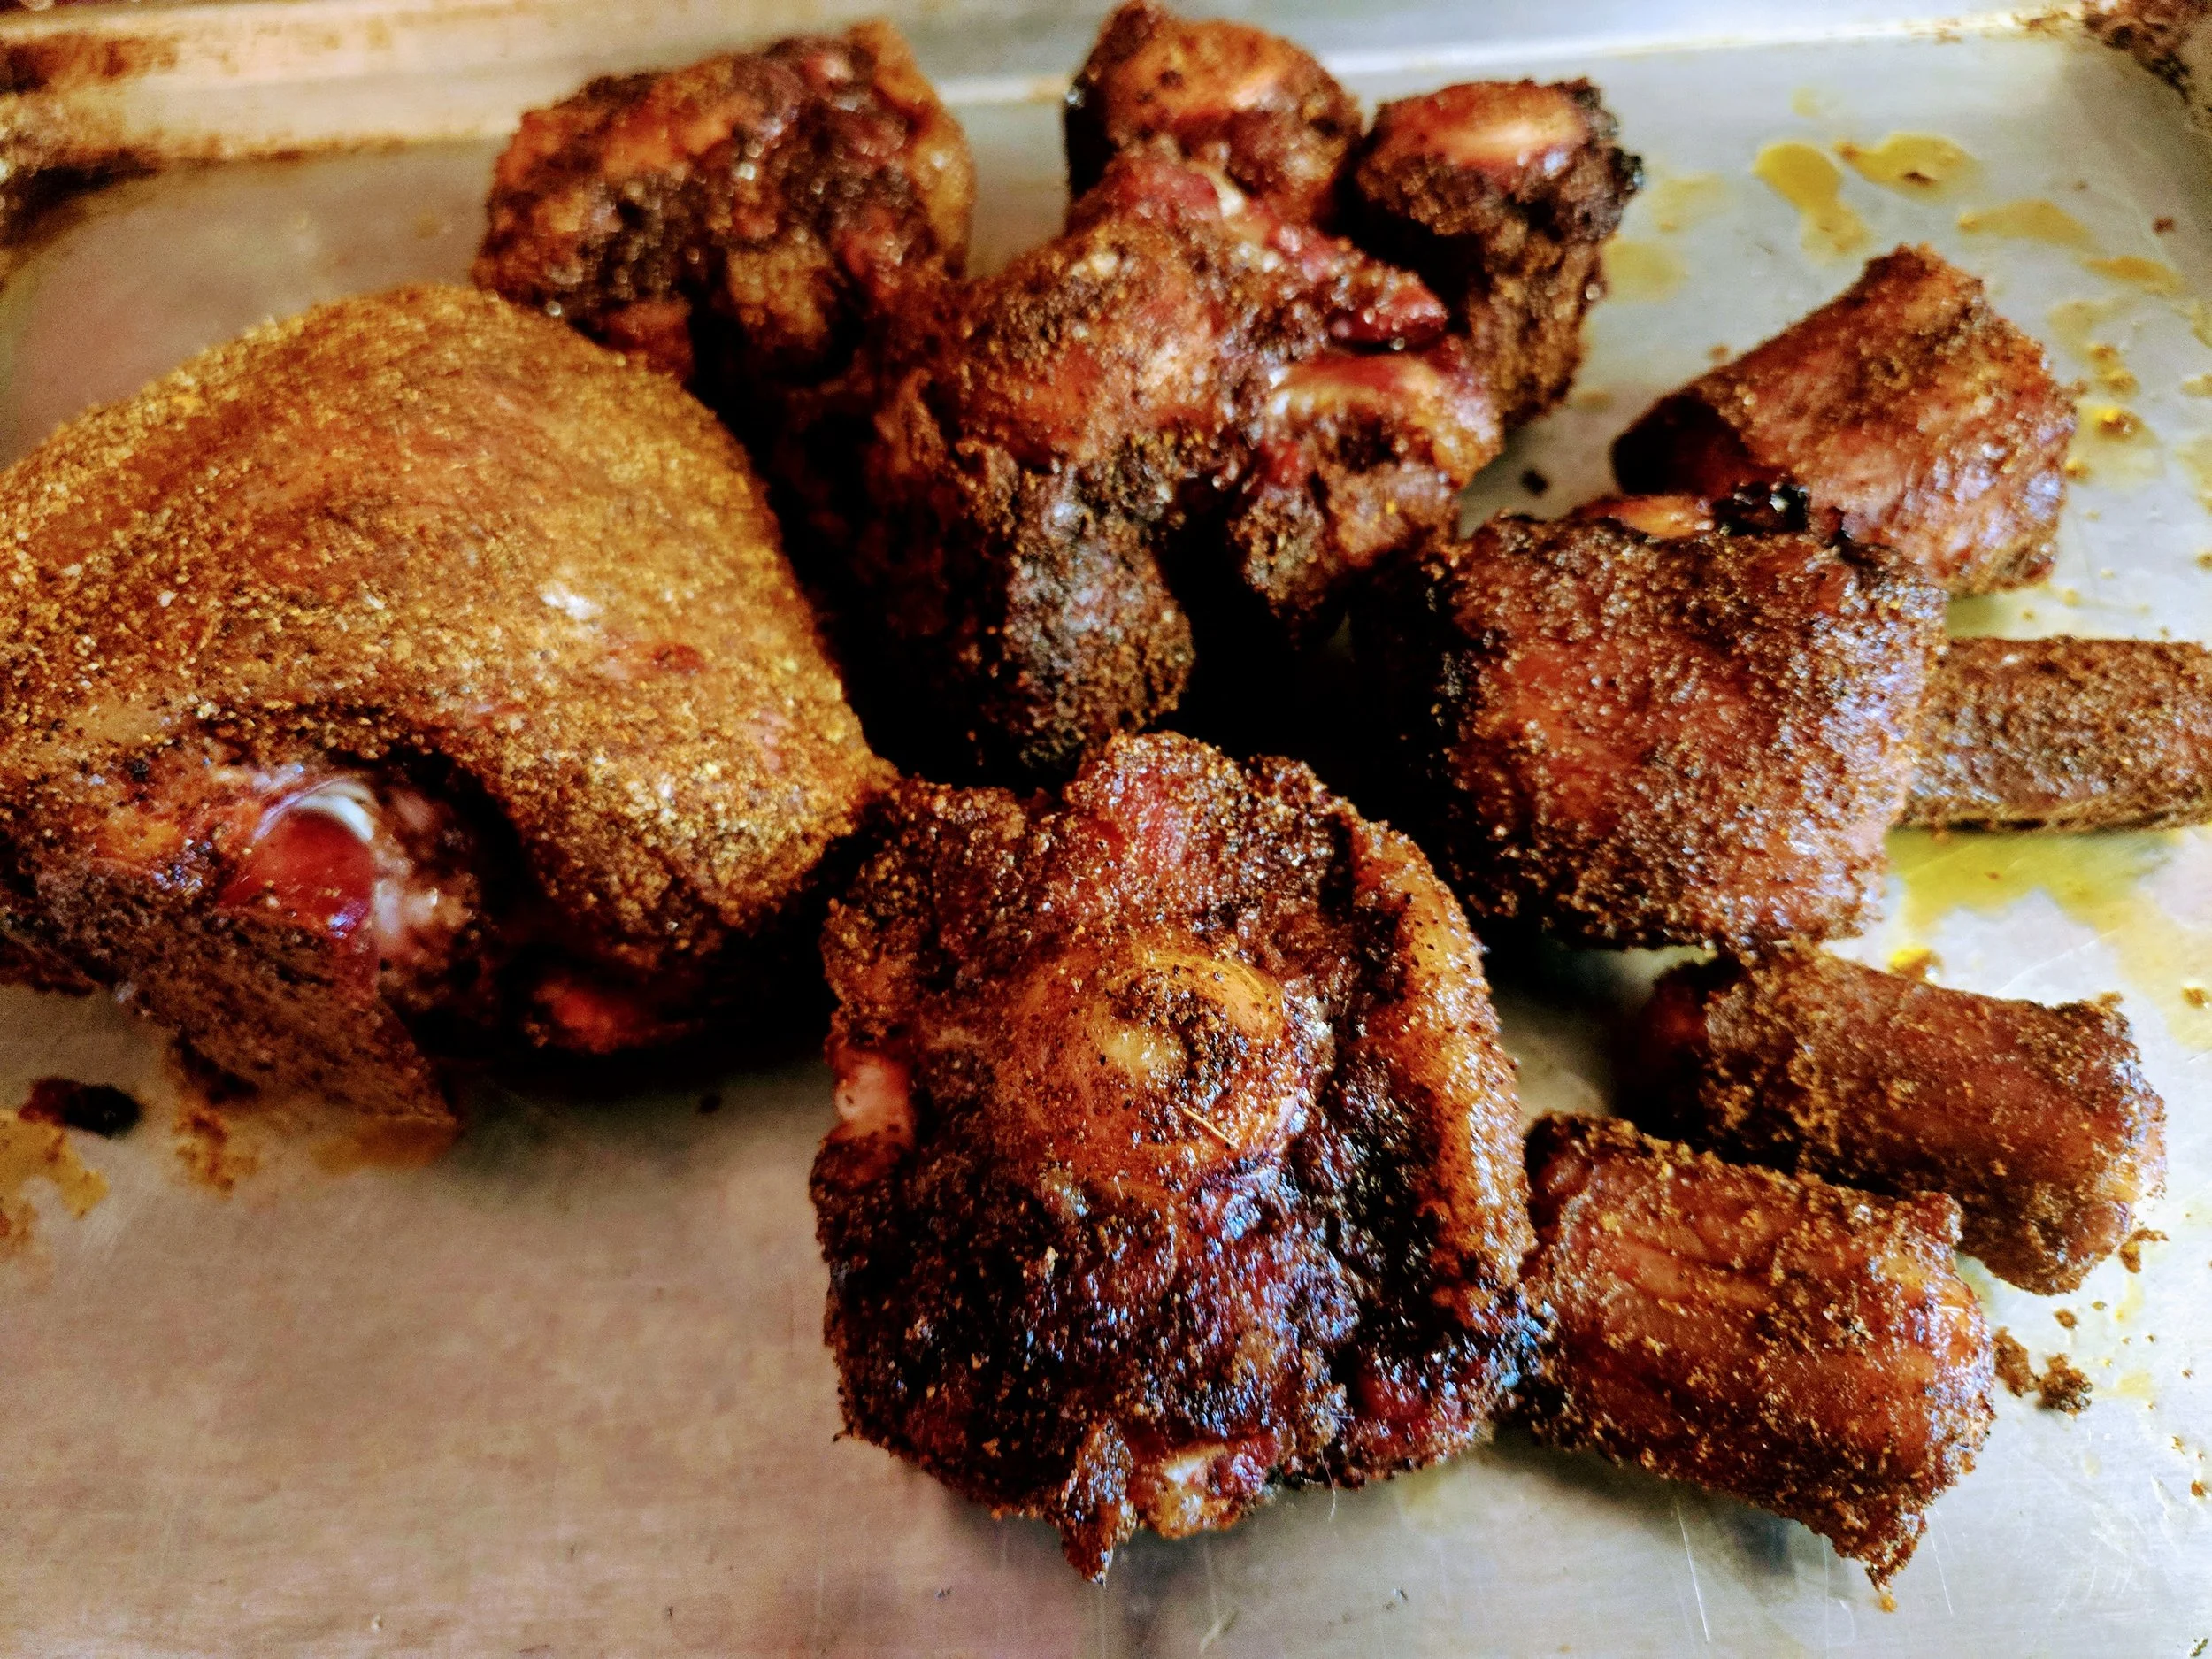
3. Smoke the Pork Shanks & Oxtail
Place the pork shanks and oxtails directly on the smoker grates.
Smoke at 250°F for 1½–2 hours.
You're not trying to make the meat tender yet.
At this stage, we're looking for:
Smoke flavor
Exterior color
The beginning of a bark
Rendered surface fat
The braise will handle the tenderness.
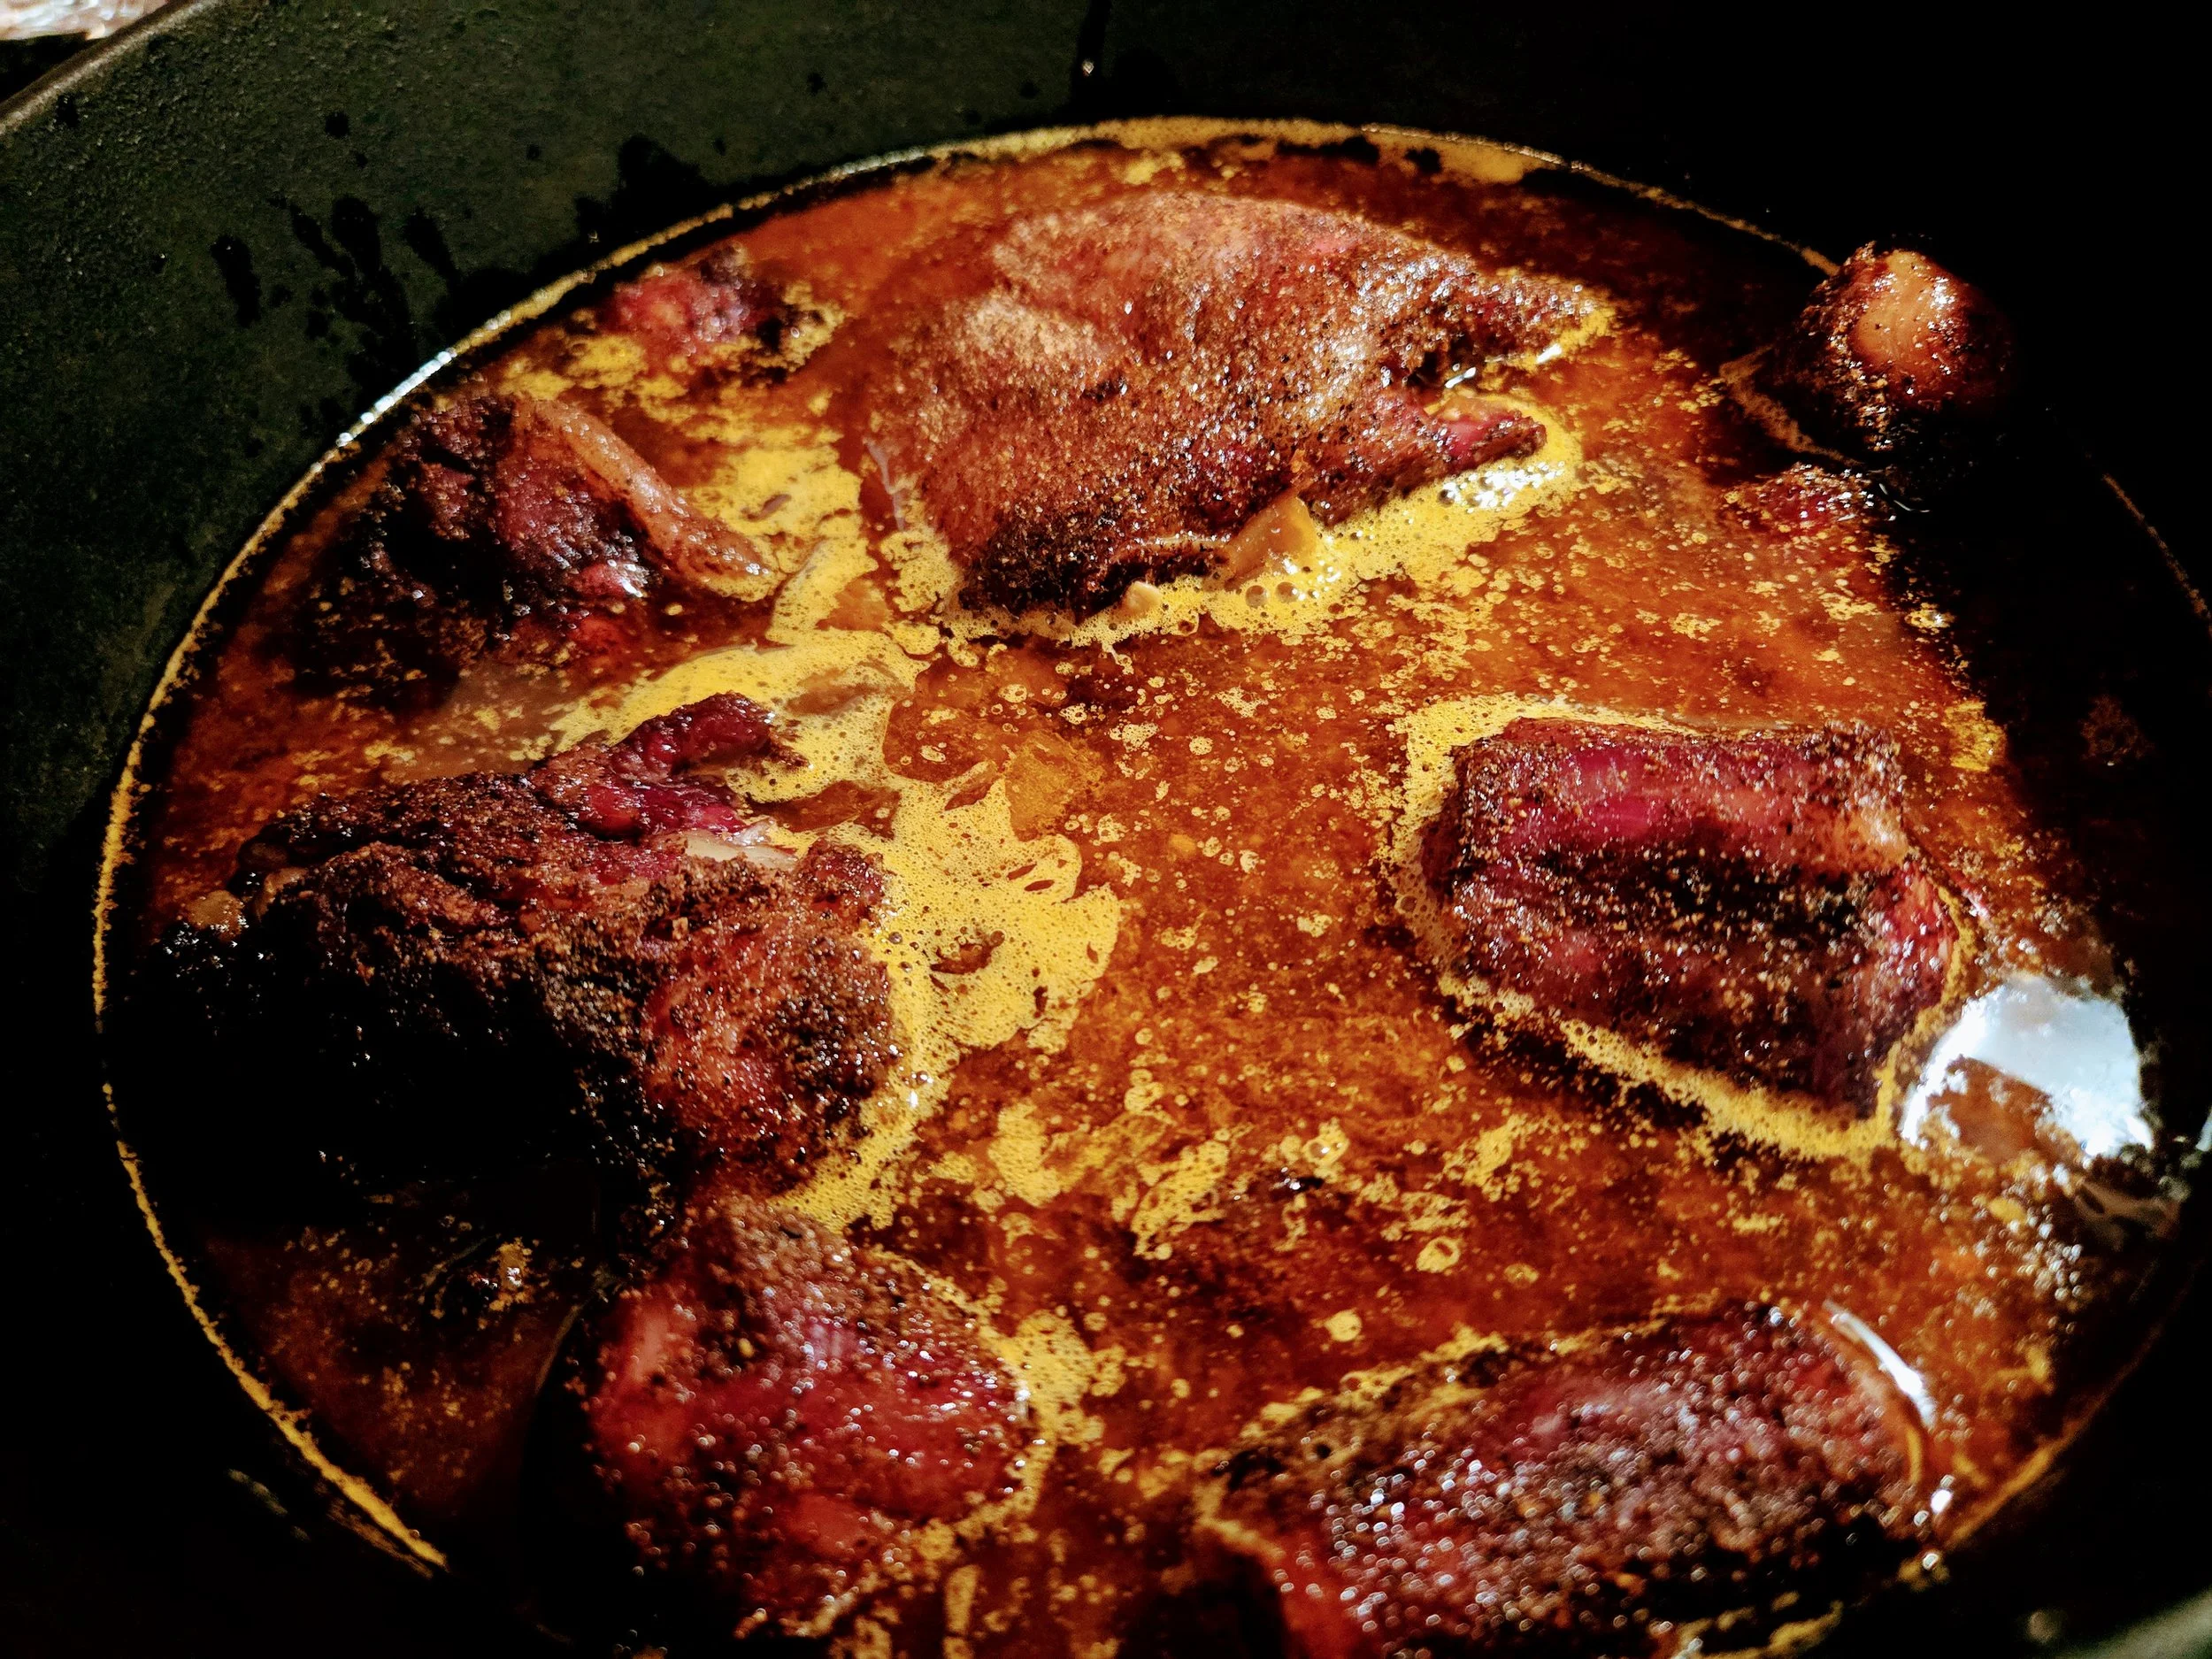
4. Build the Stew Base
Once the meat has finished smoking, place a large Dutch oven over medium heat.
Add a small amount of avocado oil only if the pot needs it.
Add the diced onion and cook for 4–5 minutes, stirring occasionally, until softened.
Add the garlic and cook for another 30–60 seconds.
5. Cook the Ketchup & Seasonings
Add:
3 Tbsp ketchup
Remaining ½ Tbsp Firehouse Seasoning
1 tsp smoked paprika
½ tsp crushed red pepper flakes, if using
Cook for approximately 2–3 minutes, stirring frequently.
The ketchup should darken slightly and become noticeably thicker.
Kirby Rule: Treat the ketchup like tomato paste. Cooking it before adding the stock concentrates the tomato flavor and takes away the raw ketchup character.
6. Deglaze
Add the Worcestershire sauce and approximately 1 cup beef stock.
Scrape the bottom of the Dutch oven thoroughly to release everything that has developed on the bottom.
Add the remaining beef stock.
Stir in the bay leaves and thyme.
7. Add the Smoked Meat
Nestle the smoked pork shanks and oxtails into the broth.
The liquid should come approximately two-thirds of the way up the meat.
It doesn't need to completely cover it.
Add a little additional beef stock or water if necessary.
Cover the Dutch oven.
8. Braise
Place the covered Dutch oven in a 300°F oven or smoker.
Braise for approximately 2–2½ hours.
Check the meat.
It should be noticeably tender, and the connective tissue should be beginning to break down.
If the meat is still tough, continue cooking and check again after approximately 30 minutes.
Kirby Rule: Don't cook collagen-rich meat by the clock alone. If it's still tough, it usually needs more time.
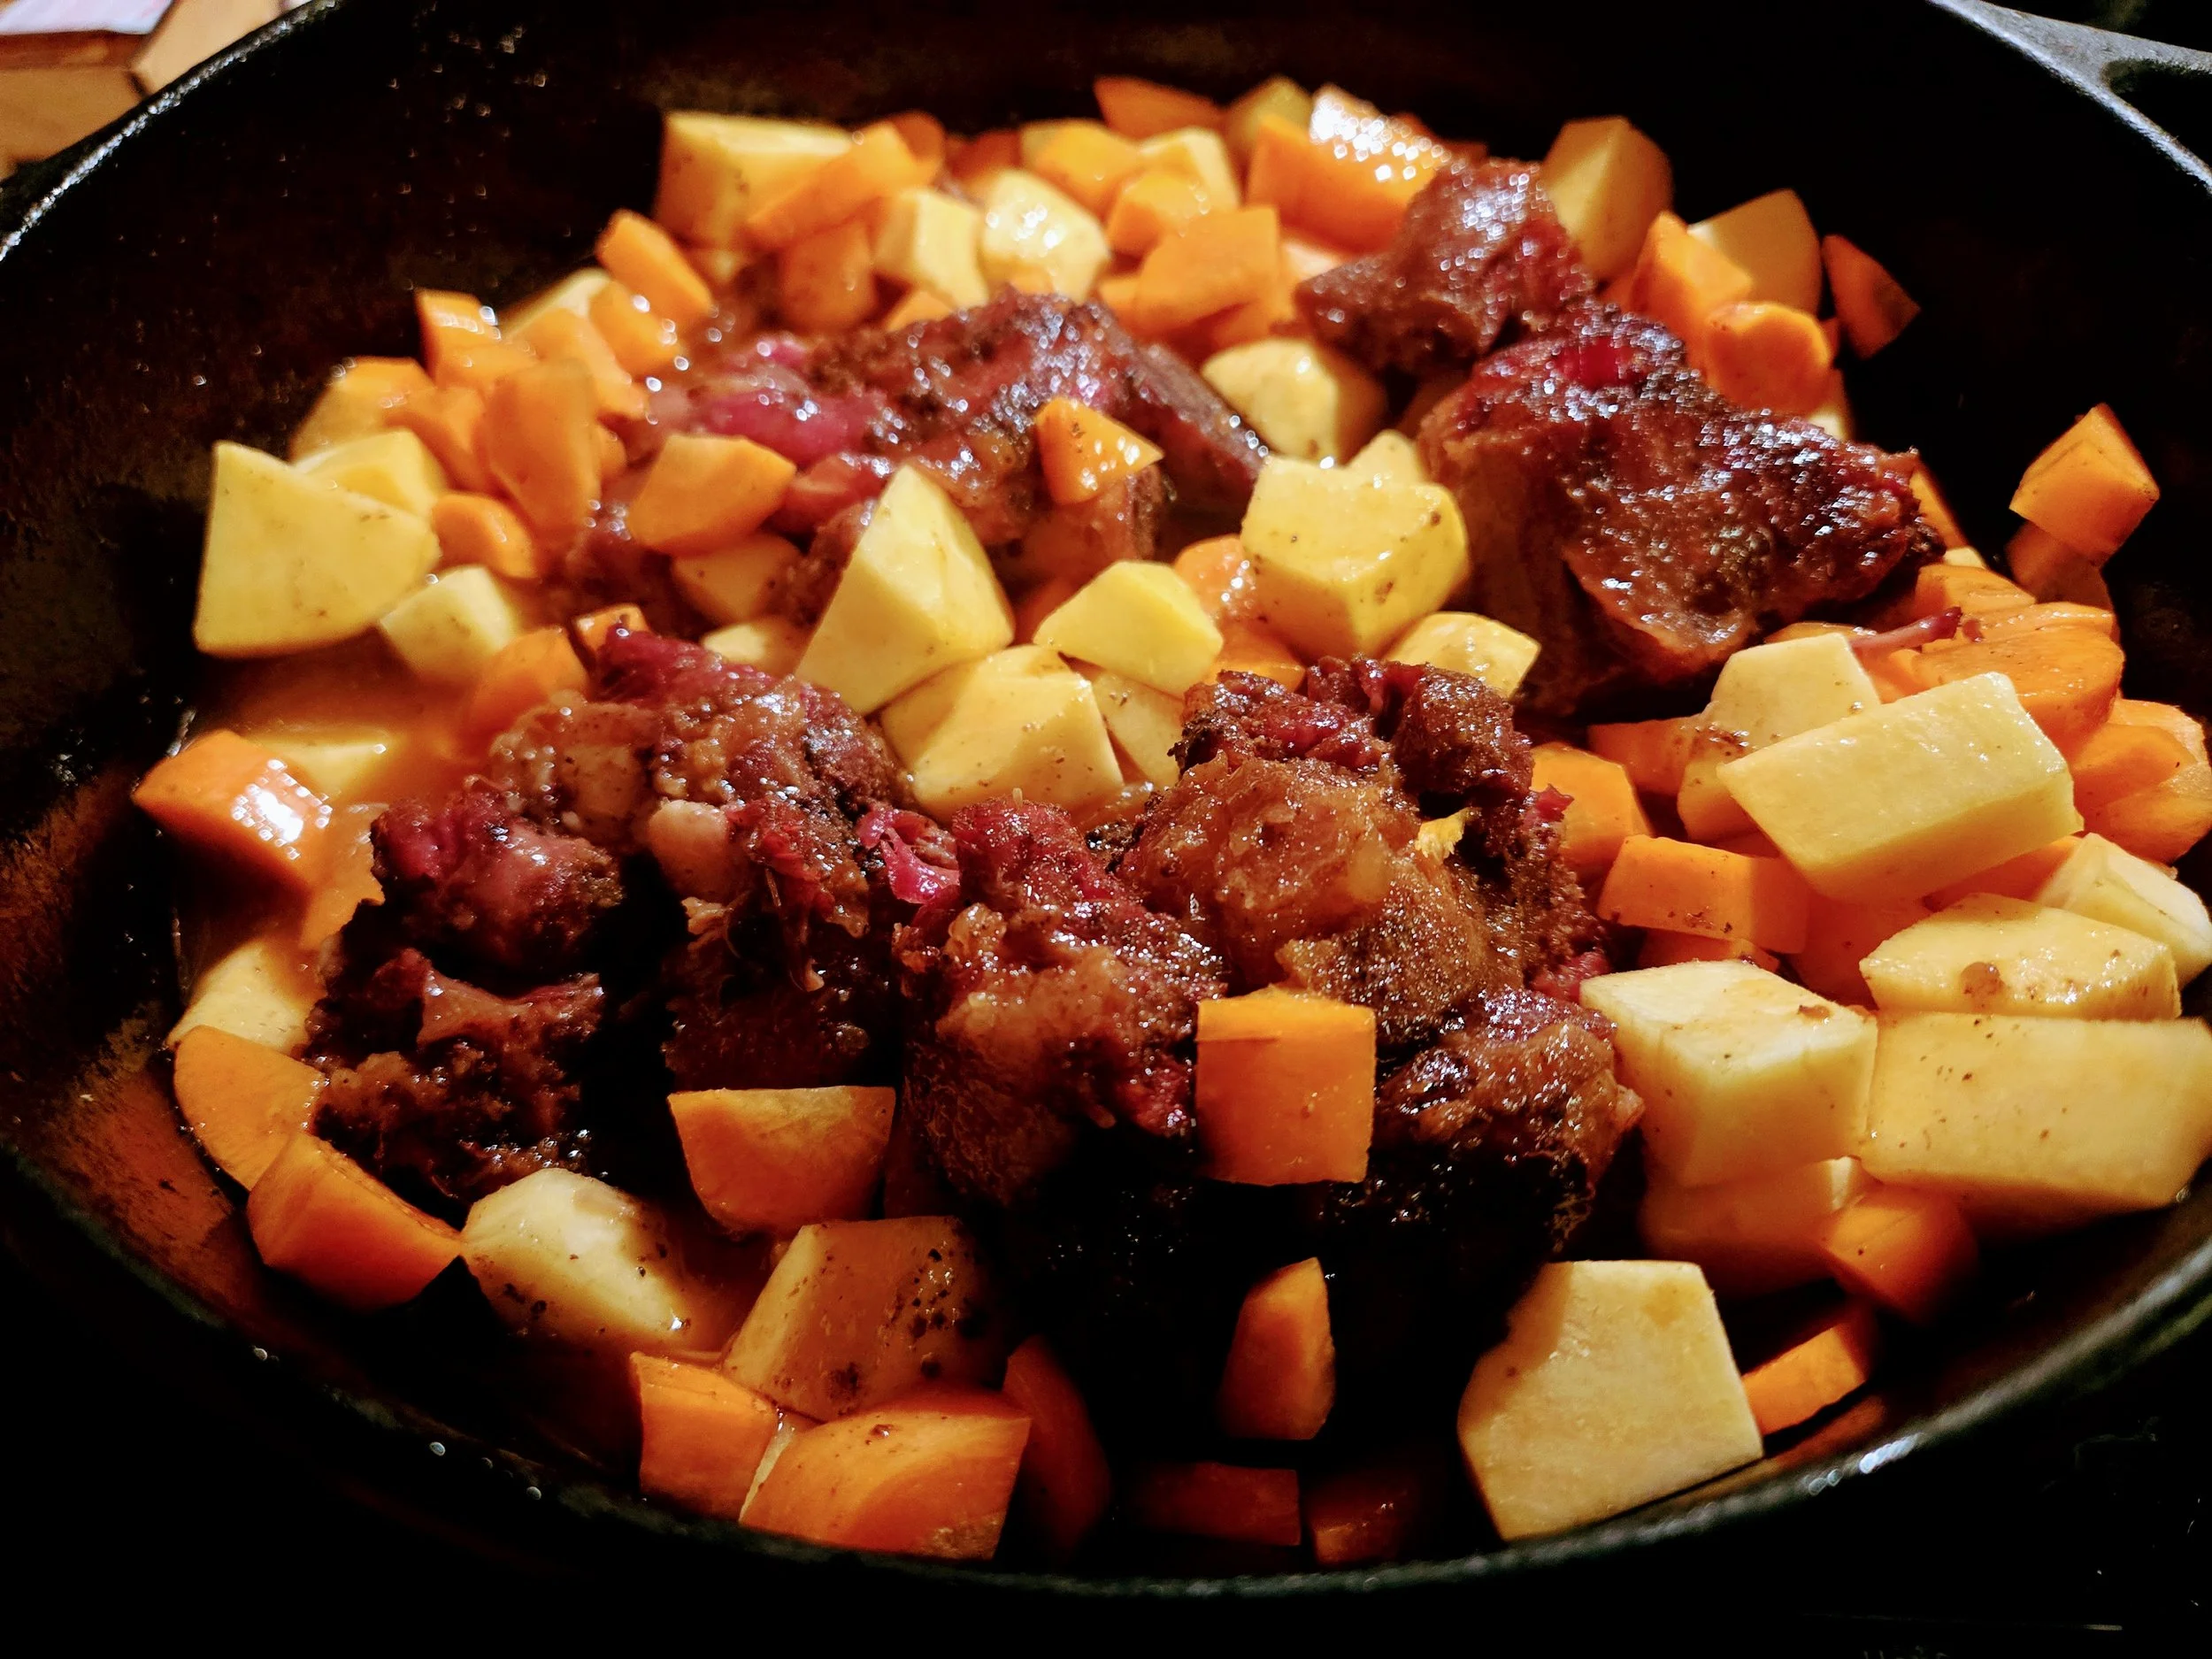
9. Add the Potatoes & Carrots
Add:
500 g Yukon Gold potatoes
300 g carrots
Gently work the vegetables into the braising liquid.
Cover again.
Continue cooking at 300°F for another 45–60 minutes, or until the potatoes and carrots are fork-tender and both the pork and oxtail are nearly falling from their bones.
Kirby Rule: Add the root vegetables later in the cook. They need enough time to absorb the broth without spending hours turning into purée.
10. Pull the Meat
Carefully remove the pork shanks and oxtails from the Dutch oven.
Allow them to cool just enough to handle safely.
Remove the meat from the bones.
Discard:
Bones
Tough connective tissue
Large pieces of unrendered fat
Shred or roughly chop the usable meat.
Return the meat to the Dutch oven.
11. Reduce the Stew
Remove the bay leaves and any woody thyme stems.
Leave the Dutch oven uncovered and simmer for approximately 10–20 minutes, or until the broth reaches your preferred consistency.
The collagen from the oxtail and pork shanks should naturally give the broth considerable body.
No flour or cornstarch should be necessary.
12. Taste Before You Finish
Taste the stew.
Only now decide whether it needs additional salt.
Between the Firehouse Seasoning, Worcestershire sauce, ketchup, and beef stock, it may already have enough.
Then judge the richness.
If the broth feels heavy, add apple cider vinegar 1 teaspoon at a time.
Taste after each addition.
Use up to approximately 1 tablespoon, but stop as soon as the stew tastes balanced.
Kirby Rule: Acid should make a rich stew taste brighter. You shouldn't actually think, “This tastes like vinegar.”
13. Rest
Turn off the heat and allow the stew to rest for approximately 10–15 minutes.
The broth will continue to settle and thicken slightly as it rests.
14. Serve
Ladle the stew into bowls, making sure every serving gets plenty of pork shank, oxtail, potatoes, carrots, and rich smoky broth.
Finish each bowl with a small pinch of Firehouse Seasoning, sprinkled lightly over the top just before serving.
Add freshly cracked black pepper if desired.
Kirby Kitchen Tip: The stew is seasoned throughout the cook, but a small pinch of Firehouse Seasoning at the table brings the garlic, pepper, paprika, and heat back to the front. Start with a little and add more to taste.
Performance Notes
🐂 Why Oxtail?
Oxtail contributes more than beef flavor.
Its connective tissue contains collagen that breaks down during the long braise and turns into gelatin.
That's what gives the finished broth its rich, silky body.
🐖 Why Pork Shanks?
Pork shanks provide another collagen-rich cut with plenty of meat and deep pork flavor.
Using pork alongside the oxtail creates a stew with multiple layers of flavor without requiring the entire pot to be made from oxtail.
🔥 Smoke Before the Braise
Smoking the meat first gives us something a Dutch oven alone can't create.
The meat develops real wood-smoke flavor and exterior color before spending several hours surrounded by liquid.
The braise then takes care of breaking down the tough connective tissue.
🥔 Let the Potatoes Soak It Up
Yukon Gold potatoes bring a naturally creamy texture while holding their shape well during the braise.
As they cook, they absorb the rich broth created by the smoked pork shanks, oxtail, Firehouse Seasoning, and aromatics, giving every bite another layer of flavor.
Cut them into larger chunks so they become tender without disappearing into the stew.
Sometimes the classic choice is the right choice.
🍅 No Tomato Paste? No Problem.
Ketchup works surprisingly well in a stew like this when it's treated properly.
Cooking it for a few minutes before adding the stock concentrates the tomato flavor and reduces the recognizable ketchup character.
Because ketchup already contains sweetness, acidity, and salt, the rest of the recipe is seasoned accordingly.
🔥 Finish With Firehouse
Long braising creates deep, mellow flavors as the pork, beef, smoke, vegetables, and seasonings come together.
A small pinch of Firehouse Seasoning added directly to the finished bowl brings back a brighter hit of garlic, pepper, paprika, and heat.
It's optional, but if you enjoy a bold flavor profile, don't skip it.
Fuel Profile — Estimated Per Serving
Calories: ~450 kcal | Protein: ~35 g | Carbohydrates: ~22 g | Net Carbs: ~19 g | Fiber: ~3 g | Fat: ~25 g
Based on approximately 8 servings using 2½ pounds bone-in pork shanks, 2 pounds bone-in oxtail, 500 g Yukon Gold potatoes, carrots, beef stock, ketchup, and seasonings. Nutrition is estimated and will vary depending on the actual yield and fat content of the pork shanks and oxtail and the specific ingredient brands used.
Make It Your Own
More Heat: Increase the red pepper flakes or add a slightly larger finishing pinch of Firehouse Seasoning.
More Smoke: Use hickory instead of pecan or oak.
More Vegetables: Add celery, mushrooms, or additional carrots.
Thicker Stew: Simmer uncovered longer after returning the meat.
More Broth: Add additional beef stock if you prefer something closer to a soup.
Brighter Finish: Add another small splash of apple cider vinegar immediately before serving.
Storage
Refrigerator
Cool the stew and store in an airtight container for up to 4 days.
This is one of those dishes that may taste even better the next day after the flavors have had more time to come together.
Freezer
Freeze in airtight freezer-safe containers for up to 3 months.
Thaw overnight in the refrigerator before reheating.
Reheating
Reheat gently on the stovetop.
The broth may become almost jelly-like when refrigerated.
That's a good thing.
It's the gelatin created by all that collagen. It will melt back into a silky broth as the stew reheats.
Performance Tip
“Tough cuts don't need shortcuts. They need smoke, time, and enough patience to let them become something better.”
Firehouse Cumin Beef & Peppers
Performance Dinner (or Lunch if you're meal prepping)
Bold cumin, savory garlic, colorful bell peppers, and tender ground beef come together in one skillet for a simple, protein-packed meal. Served over fluffy jasmine rice, this recipe is inexpensive, meal-prep friendly, and perfect for busy weeknights.
Every great weeknight meal should be simple, satisfying, and built from everyday ingredients.
Firehouse Cumin Beef & Peppers takes humble ground beef and transforms it into a flavorful skillet meal with warm cumin, aromatic garlic, sweet bell peppers, and a touch of tamari for depth. Served over jasmine rice, it's hearty enough for dinner while making excellent leftovers for lunch throughout the week.
Whether you're cooking for the family or filling meal prep containers, this is the kind of recipe you'll find yourself making again and again.
Yield: 2 Servings | Prep Time: 15 Minutes | Cook Time: 20 Minutes
Ingredients
Beef & Vegetables
425 g ground beef
150 g red onion, diced
180 g mixed bell peppers, diced (red, yellow, and orange)
Seasoning
2 tsp ground cumin
1 tsp garlic powder
1 tsp ground ginger
½ tsp smoked paprika
½ tsp crushed red pepper flakes
¼ tsp kosher salt
2 tsp tamari soy sauce
1 tsp sesame oil
For Serving
400 g cooked jasmine rice (200 g per serving)
Instructions
Brown the Beef
Heat a large skillet over medium-high heat.
Add the ground beef and cook until no longer pink, breaking it into crumbles as it cooks.
Add the diced onion and bell peppers.
Cook until the vegetables begin to soften, about 5–7 minutes.
Drain the rendered fat and return the beef and vegetables to the skillet.
Build the Flavor
Reduce the heat to medium.
Add the sesame oil.
Sprinkle over the cumin, garlic powder, ginger, smoked paprika, crushed red pepper flakes, and salt.
Cook for about 1 minute, stirring frequently, to bloom the spices.
Finish
Stir in the tamari.
Cook another 1–2 minutes, allowing the sauce to coat the beef and vegetables evenly.
Serve immediately over warm jasmine rice.
Performance Notes
Better Than Basic Ground Beef
The combination of cumin, ginger, tamari, and sesame oil creates a savory, slightly smoky flavor that transforms everyday ground beef into something much more exciting.
Meal Prep Friendly
This recipe reheats exceptionally well and makes an excellent lunch the next day. Store the beef and rice separately for the best texture.
Color Adds Flavor
Using a mix of red, yellow, and orange bell peppers adds natural sweetness and freshness while creating a more colorful, balanced dish.
Performance Tip
Blooming the spices for one minute after draining the beef unlocks their full flavor and creates a richer, more aromatic finished dish.
Fuel Profile — Estimated Per Serving
Calories: 690 kcal | Protein: 47 g | Carbohydrates: 67 g | Net Carbs: 62 g | Fiber: 5 g | Fat: 25 g
Based on 2 servings with 200 g cooked jasmine rice per serving. Nutrition is estimated and will vary depending on the ground beef, tamari, sesame oil, rice, and other ingredient brands used.