
Smokehouse BBQ Sauce
Rich tomato. Balanced sweetness. Bright tang. Just enough smoke and heat.
A homemade barbecue sauce built from crushed tomatoes, fresh onion and garlic, apple cider vinegar, apple juice, brown monk fruit sweetener, and Firehouse Seasoning.
No tomato sauce. No tomato paste. No liquid smoke.
Just real ingredients given enough time to turn into a rich, flavorful barbecue sauce.
Great barbecue comes first.
Around here, great barbecue doesn't depend on sauce.
It starts with quality meat, good seasoning, smoke, and enough patience to let time do its job.
When the meat is cooked right, sauce becomes an addition rather than something needed to rescue it.
Smokehouse BBQ Sauce follows that philosophy.
Crushed tomatoes provide the foundation while slowly cooked onion and fresh garlic build savory depth. Apple cider vinegar brings the tang, unsweetened apple juice adds subtle fruit sweetness, and brown monk fruit provides the brown-sugar character expected from barbecue sauce without loading the batch with conventional sugar.
Firehouse Seasoning, smoked paprika, cayenne, and dry mustard finish the flavor profile with smoke, warmth, and just enough heat.
Leave it rustic or blend it smooth.
Either way, it has one job:
Make good barbecue even better.
Recipe at a Glance
Yield: Approximately 3½–4 cups, depending on reduction
Serving Size: 2 Tbsp
Servings: Approximately 28–32
Prep Time: 15 minutes
Cook Time: Approximately 45–60 minutes
Ingredients
1 Tbsp avocado oil
200 g yellow onion, finely diced
20 g fresh garlic, minced
1 can (28 oz / 794 g) crushed tomatoes
⅓ cup apple cider vinegar
⅓ cup unsweetened apple juice
2 Tbsp Worcestershire sauce
¼ cup brown monk fruit sweetener, plus more to taste
1 Tbsp dark unsulphured molasses, optional
¾ tsp chipotle powder
½ tsp smoked paprika
1 Tbsp Firehouse Seasoning
1½ tsp dry mustard
1 tsp coarse-ground black pepper
Instructions
1. Build the Flavor
Heat the avocado oil in a medium-to-large saucepan over medium heat.
Add the 200 g finely diced yellow onion.
Cook for approximately 8–10 minutes, stirring occasionally, until the onion is completely softened and beginning to develop some golden color.
Add the 20 g minced garlic.
Cook for another 30–60 seconds, stirring frequently, just until fragrant.
Don't allow the garlic to burn.
Kirby Rule: Without tomato paste doing the heavy lifting, properly cooked onion becomes an important part of the sauce's depth. Give it time.
2. Build the Sauce
Add the entire 28-ounce can of crushed tomatoes.
Stir in:
Apple cider vinegar
Unsweetened apple juice
Worcestershire sauce
Brown monk fruit sweetener
Dark unsulphured molasses, if using
Firehouse Seasoning
¾ tsp chipotle powder
Dry mustard
Black pepper
Smoked Paprika
Stir thoroughly until everything is evenly combined.
3. Simmer & Reduce
Bring the sauce to a gentle simmer.
Reduce the heat to low.
Cook uncovered for approximately 45–60 minutes, stirring occasionally.
As the sauce cooks, the crushed tomatoes will reduce, the onion will continue to break down, and the flavors will become more concentrated.
Stir more frequently toward the end of cooking as the sauce thickens.
Continue reducing until it reaches your preferred barbecue sauce consistency.
Kirby Kitchen Tip: There's no tomato paste doing the thickening here. Time does the job instead. Let the tomatoes reduce naturally and remember that the sauce will thicken even more after cooling.
4. Taste & Adjust
Once the sauce has reduced, taste it.
For more sweetness, add additional brown monk fruit sweetener.
For more tang, add a small splash of apple cider vinegar.
For more heat, add cayenne pepper a pinch at a time.
For more smoke, add a little additional smoked paprika.
For a deeper brown-sugar and molasses character, add the optional dark unsulphured molasses or increase it slightly.
If the sauce has become too concentrated, loosen it with a small splash of water or unsweetened apple juice.
Make your final adjustments after reducing. The flavor at the beginning of the cook won't represent the finished sauce.
5. Choose Your Texture
Rustic Smokehouse
Leave the sauce as-is.
The softened onion, garlic, and crushed tomatoes give the sauce a rustic texture.
Smooth Smokehouse
Remove the saucepan from the heat and allow the sauce to cool slightly.
Carefully blend with an immersion blender until smooth.
For an especially smooth table sauce or a sauce you'll use in a squeeze bottle, blend until no noticeable pieces of onion or tomato remain.
6. Cool & Store
Allow the sauce to cool completely.
Transfer to clean airtight containers or squeeze bottles.
Refrigerate until ready to use.
The sauce will continue to thicken slightly as it chills.
Performance Notes
🍅 Start With the Whole Can
The recipe is built around an entire 28-ounce can of crushed tomatoes.
There's no half-used can left in the refrigerator, and there's no need for tomato sauce or tomato paste.
The tomatoes develop their concentration naturally as the sauce reduces.
🧅 Build Flavor With Real Aromatics
Fresh yellow onion and garlic provide the savory foundation.
Cooking the onion until soft and lightly golden develops natural sweetness and another layer of flavor underneath the tomatoes.
Using measured weights also makes the sauce easier to reproduce from one batch to the next.
🍎 Apple Works Both Sides
Unsweetened apple juice contributes subtle fruit sweetness while apple cider vinegar provides acidity.
That sweet-and-tangy combination works particularly well with smoked pork and chicken.
🍯 Brown Monk Fruit Does the Heavy Lifting
Brown monk fruit sweetener provides the deeper sweetness associated with brown sugar while keeping conventional sugar considerably lower.
For more depth, dark unsulphured molasses can be added.
The molasses is optional, so the sauce can be adjusted depending on the barbecue it's being paired with.
🔥 Smoke Without Chipotle or Liquid Smoke
Smoked paprika provides the smoky character while a small amount of cayenne brings the heat.
Using 2½ teaspoons smoked paprika + ¼ teaspoon cayenne gives us the two things chipotle powder would normally contribute without requiring another specialty spice.
And when this sauce goes onto meat that's already been properly smoked, the smoker provides the rest.
🌶️ Firehouse in the Background
Firehouse Seasoning brings additional garlic, pepper, paprika, jalapeño, and seasoning into the sauce.
It's there to support the barbecue flavor rather than dominate it.
Put It to Work
Smokehouse BBQ Sauce works especially well with:
Pulled pork
Pork ribs
Smoked chicken
Grilled chicken
Brisket
Burgers
Wings
Meatloaf
BBQ sandwiches
BBQ chicken wraps
BBQ chicken pizza
It's also the homemade BBQ sauce used as the base for Firehouse BBQ Chicken & Bacon Pizza.
Make It Your Own
Sweeter: Add additional brown monk fruit sweetener.
Tangier: Add additional apple cider vinegar.
Hotter: Add cayenne pepper a pinch at a time.
Smokier: Add additional smoked paprika.
Deeper: Add the optional dark unsulphured molasses.
Rustic: Leave the finished sauce unblended.
Smooth: Blend after cooking.
Thicker: Reduce longer.
Thinner: Add a small amount of water or unsweetened apple juice.
Fuel Profile — Estimated Per Serving
Calories: ~20–25 kcal | Protein: ~0.5 g | Carbohydrates: ~4–5 g | Net Carbs: ~3–4 g | Fiber: ~1 g | Fat: ~0.5 g
Based on a 2-tablespoon serving and approximately 3½–4 cups finished sauce. Nutrition is estimated and will vary depending on the final reduction, crushed tomatoes, Worcestershire sauce, brown monk fruit sweetener, and whether the optional molasses is used.
Storage
Refrigerator
Transfer the completely cooled sauce to a clean airtight container.
Refrigerate and use within approximately 7–10 days.
Freezer
Freeze in airtight portions for up to 3 months.
Thaw overnight in the refrigerator and stir well before using.
Kitchen Wisdom
“A great barbecue sauce should earn its place at the table by enhancing great barbecue, never replacing it.”
Smokehouse Cream Drizzle
Cool. Creamy. Tangy. The finishing touch for BBQ pizza.
A creamy finishing sauce built with Greek yogurt, a little avocado oil mayo, House Ranch Seasoning, garlic, and lemon.
Designed to drizzle over hot BBQ chicken pizza after it comes out of the oven, bringing a cool, tangy contrast to smoky BBQ sauce, bacon, melted mozzarella, and red onion.
The BBQ sauce already did its job.
The sauce underneath the pizza brings the smoke, sweetness, and BBQ flavor.
This sauce is here for something different.
Smokehouse Cream Drizzle adds a cool, creamy finish that cuts through the richness of melted mozzarella and bacon while balancing the sweetness and smoke of the BBQ sauce.
It's deliberately lighter and brighter than a traditional ranch.
Drizzle it over the pizza after baking so the contrast between the hot pizza and cool cream sauce stays intact.
Recipe at a Glance
Yield: About ¾ cup
Serving Size: 1 Tbsp
Servings: About 12
Prep Time: 5 minutes
Chill Time: 30 minutes
Cook Time: None
Ingredients
½ cup plain Greek yogurt
¼ cup Chosen Foods Classic Avocado Oil Mayo
1 tsp House Ranch Seasoning
1 tsp fresh lemon juice
½ tsp apple cider vinegar
¼ tsp garlic powder
⅛ tsp coarse-ground black pepper
1–3 Tbsp Fairlife 2% milk, as needed for consistency
Instructions
1. Build the Sauce
Add the Greek yogurt and avocado oil mayo to a small mixing bowl.
Add:
House Ranch Seasoning
Lemon juice
Apple cider vinegar
Garlic powder
Black pepper
Whisk until completely smooth.
2. Make It Drizzle
Add 1 tablespoon Fairlife 2% milk.
Whisk thoroughly.
Continue adding milk 1 teaspoon at a time until the sauce flows easily from a spoon or squeeze bottle.
The sauce should be thinner than dipping ranch but thick enough to stay where it's drizzled.
Kirby Rule: A finishing sauce should sit on top of the pizza, not run off onto the plate.
3. Chill
Cover and refrigerate for at least 30 minutes.
This gives the herbs in the House Ranch Seasoning time to hydrate and lets the garlic, lemon, vinegar, and dairy come together.
Stir before serving.
🍕 Finish the BBQ Chicken Pizza
Build the pizza with:
Homemade BBQ Sauce → Mozzarella → BBQ Chicken → Red Onion → Bacon → Mozzarella as desired
Bake until the crust is finished, the mozzarella is melted and browned, and the bacon is hot and crisp.
Allow the pizza to rest for approximately 1–2 minutes.
Drizzle Smokehouse Cream Drizzle lightly across the finished pizza.
Start with approximately 2 tablespoons for a 12-inch pizza or 3 tablespoons for a 16-inch pizza.
Serve additional sauce on the side if desired.
Kirby Kitchen Tip: Don't bake the cream sauce. Adding it after the pizza comes out keeps it cool, bright, and creamy against the hot BBQ toppings.
Performance Notes
🥛 Greek Yogurt Builds the Base
Greek yogurt provides tang, body, and creaminess without requiring the entire sauce to be mayonnaise.
It also gives the sauce a fresh character that works particularly well against rich bacon and mozzarella.
🥑 A Little Mayo Matters
The avocado oil mayo gives the sauce enough richness to feel like a proper finishing sauce rather than seasoned yogurt.
We're using considerably less mayo than Greek yogurt.
🌿 Ranch Without Making Ranch
House Ranch Seasoning provides dill, chives, garlic, onion, herbs, and buttermilk flavor.
But at only 1 teaspoon, it stays in the background.
The goal isn't BBQ pizza covered in ranch.
It's a creamy sauce with enough herb character to complement the toppings.
🍋 Acid Cuts Through Richness
Lemon and apple cider vinegar brighten the sauce.
That acidity is particularly useful against:
BBQ sauce + mozzarella + bacon.
The sauce should make the next bite taste better rather than simply making the pizza richer.
Make It Your Own
More Garlic: Increase the garlic powder slightly.
More Tang: Add another small squeeze of lemon.
More Ranch: Increase House Ranch Seasoning by ½ teaspoon.
Thicker: Use less Fairlife milk.
Thinner: Add Fairlife milk 1 teaspoon at a time.
More Heat: Add a small pinch of Firehouse Seasoning.
Fuel Profile — Estimated Per Serving
Calories: ~35 kcal | Protein: ~2 g | Carbohydrates: ~1 g | Net Carbs: ~1 g | Fiber: 0 g | Fat: ~3 g
Based on approximately 12 one-tablespoon servings. Nutrition is estimated and will vary depending on the Greek yogurt, avocado oil mayo, milk, and ingredient brands used.
Storage
Transfer to an airtight container or squeeze bottle.
Refrigerate and use within approximately 5–7 days.
Stir or shake before using.
Kitchen Wisdom
“The BBQ sauce builds the pizza. The cream sauce brings it home.”
For that specific BBQ chicken + bacon + red onion + mozzarella + homemade BBQ sauce pizza, I think this is a much better direction than putting more BBQ flavor into the drizzle. The contrast is what should make the finishing sauce earn its place.
Smokehouse Drizzle
Sweet. Tangy. Garlicky. Built for the final drizzle.
A bold finishing sauce made for drizzling over hot pizza after it comes out of the oven.
Tomato, garlic, herbs, a touch of sweetness, and just enough heat give the finished pizza another layer of flavor without covering up everything underneath.
The sauce underneath builds the pizza.
This one finishes it.
Pizza sauce and pizza topping sauce have two different jobs.
Kirby Kitchen Pizza Sauce creates the tomato foundation underneath the cheese and toppings.
Kirby Kitchen Pizza Topping Sauce comes in after the bake.
It's thicker, punchier, and designed to be used sparingly across the finished pizza, almost like the final seasoning.
A little drizzle brings acidity, sweetness, garlic, herbs, and heat directly to the first bite.
Recipe at a Glance
Yield: About 1½ cups
Serving Size: 1 Tbsp
Servings: About 24
Prep Time: 5 minutes
Cook Time: 15–20 minutes
Ingredients
1 cup (240 g) tomato sauce
¼ cup (60 g) tomato paste
2 Tbsp apple cider vinegar
2 Tbsp brown sugar monk fruit sweetener
1 Tbsp Worcestershire sauce
1 Tbsp extra-virgin olive oil
2 cloves garlic, finely grated or minced
1 tsp dried oregano
½ tsp dried basil
½ tsp onion powder
½ tsp smoked paprika
½ tsp kosher salt
¼ tsp coarse-ground black pepper
¼ tsp crushed red pepper flakes, optional
2–4 Tbsp water, as needed for consistency
Instructions
1. Build the Sauce
Add the tomato sauce and tomato paste to a small saucepan.
Whisk until smooth.
Add:
Apple cider vinegar
Brown sugar monk fruit sweetener
Worcestershire sauce
Olive oil
Garlic
Oregano
Basil
Onion powder
Smoked paprika
Kosher salt
Black pepper
Crushed red pepper flakes, if using
Whisk thoroughly.
2. Simmer
Place over medium-low heat.
Bring to a gentle simmer.
Cook for approximately 15–20 minutes, stirring occasionally.
The sauce should become slightly darker, thicker, and more concentrated.
Do not aggressively boil.
Kirby Rule: This is a finishing sauce, so the flavor needs to be concentrated enough that a small drizzle actually matters.
3. Adjust the Consistency
Remove the sauce from the heat.
If it's too thick for drizzling, whisk in water 1 tablespoon at a time until it reaches your preferred consistency.
You're looking for something thicker than traditional pizza sauce but loose enough to drizzle from a spoon or squeeze bottle.
4. Taste & Adjust
Taste the sauce while it's still warm.
For more sweetness, add a little additional brown sugar monk fruit.
For more acidity, add a small splash of apple cider vinegar.
For more heat, increase the crushed red pepper.
For a stronger savory finish, add another small splash of Worcestershire.
5. Cool
Allow the sauce to cool.
Transfer to a clean squeeze bottle, jar, or airtight container.
Refrigerate until ready to use.
How to Use It
Once the pizza comes out of the oven, let it rest for approximately 1–2 minutes.
Drizzle the topping sauce lightly across the surface.
Start with approximately 1–2 tablespoons for a full pizza.
You can always add more.
Kirby Rule: Finishing sauce should highlight the pizza, not hide it. Drizzle first. Drown never.
Performance Notes
🍅 Tomato Paste Makes It Stick
The extra tomato paste makes this considerably thicker and more concentrated than the Pizza Sauce.
That helps it stay on top of the pizza instead of immediately running off.
🍯 Brown Sugar Flavor
Brown sugar monk fruit brings a deeper sweetness that works particularly well with tomato, garlic, smoked meats, bacon, pepperoni, and sausage.
It also keeps us from needing a large amount of conventional sugar.
🔥 A Little Smoke
Smoked paprika gives the sauce a subtle smoky background.
That makes it particularly useful on pizzas topped with grilled or smoked meats without making the sauce taste like barbecue sauce.
🍎 Bring the Acid
Apple cider vinegar gives the finishing sauce a brighter, tangier character than the sauce underneath the pizza.
That acidity helps cut through mozzarella, meats, and richer toppings.
🧄 Garlic Up Front
Because this sauce goes onto the pizza after baking, its garlic and herb flavors remain more noticeable.
That's intentional.
The topping sauce is supposed to have more personality than the base sauce.
Make It Your Own
Sweeter: Add additional brown sugar monk fruit.
Hotter: Increase the crushed red pepper.
Firehouse Version: Add ¼–½ teaspoon Firehouse Seasoning.
Smokier: Increase the smoked paprika slightly.
More Garlic: Add another fresh garlic clove.
Thinner Drizzle: Add additional water.
Thicker Dip: Reduce the water or simmer slightly longer.
Beyond Pizza
This doesn't have to stay on pizza.
Try it with:
Calzones
Stromboli
Mozzarella sticks
Garlic bread
Meatball subs
Chicken Parmesan
Breadsticks
Pizza rolls
Grilled cheese
Firehouse Bacon Jalapeño Cheddar Bread
Fuel Profile — Estimated Per Serving
Calories: ~15 kcal | Protein: ~0.5 g | Carbohydrates: ~3 g | Net Carbs: ~2 g | Fiber: ~1 g | Fat: ~0.5 g
Based on approximately 24 one-tablespoon servings. Nutrition is estimated and will vary depending on the tomato products, Worcestershire sauce, brown sugar monk fruit sweetener, and other ingredient brands used.
Storage
Transfer the cooled sauce to an airtight container or squeeze bottle.
Refrigerate for up to 7 days.
Shake or stir before using.
For longer storage, freeze in small portions for up to 3 months.
Kitchen Wisdom
“The sauce underneath starts the pizza. The sauce on top gets the last word.”
Kirby Kitchen Pizza Sauce
Bright tomato. Fresh onion. Garlic, herbs, and a little fennel.
A simple, flavorful pizza sauce built around crushed tomatoes, fresh white onion, garlic, oregano, basil, and fennel seed. No tomato paste and no added sugar. Just a balanced sauce designed to complement the crust, cheese, and toppings without taking over the pizza.
Good pizza starts underneath the toppings.
Pizza sauce doesn't need to be complicated.
It needs to be balanced enough to support everything that comes afterward.
Kirby Kitchen Pizza Sauce starts with crushed tomatoes and builds from there with slowly softened white onion, fresh garlic, oregano, basil, and fennel seed.
The fennel is subtle, but it adds that little extra depth that makes the sauce taste more like something from a great pizzeria.
There's no tomato paste and no added sugar.
Just tomatoes, aromatics, herbs, and enough time to let them come together.
Recipe at a Glance
Yield: About 3 cups
Serving Size: ¼ cup
Servings: About 12
Prep Time: 10 minutes
Cook Time: 20–25 minutes
Ingredients
1 can (28 oz / 794 g) crushed tomatoes
½ medium white onion, very finely diced
3–4 cloves garlic, finely minced
1 Tbsp extra-virgin olive oil
1½ tsp dried oregano
1 tsp dried basil
½ tsp fennel seed, lightly crushed
1 tsp kosher salt
½ tsp coarse-ground black pepper
¼ tsp crushed red pepper flakes, optional
Instructions
1. Prepare the Aromatics
Warm the olive oil in a saucepan over medium-low heat.
Add the finely diced white onion.
Cook for approximately 5–7 minutes, stirring occasionally, until the onion has softened and become translucent.
Don't rush this step. The goal is to soften the onion and bring out its natural sweetness without heavily browning it.
2. Add the Garlic & Fennel
Add the garlic and lightly crushed fennel seed.
Cook for approximately 30–60 seconds, stirring constantly.
The garlic should become fragrant without browning.
Kirby Rule: Fresh garlic and fennel only need a little heat to release their aroma. Burn them here and you'll taste it throughout the entire sauce.
3. Add the Tomatoes & Herbs
Pour in the crushed tomatoes.
Add:
Oregano
Basil
Kosher salt
Black pepper
Crushed red pepper flakes, if using
Stir until everything is evenly combined.
4. Simmer
Bring the sauce to a gentle simmer.
Reduce the heat to low.
Simmer uncovered for approximately 20–25 minutes, stirring occasionally.
The onion should become completely tender and the sauce should thicken slightly while retaining enough moisture to spread easily over pizza.
Kirby Kitchen Tip: You're not trying to cook this down into tomato paste. It should still spread easily across the crust and continue cooking when the pizza goes into the oven.
5. Taste & Adjust
Taste the sauce.
Adjust the salt, black pepper, oregano, or red pepper flakes as needed.
The fennel should be noticeable as a background flavor, not the first thing you taste.
6. Cool
Allow the sauce to cool before using.
For the best flavor, refrigerate for at least 30 minutes before making pizza.
The flavors will continue to come together as the sauce rests.
How Much Pizza Sauce?
🍕 12-Inch Pizza
Use approximately ⅓ cup.
🍕 16-Inch Pizza
Use approximately ½ cup, depending on how heavily sauced you like your pizza.
🫓 Joseph's Pita Pizza
Start with 2–3 tablespoons.
🫓 Joseph's Lavash Pizza
Start with approximately ¼ cup.
Kirby Rule: More sauce doesn't automatically mean better pizza. Too much sauce adds moisture and makes it harder to keep the crust crisp.
Performance Notes
🍅 No Tomato Paste
This sauce intentionally skips tomato paste.
The goal is a brighter, fresher tomato flavor rather than a heavily concentrated sauce.
The crushed tomatoes provide everything we need.
🧅 Fresh White Onion
Instead of onion powder, fresh white onion is cooked into the sauce.
This gives the sauce a more rounded savory flavor and a subtle natural sweetness as the onion softens.
🌿 Keep the Herbs Simple
Oregano and basil provide the familiar pizza-sauce foundation without overwhelming the tomatoes.
🌱 Don't Forget the Fennel
Fennel seed gives the sauce a subtle warm, aromatic quality that pairs especially well with sausage, pepperoni, Italian meats, and rich cheeses.
Lightly crushing the fennel before adding it helps release its flavor throughout the sauce.
🌶️ Heat Is Optional
The red pepper flakes are intentionally low.
The goal isn't to make the sauce hot. It's to add a little background warmth.
Make It Your Own
More Garlic: Add another clove of fresh garlic.
More Fennel: Increase to ¾ teaspoon for a more pronounced fennel character.
More Heat: Increase the crushed red pepper flakes.
Chunkier: Leave the onion slightly larger.
Smoother: Briefly blend with an immersion blender after simmering.
Fresh Herb Version: Replace part of the dried basil with fresh basil just before the sauce finishes cooking.
Put It to Work
Kirby Kitchen Pizza Sauce works especially well with:
Traditional pizza
Joseph's pita pizza
Joseph's Lavash pizza
BBQ chicken pizza
Pepperoni pizza
Sausage pizza
Meatball subs
Calzones
Stromboli
Pizza rolls
Chicken Parmesan
Mozzarella sticks
Fuel Profile — Estimated Per Serving
Calories: ~30 kcal | Protein: ~1 g | Carbohydrates: ~4 g | Net Carbs: ~3 g | Fiber: ~1 g | Fat: ~1 g
Based on approximately 12 quarter-cup servings. Nutrition is estimated and will vary depending on the crushed tomatoes, olive oil, onion, and specific ingredient brands used.
Storage
Refrigerator
Transfer the cooled sauce to an airtight container and refrigerate for up to 5–7 days.
Freezer
Freeze in small portions for up to 3 months.
Freezing the sauce in ¼- to ½-cup portions makes it easy to pull out exactly what you need for pizza night.
Thaw overnight in the refrigerator before using.
Kitchen Wisdom
“Good pizza sauce doesn't compete with the toppings. It gives them something worth standing on.”
Homestead Poultry Seasoning
Classic herbs. Savory spices. Built for chicken and turkey.
An herb-forward poultry seasoning with garlic, onion, smoked paprika, thyme, sage, and black pepper. Built as an everyday foundation for chicken, turkey, soups, casseroles, gravies, vegetables, and more.
One poultry seasoning. Plenty of ways to use it.
Great poultry seasoning shouldn't overpower the meat.
Homestead Poultry Seasoning brings together the familiar flavors of thyme and sage with garlic, onion, smoked paprika, and black pepper to create a savory blend that works throughout the kitchen.
Use it to season chicken before roasting, build flavor into soups and stews, add depth to casseroles and gravies, or bring a savory herb finish to vegetables and potatoes.
And when crispy poultry skin is the goal, a little cornstarch turns the base blend into Shatter-Crust Poultry Rub, giving you a specialized dry brine without requiring another completely separate seasoning blend.
Make one jar. Use it everywhere.
Recipe at a Glance
Yield: About ⅔ cup
Prep Time: 5 minutes
Cook Time: None
Ingredients
4 Tbsp sea salt
2 Tbsp smoked paprika
1 Tbsp garlic powder
1 Tbsp onion powder
1 tsp dried thyme
1 tsp dried sage
1 tsp ground black pepper
Instructions
1. Prepare the Herbs
Rub the dried thyme and sage lightly between your fingers to break down any larger pieces.
This helps distribute the herbs more evenly throughout the seasoning.
2. Combine
Add the sea salt, smoked paprika, garlic powder, onion powder, thyme, sage, and black pepper to a mixing bowl or glass jar.
Whisk thoroughly or seal the jar and shake vigorously for approximately 30 seconds.
Kirby Rule: A fine, evenly distributed seasoning blend coats meat more consistently and helps every bite carry the same balance of flavor.
3. Store
Transfer the seasoning to an airtight spice jar if you haven't already mixed it directly in one.
Store in a cool, dark, dry place.
Shake well before each use.
Performance Notes
🌿 Classic Poultry Herbs
Thyme and sage provide the familiar herb-forward character associated with roasted chicken and turkey.
They're intentionally kept balanced so neither herb overwhelms the meat.
🧄 Build the Savory Foundation
Garlic and onion provide the savory backbone while black pepper adds a little bite.
🌶️ A Little Smoke
Smoked paprika adds color and a subtle smoky character without turning this into a barbecue rub.
That makes Homestead Poultry Seasoning equally useful whether the chicken is headed for the oven, stovetop, grill, or smoker.
🧂 Salt Is Already Included
Homestead Poultry Seasoning contains salt, so keep that in mind when using it with chicken stock, sauces, cheese, or other seasoned ingredients.
Start with the seasoning blend and adjust additional salt after tasting the finished dish.
How to Use It
🍗 Chicken Breast
Start with approximately 1–1½ teaspoons per pound and adjust to taste.
🍗 Chicken Thighs
Use approximately 1½–2 teaspoons per pound, especially when seasoning skin-on thighs.
🦃 Turkey
Start with approximately 1½ teaspoons per pound.
For a whole bird, season both the exterior and underneath the skin when possible.
🍲 Soups & Stews
Start with ½–1 teaspoon, allow the seasoning to cook into the broth, then taste before adding more.
🥔 Vegetables & Potatoes
Season lightly before roasting, then adjust after cooking.
Quick Build: Shatter-Crust Poultry Rub
Crispy skin starts before the bird ever reaches the heat.
Homestead Poultry Seasoning provides the flavor. Cornstarch turns it into a specialized dry brine designed for skin-on chicken and turkey.
The cornstarch helps absorb surface moisture, encouraging the skin to become crisp, golden, and crackling during roasting, grilling, or smoking.
Ingredients
11 Tbsp Homestead Poultry Seasoning
1 Tbsp cornstarch
Instructions
Add the Homestead Poultry Seasoning and cornstarch to a glass jar.
Seal and shake vigorously until completely combined.
Shake again before each use.
How to Use Shatter-Crust
Pat the poultry very dry with paper towels.
Season evenly with Shatter-Crust Poultry Rub.
Place the poultry uncovered in the refrigerator for 4–12 hours before cooking.
This gives the salt time to season the meat while the uncovered refrigerator rest and cornstarch help dry the surface.
Before cooking, apply a very thin layer of beef tallow if desired.
Roast, grill, or smoke using your preferred method.
Kirby Rule: Crispy skin isn't something you fix during the last five minutes of cooking. Start with a dry surface and give the seasoning time to do its job.
Why Cornstarch Isn't in the Main Blend
Shatter-Crust originally started as a standalone poultry rub with cornstarch mixed directly into the seasoning.
But crispy skin isn't the goal every time poultry enters the kitchen.
Chicken and dumplings, soups, casseroles, gravies, skinless chicken breasts, and plenty of other recipes benefit from poultry seasoning without needing cornstarch.
Keeping Homestead Poultry Seasoning as the foundation and adding cornstarch only when needed makes one seasoning blend much more versatile.
Put It to Work
Homestead Poultry Seasoning works especially well with:
Roasted chicken
Smoked chicken
Chicken thighs
Whole turkey
Turkey breast
Chicken and dumplings
Chicken pot pie
Chicken soup
Turkey soup
Gravies
Casseroles
Roasted potatoes
Roasted vegetables
Use the Shatter-Crust Quick Build when crisp skin is part of the goal.
Fuel Profile — Estimated Per Serving
Serving Size: 1 tsp
Calories: ~4 kcal | Protein: ~0.2 g | Carbohydrates: ~0.8 g | Net Carbs: ~0.5 g | Fiber: ~0.3 g | Fat: ~0.1 g
Based on a 1-teaspoon serving of Homestead Poultry Seasoning. Nutrition is estimated and will vary depending on the specific spices and ingredient brands used.
Storage
Store Homestead Poultry Seasoning in an airtight container in a cool, dark, dry place.
For the best flavor and aroma, use within approximately 6 months.
Because the blend contains no anti-caking agents, some natural clumping may occur.
Shake well before each use.
Kitchen Wisdom
“Great poultry seasoning shouldn't cover up the bird. It should make the chicken taste more like chicken.”
Kirby's High-Volume Taco Rub
Big batch. Bold flavor. Ready whenever taco night happens.
A pantry-sized taco seasoning built for everything from weeknight tacos and quesadillas to smoked Tex-Mex favorites. Lower in salt than many commercial taco seasonings, so you can build plenty of flavor while staying in control of the final seasoning.
Make it once. Reach for it all year.
Store-bought taco seasoning packets are convenient, but they don't give you much control over what's actually going into the food.
Kirby's High-Volume Taco Rub was created to solve that problem.
Chili powder and cumin form the backbone, while garlic, onion, paprika, oregano, black pepper, and crushed red pepper build layers of savory flavor and heat.
The salt is intentionally kept lower than many commercial blends, allowing you to season generously and adjust the final salt level based on what you're cooking.
And instead of making enough for one pound of taco meat, this recipe makes a full pantry-sized batch.
Mix it once, put it in a jar, and taco night is ready whenever you are.
Recipe at a Glance
Yield: Approximately 2 cups
Serving Size: 1 tsp
Prep Time: 5 minutes
Cook Time: None
Storage: Up to 6–8 months for best flavor
Ingredients
1 cup chili powder
6 Tbsp ground cumin
¼ cup onion powder
¼ cup garlic powder
2 Tbsp paprika
2 Tbsp sea salt
2 Tbsp coarse-ground black pepper
2 Tbsp crushed red pepper flakes
1 Tbsp dried oregano
Instructions
1. Prepare the Oregano
Measure the dried oregano into your hand.
Rub it gently between your fingers to break it down slightly before adding it to the other spices.
Kirby Rule: Breaking up the oregano helps distribute it throughout the blend so every scoop delivers a more balanced combination of herbs and spices.
2. Combine
Add all ingredients to a large mixing bowl.
Whisk thoroughly until the spices are completely and evenly combined.
Make sure there are no pockets of cumin, salt, garlic, or other individual seasonings remaining.
3. Store
Transfer the Taco Rub to a clean mason jar, spice jar, or other airtight container.
Label and store in a cool, dry place away from direct sunlight and heat.
Shake the container before using.
How Much Should I Use?
🌮 Classic Taco Meat
Start with 2–3 tablespoons per pound of ground beef, chicken, pork, or turkey.
Use less initially if other ingredients in the dish already contain significant salt.
🥩 2 Pounds of Meat
Use approximately ¼ cup Taco Rub.
🫑 Roasted Vegetables
Start with approximately 1 tablespoon per pound of vegetables.
It's especially good on:
Potatoes
Sweet potatoes
Bell peppers
Onions
Corn
Zucchini
🫘 Beans
Start with 1–2 tablespoons, then adjust to taste.
🧀 Queso
Start with approximately 2 tablespoons and adjust after the cheese has completely melted.
🔥 Get More Flavor: Bloom the Spices
When you're browning meat, don't simply sprinkle the Taco Rub over the finished beef.
Once the meat has rendered some fat, push it toward the outside of the skillet and allow a small amount of fat to collect in the center.
Add the Taco Rub directly to the hot fat.
Cook for approximately 30 seconds, just until fragrant, then stir everything back into the meat.
Kirby Rule: Blooming spices in fat helps release their aromatic compounds and creates deeper flavor than simply stirring dry seasoning into finished meat.
If you're cooking particularly lean meat, add a small amount of beef tallow or avocado oil before blooming the seasoning.
Performance Notes
🌶️ Chili & Cumin Build the Foundation
Chili powder provides the broad chile flavor while cumin brings the warm, earthy character people associate with tacos and Tex-Mex cooking.
Together, they make up the backbone of the blend.
🧂 Lower Salt, More Control
This blend intentionally doesn't rely heavily on salt for flavor.
That gives you more freedom when using it with cheese, sauces, seasoned meats, beans, and other ingredients that may already contribute sodium.
You can always add salt to the finished dish.
You can't take it back out.
🧄 Layer the Savory Flavors
Garlic and onion powder provide the savory foundation while paprika, oregano, and black pepper add additional complexity.
Crushed red pepper provides the heat.
🔥 Control the Heat
For a milder Taco Rub, reduce the crushed red pepper flakes from 2 tablespoons to 1 tablespoon.
For more heat and smoke, replace some of the red pepper flakes with ground chipotle.
🔥 Pitmaster Variation: Ultimate Taco Rub
Want to take the base blend deeper?
For the entire 2-cup batch of Kirby's High-Volume Taco Rub, add:
1 Tbsp unsweetened cocoa powder
1 Tbsp finely ground espresso
1 Tbsp dried lime peel
1 Tbsp ground chipotle
Mix thoroughly and store just like the original.
Why Those Ingredients?
The cocoa and espresso aren't there to make your tacos taste like chocolate or coffee.
They add darker roasted notes and help deepen the color and complexity of the seasoning.
Chipotle brings smoke and additional heat, while dried lime peel adds a bright citrus note that helps balance richer meats.
This version is particularly at home with beef, smoked meats, and tallow-based cooking.
Put It to Work
Kirby's High-Volume Taco Rub works in:
Ground beef tacos
Chicken tacos
Quesadillas
Burritos
Taco bowls
Nachos
Enchiladas
Queso
Refried beans
Chili
Roasted vegetables
Smoked meats
And now we have two direct uses already on the website:
🌶️ Firehouse Buffalo Beef Quesadilla
🌶️ Firehouse Buffalo Chicken Quesadilla
Fuel Profile — Estimated Per Serving
Calories: 6 kcal | Protein: 0.3 g | Carbohydrates: 1.2 g | Net Carbs: 0.6 g | Fiber: 0.6 g | Fat: 0.2 g
Based on a 1-teaspoon serving. Nutrition is estimated and will vary depending on the specific spices and ingredient brands used.
For this seasoning, I'd keep the decimal values rather than round them. With only about 6 calories per teaspoon, rounding protein, carbs, fiber, and fat to whole numbers would hide most of the useful information.
Storage
Store in an airtight glass jar or spice container in a cool, dry place away from direct sunlight and heat.
For the strongest flavor and aroma, use within approximately 6–8 months.
Give the jar a good shake before measuring, particularly if it has been sitting for a while.
Kitchen Wisdom
“A good taco seasoning shouldn't hide the meat. It should make every bite taste more like the meat it was meant for.”
Peppermint Mocha Coffee Creamer
Chocolate. Peppermint. Coffee-shop flavor made at home.
A rich and creamy peppermint mocha coffee creamer made with Fairlife milk, real cream, unsweetened cocoa, maple syrup, vanilla, and just enough peppermint to bring a little holiday flavor to your morning coffee.
A little Christmas in your coffee.
Peppermint mocha is one of those flavors that immediately feels like the holidays.
But you don't need a bottle of heavily sweetened creamer or a trip to the coffee shop every morning to get it.
This Kirby Kitchen version starts with Fairlife 2% milk and real heavy cream, then builds the mocha flavor with unsweetened cocoa, real maple syrup, vanilla, and a carefully measured amount of peppermint.
Golden monk fruit provides additional sweetness without requiring us to keep adding sugar.
The goal is a creamer that's rich, chocolatey, refreshing, and unmistakably peppermint mocha—without being so sweet that you can no longer taste the coffee underneath it.
🧪 In Testing — Kirby Kitchen Test Kitchen
This recipe is currently being tested.
The recipe below is the current working version from the Kirby Kitchen Test Kitchen. The ingredients and method have been developed, but the recipe hasn't completed our final cook-and-taste test yet.
We're testing chocolate intensity, peppermint level, sweetness, creaminess, and how the flavors come through once the creamer is added to coffee.
Measurements may change as we dial everything in.
You're welcome to try it along with us. If you do, leave a comment and let us know what worked, what you'd change, and how you made it your own.
Once we're happy with the final result, the In Testing label will come off and this page will be updated with the finished recipe.
Recipe at a Glance
Yield: About 2 cups
Serving Size: 2 Tbsp
Servings: About 16
Prep Time: 5 minutes
Cook Time: 5–10 minutes
Ingredients
1 cup Fairlife 2% Ultra-Filtered Milk
½ cup heavy cream
2 Tbsp unsweetened cocoa powder
2 Tbsp pure maple syrup
1 Tbsp golden monk fruit sweetener, plus more to taste
1 tsp vanilla bean paste
¼ tsp peppermint extract
⅛ tsp kosher salt
Instructions
1. Bloom the Cocoa
Add the unsweetened cocoa powder, maple syrup, golden monk fruit sweetener, and kosher salt to a small saucepan.
Pour in approximately ¼ cup of the Fairlife milk.
Whisk until the cocoa forms a smooth chocolate mixture with no dry pockets remaining.
Place over medium-low heat and cook for 1–2 minutes, whisking constantly.
Kirby Rule: Give the cocoa a chance to fully hydrate before adding the rest of the dairy. This helps create a smoother creamer without little clumps of cocoa floating in your coffee.
2. Add the Dairy
Gradually whisk in the remaining Fairlife milk.
Add the heavy cream and whisk until completely combined.
Continue warming over low to medium-low heat, whisking occasionally.
Do not allow the mixture to boil.
3. Add the Peppermint & Vanilla
Remove the saucepan from the heat.
Stir in the vanilla bean paste and ¼ teaspoon peppermint extract.
Kirby Rule: Peppermint extract is powerful. Start small. You can always add more, but once your coffee tastes like toothpaste, there's no going back.
4. Blend Until Smooth
Carefully blend the warm creamer with an immersion blender for approximately 15–20 seconds.
Alternatively, carefully transfer it to a regular blender and briefly blend until completely smooth.
5. Cool & Chill
Allow the creamer to cool before transferring it to a clean glass jar or airtight container.
Refrigerate until completely chilled.
Shake well before each use.
The Coffee Test
Start with 2 tablespoons of creamer per 8–12 oz cup of coffee.
And here's an important part of testing this recipe:
Judge the peppermint in the coffee—not straight from the jar.
Coffee will change how strongly you perceive the chocolate, sweetness, and peppermint.
If the peppermint needs more presence, increase the extract in the batch by only ⅛ teaspoon at a time.
Performance Notes
🍫 Build a Real Mocha
Unsweetened cocoa gives us genuine chocolate flavor without relying on bottled chocolate syrup.
Blooming the cocoa first helps deepen the flavor while producing a smoother finished creamer.
🌿 Peppermint Needs Restraint
More isn't always better.
Peppermint extract is extremely concentrated, so ¼ teaspoon is our starting point for the entire batch.
We want peppermint mocha—not peppermint mouthwash.
🍁 Keep Some Real Maple
We're intentionally keeping a small amount of real maple syrup.
It contributes flavor and sweetness that complement both chocolate and coffee, while golden monk fruit helps provide the remaining sweetness without requiring a large amount of added sugar.
🥛 Keep the Cream
Fairlife 2% provides the primary dairy base, but we're keeping real heavy cream.
This is supposed to be coffee creamer, and that little bit of additional richness gives it the body and mouthfeel we're looking for.
🤏 Don't Skip the Salt
The small amount of kosher salt shouldn't make the creamer taste salty.
It helps balance sweetness while bringing out both the chocolate and coffee flavors.
Make It Your Own
More Peppermint: Add peppermint extract ⅛ teaspoon at a time.
Deeper Chocolate: Increase the cocoa powder to 3 tablespoons.
Sweeter: Add additional golden monk fruit a little at a time.
More Vanilla: Add another ½ teaspoon vanilla bean paste.
Richer: Replace a small portion of the Fairlife milk with additional heavy cream.
Lighter: Replace some of the heavy cream with additional Fairlife 2%.
Quick Build: Dark Chocolate Peppermint Mocha
Prefer a darker, more intense chocolate flavor?
Start with the base recipe and increase the unsweetened cocoa powder from 2 tablespoons to 3 tablespoons.
Taste the finished creamer in coffee before adjusting the sweetness. Darker cocoa flavor may make you want a little additional sweetener.
Fuel Profile — Estimated Per Serving
Calories: ~45 kcal | Protein: ~1 g | Carbohydrates: ~4 g | Net Carbs: ~3 g | Fiber: ~1 g | Fat: ~3 g
Based on approximately 16 two-tablespoon servings. Nutrition is estimated and will vary depending on the specific Fairlife milk, heavy cream, maple syrup, cocoa powder, and golden monk fruit sweetener used.
Because this recipe is currently in testing, the Fuel Profile will be recalculated if the final ingredient amounts change.
Storage
Transfer the cooled creamer to a clean, airtight container and keep refrigerated.
For this test version, use within 5–7 days.
Shake well before each use. Some natural separation may occur because this homemade creamer doesn't contain the stabilizers and emulsifiers commonly found in commercial creamers.
Discard if you notice an unusual odor, appearance, or texture.
Performance Tip
“Holiday flavor doesn't have to come from a bottle full of sugar. Sometimes chocolate, peppermint, and a little restraint are all you need.”
Kirby Kitchen Pumpkin Pie Spice
Warm. Fragrant. Built for more than pie.
A balanced blend of cinnamon, ginger, nutmeg, allspice, and cloves made for pumpkin desserts, coffee, oatmeal, pancakes, French toast, baked goods, and anything that needs a little fall warmth.
One jar. All the flavors of fall.
Pumpkin pie spice is one of those blends that's incredibly convenient to have around, but there's really no reason it has to come premixed from the store.
Making it yourself takes only a few minutes and gives you complete control over the balance.
The Kirby Kitchen version puts cinnamon front and center, backed by warm ginger and nutmeg. Allspice adds depth while cloves provide just enough intensity to round everything out without taking over.
Mix it once, keep a jar in the pantry, and you're ready whenever pumpkin season shows up.
Recipe at a Glance
Yield: About ½ cup
Serving Size: 1 tsp
Prep Time: 5 minutes
Cook Time: None
Ingredients
4 Tbsp ground cinnamon
2 Tbsp ground ginger
1 Tbsp ground nutmeg
2 tsp ground allspice
1 tsp ground cloves
Instructions
1. Combine
Add the cinnamon, ginger, nutmeg, allspice, and cloves to a small mixing bowl.
Whisk thoroughly until the spices are evenly distributed.
2. Store
Transfer to an airtight spice jar or container.
Store in a cool, dry place away from direct sunlight and heat.
Shake before using.
Performance Notes
🍂 Cinnamon Leads the Way
Cinnamon makes up the backbone of the blend because it provides the familiar warmth most people associate with pumpkin spice.
🌿 Ginger & Nutmeg Bring the Warmth
Ginger adds a little bite while nutmeg provides a warm, slightly sweet nuttiness.
Together, they keep the blend from tasting like plain cinnamon.
🌰 Allspice Adds Depth
Despite the name, allspice isn't a mixture of spices. It's its own spice and brings flavors reminiscent of cinnamon, nutmeg, and cloves.
A little adds considerable complexity.
🌺 Go Easy on the Cloves
Cloves are powerful.
We're deliberately using less clove than the other spices so you can actually taste everything else in the blend.
How to Use It
Start with 1 teaspoon and adjust to taste.
Try it in:
Pumpkin pie
Pumpkin Spice Coffee Creamer
Pumpkin bread
Muffins
Pancakes and waffles
French toast
Oatmeal
Overnight oats
Coffee
Protein shakes
Baked apples
Sweet potatoes
Cheesecake
Cookies
On the website, I'd make Pumpkin Spice Coffee Creamer an internal link here, and then replace the generic pumpkin pie spice ingredient on the creamer page with:
1½ tsp Kirby Kitchen Pumpkin Pie Spice
Now the recipes start feeding into each other, just like Firehouse Seasoning and the other Performance Pantry foundations.
Fuel Profile — Estimated Per Serving
Calories: 6 kcal | Protein: 0 g | Carbohydrates: 2 g | Net Carbs: 1 g | Fiber: 1 g | Fat: 0 g
Based on a 1-teaspoon serving. Nutrition is estimated and will vary depending on the specific spices and ingredient brands used.
Storage
Store in an airtight container in a cool, dark, dry place.
For the best flavor and aroma, use within 6 months.
The blend won't suddenly become unsafe after that point, but ground spices gradually lose their potency.
Performance Tip
“The best spice blends don't let one ingredient do all the talking.”
And this one doesn't need the 🧪 In Testing label. The ratios are forgiving enough that we can confidently treat it as a pantry blend, and if you eventually decide you want more ginger or less clove, we can always tweak the Kirby Kitchen house ratio.
Pumpkin Spice Coffee Creamer
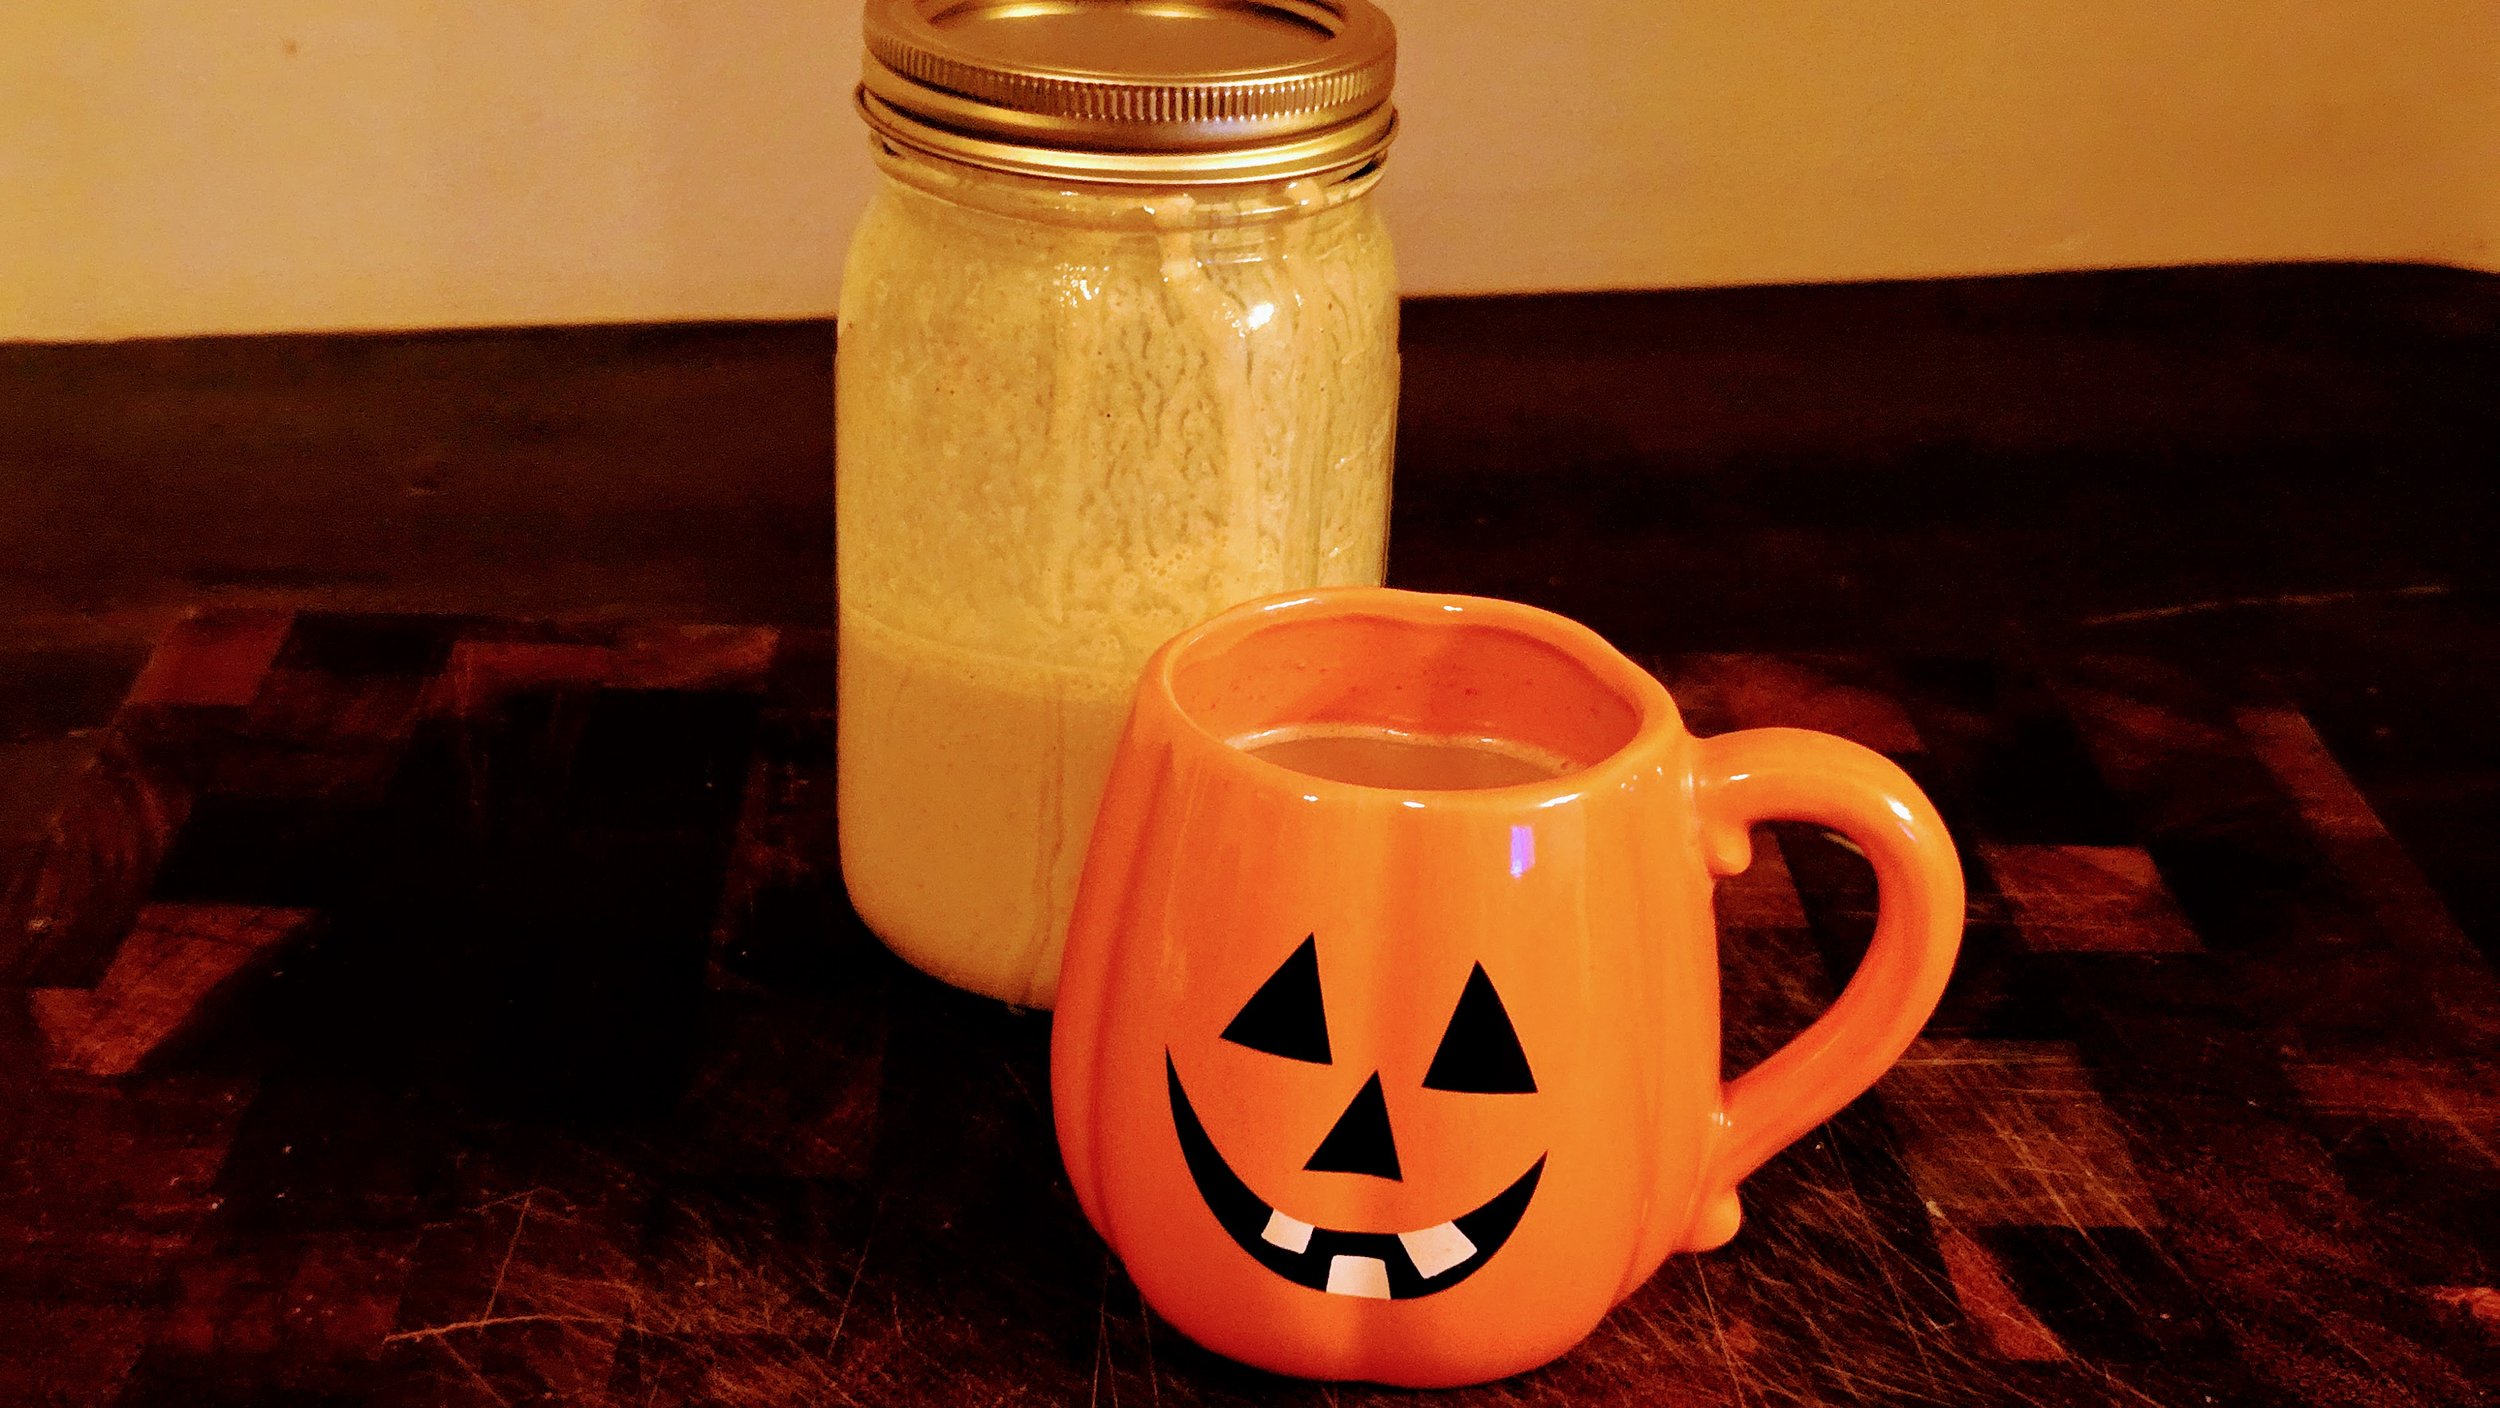
Real pumpkin. Warm fall spices. Creamy coffeehouse flavor without the sugar overload.
A rich homemade pumpkin spice coffee creamer made with real pumpkin, Fairlife 2% milk, heavy cream, brown sugar monk fruit sweetener, vanilla, and warm pumpkin pie spice.
Pumpkin spice season starts in the coffee cup.
Pumpkin spice creamer is easy to grab from the grocery store, but making it at home gives you control over the sweetness, spice, ingredients, and even the final consistency.
This Kirby Kitchen version uses real pumpkin instead of relying entirely on flavoring.
Fairlife 2% milk and heavy cream create the creamy foundation, while brown sugar monk fruit provides a deeper caramel-like sweetness that naturally complements pumpkin and warm spices.
A little vanilla rounds everything out, and Kirby Kitchen Pumpkin Pie Spice brings the cinnamon, ginger, nutmeg, allspice, and cloves.
Make a batch, keep it cold, and pumpkin spice coffee is only a pour away.
Recipe at a Glance
Yield: About 2 cups
Serving Size: 2 Tbsp
Servings: About 16
Prep Time: 5 minutes
Cook Time: 5–10 minutes, plus additional time if reducing for a thicker creamer
Ingredients
1 cup Fairlife 2% Ultra-Filtered Milk
½ cup heavy cream
½ cup 100% pure pumpkin purée
2 Tbsp brown sugar monk fruit sweetener, plus more to taste
1½ tsp Kirby Kitchen Pumpkin Pie Spice
1 tsp pure vanilla extract
⅛ tsp kosher salt
Instructions
1. Build the Pumpkin Base
Add the pumpkin purée, brown sugar monk fruit sweetener, Pumpkin Pie Spice, and kosher salt to a small saucepan.
Add approximately ¼ cup of the Fairlife milk.
Whisk until smooth and evenly combined.
2. Warm the Pumpkin & Spices
Place the saucepan over medium-low heat.
Cook for approximately 1–2 minutes, whisking frequently.
This gives the pumpkin and spices a chance to warm and develop before the remaining dairy is added.
Kirby Rule: Give the spices a little heat before adding all the dairy. Warm spices release more aroma and create a deeper pumpkin spice flavor.
3. Add the Dairy
Gradually whisk in the remaining Fairlife milk.
Add the heavy cream.
Continue heating over low to medium-low heat, whisking occasionally, until everything is completely smooth and the sweetener has dissolved.
For a thicker, richer creamer, continue cooking gently for a few additional minutes to reduce the mixture slightly.
Do not boil.
Kirby Kitchen Tip: Homemade creamer doesn't have to have one perfect consistency. Keep the cook shorter for a lighter, pourable creamer, or let it gently reduce a little longer if you prefer yours thicker.
4. Add the Vanilla
Remove the saucepan from the heat.
Stir in 1 teaspoon pure vanilla extract.
Whisk until completely combined.
5. Adjust the Sweetness
Taste the creamer.
For a sweeter creamer, add additional brown sugar monk fruit sweetener a little at a time, whisking until completely dissolved.
Keep in mind that the creamer will be diluted when added to coffee.
Kirby Kitchen Tip: Don't judge the sweetness from the saucepan alone. Try a little in an actual cup of coffee before making a major adjustment.
6. Cool & Chill
Allow the creamer to cool.
Transfer to a clean glass bottle, jar, or airtight container.
Refrigerate until completely chilled.
Natural settling may occur.
Shake well before each use.
The Coffee Test
Start with approximately 2 tablespoons per 8–12 oz cup of coffee.
Taste and adjust from there.
If you like your coffee lighter and sweeter, add more creamer.
If you prefer the coffee itself to remain front and center, start with less.
Performance Notes
🎃 Use Real Pumpkin
This creamer gets its pumpkin flavor from 100% pure pumpkin purée.
Make sure you're buying pumpkin purée rather than pumpkin pie filling, which already contains sweeteners and spices.
🍂 Brown Sugar Flavor Belongs Here
Brown sugar flavors naturally complement pumpkin, cinnamon, ginger, nutmeg, cloves, and coffee.
Brown sugar monk fruit provides that deeper sweetness without requiring a large amount of conventional brown sugar.
🍯 Sweetness Is Personal
The base recipe provides a balanced starting point, but coffee creamer is one of those things where there isn't one perfect sweetness level.
If you like sweeter coffee, add more brown sugar monk fruit a little at a time.
For the best test, adjust the sweetness in an actual cup of coffee, not by tasting the creamer alone.
🥛 Keep the Cream
Fairlife 2% milk makes up the primary dairy base, but real heavy cream stays.
It's coffee creamer.
The cream provides the richness and mouthfeel that separates creamer from flavored milk.
🥄 Control the Thickness With Time
No cornstarch, xanthan gum, or other thickener is necessary.
For a lighter creamer, remove it from the heat once everything is smooth and fully incorporated.
For a thicker creamer, let it cook gently for a few additional minutes so some of the water can evaporate naturally.
The longer it reduces, the thicker and richer it will become.
Remember that reducing the mixture will also slightly concentrate the pumpkin, spice, and sweetness.
🌿 Vanilla Extract Keeps It Simple
Pure vanilla extract provides the warm vanilla background this creamer needs while being easy to find and something many kitchens already keep on hand.
Vanilla bean paste can be substituted if desired.
🥣 No Blender Required
Testing showed that the creamer becomes smooth simply by thoroughly whisking the ingredients together while warming them on the stovetop.
There's no need to dirty a blender if everything is already properly incorporated.
Natural settling may still occur during refrigeration.
That's normal.
Just shake before pouring.
Homemade Brown Monk Fruit Option
Brown sugar monk fruit sweetener can be purchased ready-made, or you can make your own.
Combine:
1 cup Whole Earth Monk Fruit Sweetener with Erythritol
1 Tbsp dark unsulphured molasses
Mix thoroughly until the molasses is evenly distributed and the sweetener resembles brown sugar.
Store in an airtight container and use anywhere a brown sugar-style sweetener is called for.
Kirby Kitchen Pumpkin Pie Spice
For the house blend, combine:
4 Tbsp ground cinnamon
2 Tbsp ground ginger
1 Tbsp ground nutmeg
2 tsp ground allspice
1 tsp ground cloves
Mix thoroughly and store in an airtight spice jar.
Use 1½ teaspoons in this creamer.
Make It Your Own
Sweeter: Add additional brown sugar monk fruit sweetener.
Thicker: Allow the creamer to gently reduce a little longer on the stovetop.
Lighter: Shorten the reduction time.
More Pumpkin Spice: Add another ¼ teaspoon Pumpkin Pie Spice.
More Pumpkin: Increase the pumpkin purée slightly.
Richer: Replace a small amount of Fairlife milk with additional heavy cream.
Vanilla Bean: Substitute vanilla bean paste for the vanilla extract.
Iced Coffee: Chill completely and use in cold brew or iced coffee.
Fuel Profile — Estimated Per Serving
Calories: ~40 kcal | Protein: ~1 g | Carbohydrates: ~3 g | Net Carbs: ~2 g | Fiber: ~1 g | Fat: ~3 g
Based on approximately 16 two-tablespoon servings. Nutrition is estimated and will vary depending on the heavy cream, pumpkin purée, brown sugar monk fruit sweetener, reduction time, and specific ingredient brands used.
Storage
Transfer the cooled creamer to a clean, airtight container and refrigerate.
Use within approximately 5–7 days.
Because this creamer contains real pumpkin and doesn't contain the stabilizers found in many commercial creamers, some natural separation or settling may occur.
Shake well before each use.
Discard if you notice an unusual smell, appearance, or texture.
Kitchen Wisdom
“Fall flavor doesn't need to come from a bottle full of sugar. Sometimes real pumpkin, warm spices, and a good cup of coffee are enough.”
Pitmaster Porter Mustard
Dark malt. Bold mustard. Built for barbecue.
A rustic whole-grain mustard made with dark porter, yellow and brown mustard seeds, apple cider vinegar, honey, and Firehouse Seasoning. Bold, tangy, slightly sweet, and built for smoked meats, burgers, sausages, sandwiches, pretzels, and more.
Don't drink or cook with beer? No problem. We've included both non-alcoholic beer and completely beer-free options.
Some condiments belong next to the smoker.
Pitmaster Porter Mustard takes classic whole-grain mustard in a darker, bolder direction.
A rich porter provides roasted malt character and subtle bitterness that pairs naturally with beef, pork, sausage, and smoked meats. A little real honey balances the sharpness of the mustard, while golden monk fruit provides additional sweetness without requiring a large amount of added sugar.
Apple cider vinegar provides the tang, while Firehouse Seasoning, garlic, black pepper, and smoked paprika add layers of savory flavor and subtle smoke.
The result isn't supposed to taste like beer with mustard in it.
It's supposed to taste like mustard that belongs beside barbecue.
Recipe at a Glance
Yield: About 1½ cups
Serving Size: 1 Tbsp
Servings: About 24
Prep Time: 15 minutes
Soaking Time: 12–24 hours
Resting Time: 2–3 days
Cook Time: None
Ingredients
Mustard Seeds
50 g yellow mustard seeds
40 g brown mustard seeds
Choose Your Soaking Liquid
Traditional Porter Version
175 ml (about ¾ cup) porter
Non-Alcoholic Version
175 ml (about ¾ cup) non-alcoholic porter or stout
No-Beer Version
150 ml water
25 ml apple cider vinegar
1 tsp molasses
Remaining Ingredients
If using porter or non-alcoholic porter:
60 ml (¼ cup) apple cider vinegar
If using the no-beer option:
35 ml apple cider vinegar
Then add:
15 g honey
15 g golden monk fruit sweetener
6 g kosher salt
1 tsp Firehouse Seasoning (Performance Pantry)
½ tsp smoked paprika
¼ tsp coarse-ground black pepper
¼ tsp garlic powder
Instructions
1. Soak the Mustard Seeds
Place the yellow and brown mustard seeds in a glass bowl or jar.
For the Porter Version
Pour 175 ml porter over the mustard seeds.
For the Non-Alcoholic Version
Pour 175 ml non-alcoholic porter or stout over the mustard seeds.
For the No-Beer Version
Combine 150 ml water, 25 ml apple cider vinegar, and 1 teaspoon molasses.
Stir until the molasses is dissolved, then pour the mixture over the mustard seeds.
Cover and refrigerate for 12–24 hours.
The seeds will soften and absorb much of the soaking liquid.
Kirby Rule: Give the seeds time. Proper hydration softens the mustard seeds and gives us a better texture when it's time to blend.
2. Build the Mustard
Transfer the soaked mustard seeds and any remaining soaking liquid to a food processor or high-speed blender.
If you used porter or non-alcoholic porter, add 60 ml apple cider vinegar.
If you used the no-beer soaking liquid, add 35 ml apple cider vinegar.
Add the:
Honey
Golden monk fruit
Kosher salt
Firehouse Seasoning
Smoked paprika
Black pepper
Garlic powder
Pulse several times to begin breaking down the mustard seeds.
3. Choose Your Texture
For the signature Pitmaster Porter Mustard, leave some of the mustard seeds whole or partially crushed.
Pulse, scrape down the sides, and repeat until the mustard is thick and spreadable while still retaining a rustic whole-grain texture.
Prefer smooth mustard? Keep blending until it reaches the consistency you like.
Kirby Rule: Don't overcorrect the consistency immediately. Freshly blended mustard continues to thicken as it rests.
4. Don't Judge It Yet
You can taste the freshly blended mustard—but don't panic. 😄
Freshly crushed mustard seeds can taste surprisingly sharp, bitter, and aggressive.
Don't immediately start adding more honey, salt, or vinegar.
Transfer the mustard to a clean, airtight glass jar.
5. Let It Mature
Refrigerate for at least 48 hours, preferably 72 hours, before making your final judgment.
As the mustard rests, the initial sharpness mellows and the porter, vinegar, honey, mustard seeds, and seasonings begin to come together.
6. Make Your Final Adjustments
After 2–3 days, taste the mustard again.
Too sharp? Add a little honey.
Needs more sweetness? Add golden monk fruit a small amount at a time.
Needs more tang? Add apple cider vinegar 1 teaspoon at a time.
Want more smoke? Add a small pinch of smoked paprika.
Too thick? Stir in water 1 tablespoon at a time until you reach your preferred consistency.
If you're making the porter version, you can use a little additional porter instead of water.
Choosing Your Porter
The beer doesn't need to be expensive, but its flavor will influence the finished mustard.
🍺 Porter
My first choice.
Look for something dark, malty, and balanced. The roasted malt character works particularly well with mustard and smoked meats.
🍺 Brown Ale
A good alternative if you can't find a traditional porter. Expect something slightly softer and potentially sweeter.
🍺 Stout
It can work, but choose a relatively straightforward stout. Very intense imperial or heavily flavored stouts can overwhelm the mustard.
What I'd Avoid
Very hoppy IPAs can add unnecessary bitterness to an ingredient that's already naturally sharp.
I'd also avoid heavily flavored pastry beers for the base recipe. Chocolate-maple-marshmallow mustard sounds like an experiment for another day.
🍺 No Beer? No Problem.
You don't need to consume alcohol to make this mustard.
For the closest alternative to the original, substitute an equal amount of non-alcoholic porter or stout.
If you prefer to avoid beer altogether, the combination of water, apple cider vinegar, and a small amount of molasses creates a completely beer-free soaking liquid.
The beer-free version won't taste identical to one made with porter, but the molasses provides some of the dark sweetness and complexity we'd otherwise get from roasted malt.
Performance Notes
🌱 Two Mustard Seeds, Two Jobs
Yellow mustard seeds provide a milder, familiar mustard foundation.
Brown mustard seeds bring more pungency and heat.
Combining the two creates a mustard with character without letting either variety completely take over.
🍯 Why Keep Real Honey?
We're intentionally keeping a small amount of real honey.
Honey contributes more than sweetness. Its floral flavor rounds out the sharp mustard, vinegar, roasted malt, and smoke.
Golden monk fruit helps us reach the desired sweetness without needing a large quantity of honey.
🔥 Firehouse in the Background
Firehouse Seasoning isn't supposed to make this taste like a jar of Firehouse.
At just 1 teaspoon, it adds subtle garlic, pepper, paprika, heat, and sweetness behind the mustard and porter.
🌫️ A Touch of Smoke
Smoked paprika reinforces the Pitmaster character without relying on liquid smoke.
Keep it subtle. This mustard is designed to accompany smoked food, not compete with it.
Put It On Everything
Pitmaster Porter Mustard is built for:
Smoked brisket
Pulled pork
Smoked turkey
Bratwurst and sausage
Burgers
Hot dogs
Roast beef sandwiches
Ham
Grilled chicken
Pretzels
Cheese boards
Roasted potatoes
It can also become a foundation for BBQ sauces, glazes, marinades, vinaigrettes, and dipping sauces.
Fuel Profile — Estimated Per Serving
Calories: 25 kcal | Protein: 1 g | Carbohydrates: 3 g | Net Carbs: 2 g | Fiber: 1 g | Fat: 1 g
Based on approximately 24 one-tablespoon servings using porter. Nutrition is estimated and will vary depending on the specific porter, honey, golden monk fruit sweetener, and ingredient brands used.
Based on approximately 24 one-tablespoon servings. Nutrition will vary depending on the porter or beer-free option, honey, golden monk fruit sweetener, and specific ingredient brands used.
I'd leave this off the published page until you've chosen the actual porter and monk fruit product for your first batch. Then we can calculate the Fuel Profile from what you actually used instead of guessing.
Storage
Transfer the finished mustard to a clean, airtight glass jar and keep refrigerated.
For this first version, use within approximately 4 weeks.
Always use a clean utensil when serving.
As we test the recipe and finalize the acidity and consistency, we can revisit whether a longer refrigerated storage recommendation is appropriate.
Performance Tip
“Some flavors don't need to be louder. They need time to come together.”
Roasted Garlic Aioli
Slow-roasted garlic. Creamy avocado oil mayo. Big flavor from simple ingredients.
A rich, creamy aioli made with Chosen Foods Classic Avocado Oil Mayo and an entire head of slow-roasted garlic. Smooth, savory, and incredibly versatile for burgers, sandwiches, fries, vegetables, grilled meats, and dipping.
Sometimes the simplest ingredients create the biggest flavors.
Roasted Garlic Aioli transforms a handful of everyday ingredients into a creamy sauce with deep, mellow garlic flavor.
Slow roasting changes garlic completely. The sharp bite of the fresh cloves mellows as they become soft, sweet, golden, and almost buttery.
Combine that roasted garlic with creamy Chosen Foods Classic Avocado Oil Mayo, fresh lemon, Dijon mustard, salt, and pepper, and you get a sauce that can completely change a burger, sandwich, plate of fries, or tray of roasted vegetables without overpowering the food underneath.
Chosen Foods Classic Mayo is made with 100% avocado oil and uses pasteurized eggs, giving us a convenient ready-made foundation for this recipe.
Recipe at a Glance
Yield: About 1¼ cups
Serving Size: 1 Tbsp
Prep Time: 10 minutes
Roasting Time: 35–40 minutes
Chill Time: 30 minutes
Oven Temperature: 400°F
Ingredients
1 cup Chosen Foods Classic Avocado Oil Mayo
1 whole head garlic
1 tsp avocado oil
1 tsp fresh lemon juice
1 tsp Dijon mustard
¼ tsp kosher salt
¼ tsp coarse-ground black pepper
Instructions
1. Roast the Garlic
Preheat the oven to 400°F.
Slice approximately ¼ inch from the top of the garlic head to expose the tops of the cloves.
Drizzle the exposed garlic with 1 teaspoon avocado oil.
Loosely wrap the garlic in aluminum foil and roast for 35–40 minutes, or until the cloves are golden, very soft, and easily squeezed from their skins.
Remove from the oven and allow it to cool until comfortable to handle.
2. Make the Roasted Garlic Paste
Squeeze the roasted garlic cloves from their skins into a small bowl.
Mash thoroughly with a fork until the garlic forms a smooth paste.
Kirby Rule: Don't rush the garlic. It's ready when the cloves are completely soft and mash almost like softened butter.
3. Build the Aioli
Add the Chosen Foods Classic Avocado Oil Mayo, fresh lemon juice, Dijon mustard, kosher salt, and black pepper.
Stir until the roasted garlic is completely incorporated and the aioli is smooth and creamy.
4. Chill
Cover and refrigerate for at least 30 minutes before serving.
This gives the roasted garlic, lemon, and Dijon time to work their way throughout the aioli.
Performance Notes
🧄 Roasting Changes Everything
Raw garlic is sharp and pungent.
Roasting transforms it into something completely different—sweet, mellow, deeply savory, and almost buttery.
That transformation gives this aioli plenty of garlic flavor without the aggressive bite you'd get from using an entire head of raw garlic.
🥑 Start with Avocado Oil Mayo
Chosen Foods Classic Avocado Oil Mayo gives us a convenient creamy foundation made with avocado oil rather than soy or canola oil. Its relatively neutral flavor also gives the roasted garlic room to be the star.
🍔 More Than a Sandwich Spread
Try Roasted Garlic Aioli on:
Burgers
Sandwiches and wraps
Grilled chicken
Steak sandwiches
French fries
Roasted potatoes
Grilled vegetables
Roasted vegetables
Seafood
Baked potatoes
Dipping platters
Fuel Profile — Estimated Per Serving
Calories: ~105 kcal | Protein: 0 g | Carbohydrates: ~1 g | Net Carbs: ~1 g | Fiber: 0 g | Fat: ~11 g
Based on approximately 20 one-tablespoon servings. Nutrition is estimated and will vary depending on the size of the garlic head and the specific mayonnaise, Dijon mustard, and other ingredient brands used.
Storage
Transfer the finished aioli to an airtight container and keep refrigerated.
For best quality, I'd use the finished Roasted Garlic Aioli within 5–7 days rather than applying the opened mayo's shelf life to the finished sauce. Chosen Foods itself recommends refrigerating its Classic Mayo after opening.
Always use a clean utensil when serving.
Quick Build: Garlic Parmesan Aioli
Roasted garlic with an extra savory finish.
Freshly grated Parmesan, parsley, and cracked black pepper turn the base aioli into a rich, savory sauce that's especially good with burgers, fries, potatoes, vegetables, grilled meats, and sandwiches.
Yield: About 1¼ cups
Ingredients
1 cup Roasted Garlic Aioli
¼ cup freshly grated Parmesan cheese
1 Tbsp chopped fresh parsley
½ tsp cracked black pepper
Instructions
Stir all ingredients together until evenly combined.
Cover and refrigerate for at least 15 minutes before serving.
Quick Build: Spicy Garlic Aioli
Creamy roasted garlic with a smoky kick.
A little Chipotle Crema and fresh lime transform the base aioli into a smoky, spicy sauce that's perfect for burgers, tacos, wraps, grilled chicken, fries, and vegetables.
Yield: About 1¼ cups
Ingredients
1 cup Roasted Garlic Aioli
2 Tbsp Chipotle Crema
1 tsp fresh lime juice
Instructions
Whisk everything together until smooth and evenly combined.
Cover and refrigerate for at least 15 minutes before serving.
Performance Tip
“Roasted garlic is worth the wait—the extra time creates a depth of flavor you simply can't rush.”
House Ranch Seasoning
Homemade ranch starts here.
A savory blend of buttermilk, herbs, garlic, onion, and spices that makes fresh, flavorful ranch dressing while bringing classic ranch flavor to vegetables, potatoes, chicken, popcorn, and more.
Keep the seasoning ready. Make the ranch fresh.
Store-bought ranch packets are convenient, but making your own gives you control over exactly what goes into the jar.
House Ranch Seasoning combines buttermilk powder with parsley, dill, chives, garlic, onion, and herbs to create that familiar ranch flavor from simple pantry ingredients.
Use it to make a fresh batch of House Ranch whenever you need it, or use the dry seasoning anywhere you want a little ranch flavor without the dressing.
Once you have a jar in the pantry, homemade ranch is only a few minutes away.
Recipe at a Glance
Yield: About 1 cup
Serving Size: 1 tsp
Prep Time: 10 minutes
Cook Time: None
Ingredients
½ cup buttermilk powder
2 Tbsp dried parsley
1 Tbsp dried dill
1 Tbsp dried chives
2 Tbsp garlic powder
2 Tbsp onion powder
2 tsp kosher salt
2 tsp coarse-ground black pepper
1 tsp dried thyme
1 tsp dried oregano
Instructions
1. Combine
Add all ingredients to a mixing bowl.
Whisk thoroughly until the herbs, spices, and buttermilk powder are evenly distributed.
2. Store
Transfer the seasoning to an airtight spice jar or container.
Shake well before each use.
Performance Notes
🌿 More Than Dressing
House Ranch Seasoning isn't limited to making ranch.
Try it on:
Roasted potatoes
French fries
Grilled chicken
Chicken wings
Roasted vegetables
Burgers
Popcorn
Baked potatoes
Homemade dips
🥛 Make It Fresh
Keep the seasoning blend dry and make only as much ranch dressing or dip as you need.
You get the convenience of a ranch packet while keeping fresh ranch only a few minutes away.
🧂 Control the Flavor
One of the best parts of making your own seasoning is being able to adjust it.
Want more dill? Add it.
Love garlic? Give it a little more.
Prefer less salt? Reduce it.
The recipe provides the foundation. Your kitchen gets the final say.
Fuel Profile — Estimated Per Serving
Calories: 8 kcal | Protein: 0 g | Carbohydrates: 2 g | Net Carbs: 1 g | Fiber: 1 g | Fat: 0 g
Based on a 1-teaspoon serving. Nutrition is estimated and will vary depending on the specific buttermilk powder, herbs, spices, and ingredient brands used.
Storage
Transfer House Ranch Seasoning to an airtight container and keep it in a cool, dry place.
Because buttermilk powder is a dairy product, check the storage instructions on the package you're using after opening. If the manufacturer recommends refrigeration after opening, refrigerate the finished seasoning blend as well.
Quick Build: House Ranch
Cool, creamy ranch with a higher-protein foundation.
House Ranch combines plain Greek-style yogurt with a little avocado oil mayo and House Ranch Seasoning for a thick, creamy dressing with classic ranch flavor.
In the Kirby Kitchen, we use homemade plain yogurt made with Fairlife 2% milk, but store-bought plain Greek yogurt works just as well.
The Greek yogurt provides the creamy, tangy foundation while a smaller amount of mayo adds the richness and familiar texture you'd expect from ranch.
Perfect for salads, wraps, vegetables, wings, pizza, burgers, quesadillas, and dipping.
Recipe at a Glance
Yield: About 1½ cups
Serving Size: 2 Tbsp
Servings: About 12
Prep Time: 5 minutes
Chill Time: At least 30 minutes
Ingredients
1 cup homemade plain Greek-style yogurt made with Fairlife 2% milk
or 1 cup plain Greek yogurt, store-bought
¼ cup Chosen Foods Classic Avocado Oil Mayo
2 Tbsp House Ranch Seasoning
2–4 Tbsp Fairlife 2% milk, as needed
1 tsp fresh lemon juice
½ tsp apple cider vinegar, optional for additional tang
Instructions
1. Build the Ranch
Add the Greek yogurt, Chosen Foods Classic Avocado Oil Mayo, House Ranch Seasoning, and fresh lemon juice to a mixing bowl.
Whisk until completely smooth and evenly combined.
2. Adjust the Consistency
Add 2 tablespoons Fairlife 2% milk and whisk again.
Continue adding milk 1 tablespoon at a time until the ranch reaches your preferred consistency.
For a thicker dipping ranch, use less milk.
For a pourable salad dressing, gradually add more.
Kirby Rule: Don't add all the milk at once. It's easy to make ranch thinner. It's considerably harder to make it thick again.
3. Taste & Adjust
Taste the ranch before making any additional adjustments.
For more tang, add the optional ½ teaspoon apple cider vinegar.
For stronger ranch flavor, add additional House Ranch Seasoning ½ teaspoon at a time.
Don't over-adjust it immediately. The herbs and seasonings will become more pronounced as the ranch rests.
4. Chill
Cover and refrigerate for at least 30 minutes before serving.
For even better flavor, give it a few hours.
The resting time allows the dried herbs to hydrate and gives the garlic, onion, dill, buttermilk, and other seasonings time to work their way throughout the dressing.
Stir well before serving.
House Ranch Performance Notes
🥛 Let Greek Yogurt Do the Heavy Lifting
Instead of building the dressing primarily from mayonnaise, Greek yogurt becomes the main ingredient.
The Kirby Kitchen version uses homemade plain yogurt made from Fairlife 2% milk, giving us a creamy and protein-rich foundation.
If you don't make yogurt at home, simply use your favorite plain Greek yogurt.
🥑 Don't Eliminate the Mayo
We're intentionally keeping ¼ cup of Chosen Foods Classic Avocado Oil Mayo.
The goal isn't to make ranch as low-calorie as mathematically possible.
A little mayo adds richness and helps give the finished dressing the creamy mouthfeel people expect when they reach for ranch.
🌿 Give It Time
Freshly mixed ranch and chilled ranch don't taste exactly the same.
Right out of the bowl, the dried herbs haven't fully hydrated and the flavors are still separate.
Give it at least 30 minutes before making major seasoning adjustments.
🍋 Build the Tang
The Greek yogurt, buttermilk powder, and fresh lemon already provide plenty of tang.
That's why the apple cider vinegar is optional.
Taste the chilled ranch first. If you want a little more bite, then add it.
House Ranch Fuel Profile — Estimated Per Serving
Calories: ~45 kcal | Protein: ~3 g | Carbohydrates: ~2 g | Net Carbs: ~2 g | Fiber: 0 g | Fat: ~3 g
Based on approximately 12 two-tablespoon servings using plain 2% Greek yogurt and Chosen Foods Classic Avocado Oil Mayo. Nutrition is estimated and will vary depending on the yogurt, mayonnaise, milk, and ingredient brands used.
House Ranch Storage
Transfer the finished House Ranch to a clean, airtight container and keep refrigerated.
For best quality, use within approximately 5–7 days.
Always use a clean utensil when serving and stir well before each use.
Put It to Work
House Ranch is especially good with:
Firehouse Chicken Wrap
Kickin' Buffalo Chicken Wrap
Firehouse Buffalo Beef Quesadilla
Firehouse Buffalo Chicken Quesadilla
Chicken wings
Fresh vegetables
Salads
Burgers
Pizza
Roasted potatoes
On the website, I'd turn those Kirby Kitchen recipe names into internal links as each recipe is published. That will make this Performance Pantry page a hub that naturally leads people into Breakfast, Lunch, Dinner, and Snacks.
Performance Tip
“Keeping homemade seasoning blends on hand turns everyday meals into quick, flavorful dishes.”
Kickin' Buffalo Sauce
Heat. Tang. Butter. Everything buffalo sauce should be.
A rich, buttery buffalo sauce with the perfect balance of heat, tang, garlic, and savory flavor. Perfect for wings, grilled chicken, wraps, burgers, pizza, vegetables, and dipping.
Buffalo sauce deserves a permanent spot in the refrigerator.
Great buffalo sauce isn't just about making something hot. It should bring together heat, acidity, richness, and savory flavor without covering up the food underneath.
Kickin' Buffalo Sauce starts with Frank's RedHot Original and real butter, then builds on that classic foundation with Worcestershire sauce, apple cider vinegar, garlic, smoked paprika, and just a touch of sweetness.
The result is a smooth, flavorful sauce that clings beautifully to wings while being versatile enough to use throughout the kitchen.
Whether you're tossing fresh wings, finishing grilled chicken, or adding some kick to a wrap, this is one sauce you'll want waiting in the refrigerator.
Recipe at a Glance
Yield: About 1½ cups
Serving Size: 1 Tbsp
Servings: About 24
Prep Time: 5 minutes
Cook Time: 5 minutes
Ingredients
1 cup Frank's RedHot Original Cayenne Pepper Sauce
½ cup unsalted butter
1 Tbsp Worcestershire sauce
2 tsp apple cider vinegar
1 tsp garlic powder
½ tsp onion powder
½ tsp smoked paprika
1 tsp golden monk fruit sweetener
¼ tsp coarse-ground black pepper
½ tsp cayenne pepper, optional for additional heat
Instructions
1. Melt the Butter
Add the butter to a small saucepan over low heat.
Allow it to melt gently without browning.
2. Build the Sauce
Whisk in the Frank's RedHot, Worcestershire sauce, apple cider vinegar, garlic powder, onion powder, smoked paprika, monk fruit sweetener, black pepper, and optional cayenne.
Continue whisking until completely combined.
3. Warm Gently
Cook over low heat for 3–5 minutes, whisking occasionally.
Do not allow the sauce to boil.
Kirby Rule: Keep buffalo sauce over gentle heat. Boiling can cause the butter and hot sauce to separate instead of staying smooth and emulsified.
4. Serve or Store
Use immediately while warm or allow the sauce to cool before transferring it to an airtight container.
If separation occurs after refrigeration, gently warm and stir or shake until smooth again.
Performance Notes
🧈 Butter Makes the Difference
Real butter provides the richness and smooth texture that defines a classic buffalo sauce while helping it cling to wings, chicken, and vegetables.
🌶️ Control the Heat
The base recipe delivers familiar buffalo heat without going overboard.
Want more kick? Add the optional ½ teaspoon cayenne pepper.
🍗 More Than Wings
Kickin' Buffalo Sauce isn't just for chicken wings.
Try it on:
Grilled chicken
Chicken wraps
Burgers
Pizza
Roasted cauliflower
Roasted vegetables
Baked potatoes
Eggs
Sandwiches
Dipping sauces
🔥 Make It Your Own
Frank's RedHot Original is the preferred base for its balance of cayenne heat and vinegar tang.
You can experiment with another cayenne-style hot sauce, but remember that different sauces can change the heat, acidity, sodium, and overall flavor.
Fuel Profile — Estimated Per Serving
Calories: 45 kcal | Protein: 0 g | Carbohydrates: 1 g | Net Carbs: 1 g | Fiber: 0 g | Fat: 4.5 g
Based on approximately 24 one-tablespoon servings. Nutrition is estimated and will vary depending on the specific butter, hot sauce, Worcestershire sauce, sweetener, and other ingredient brands used.
Storage
Allow the sauce to cool before transferring it to an airtight container.
Store refrigerated for 7–10 days.
Because this sauce contains real butter, it will firm up considerably in the refrigerator. Gently reheat only the amount you need and whisk until smooth before serving.
Quick Build: Buffalo Ranch
Cool, creamy ranch with a Kickin' Buffalo finish.
Perfect for wings, salads, wraps, vegetables, pizza, burgers, and dipping.
Yield: About 1¼ cups
Ingredients
1 cup House Ranch
¼ cup Kickin' Buffalo Sauce
Instructions
Whisk the House Ranch and Kickin' Buffalo Sauce together until smooth and completely combined.
Refrigerate for at least 15 minutes before serving to allow the flavors to come together.
We'll add the Buffalo Ranch Fuel Profile after we finalize the House Ranch macros.
Performance Tip
“The best buffalo sauce adds bold flavor without overpowering the food beneath it.”
Kirby Kitchen Six-Cheese Blend
Six cheeses. One seriously creamy foundation.
A rich blend of six premium cheeses created for exceptional creaminess, bold flavor, and the perfect melt. Built for macaroni and cheese, casseroles, pizza, dips, potatoes, and more.
Great cheese dishes start with the blend.
A truly memorable cheese dish begins long before the first bite—it starts with choosing cheeses that work together.
The Kirby Kitchen Six-Cheese Blend was created after experimenting with different combinations to find the right balance of flavor, creaminess, and meltability.
Sharp white cheddar provides familiar richness. Gouda adds buttery sweetness. Gruyère contributes its signature nutty character. Triple cream Brie creates incredible creaminess. Parmigiano Reggiano delivers savory depth. Pepper Jack finishes the blend with a gentle touch of heat.
The result is a smooth, flavorful, versatile cheese blend designed to become a foundation ingredient throughout The Kirby Kitchen.
Recipe at a Glance
Yield: Approximately 2½ lbs
Prep Time: 15 minutes
Cook Time: None
Ingredients
316 g sharp white cheddar cheese, freshly shredded
316 g Gouda cheese, freshly shredded
156 g triple cream Brie, rind removed and cubed
156 g Pepper Jack cheese, freshly shredded
156 g Gruyère cheese, freshly grated
56 g Parmigiano Reggiano, finely grated
Instructions
1. Prepare the Cheese
Remove the rind from the Brie and cut it into small cubes.
Freshly shred or grate the remaining cheeses.
2. Combine
Place all six cheeses into a large mixing bowl.
3. Toss Together
Gently mix until the cheeses are evenly distributed throughout the blend.
Keep the mixture loose rather than packing it down so it's easy to portion later.
4. Store
Transfer the finished blend to an airtight container or resealable bag.
Refrigerate until ready to use.
Kirby Kitchen Notes
Freshly Shredded Matters
Whenever possible, shred your own cheese.
Pre-shredded cheese can contain anti-caking ingredients that may interfere with smooth melting. Freshly shredded cheese gives you a creamier sauce and a better final texture.
The Role of Each Cheese
Sharp White Cheddar — Bold, classic cheddar flavor and the backbone of the blend.
Gouda — Buttery richness and excellent meltability.
Triple Cream Brie — Velvety texture and luxurious creaminess.
Pepper Jack — Gentle heat with an exceptionally smooth melt.
Gruyère — Nutty complexity and depth.
Parmigiano Reggiano — Savory umami and a concentrated finishing flavor.
Perfect For
This blend was created for mac and cheese, but its uses go far beyond one recipe.
Try it in:
Macaroni and cheese
Cheese sauces
Queso
Baked potatoes
Casseroles
Pizza
Stuffed pasta
Au gratin potatoes
Grilled cheese sandwiches
Featured Recipe
Six-Cheese Pitmaster Mac
Use the Six-Cheese Blend to make the Kirby Kitchen Signature Six-Cheese Pitmaster Mac.
I would make that recipe name a direct internal link to the blog post.
Make It Ahead
Prepare the blend several days ahead of time and keep it refrigerated in an airtight container.
This makes it especially useful for holiday cooking, meal prep, and busy weeknights.
Storage
Refrigerator: Store in an airtight container for up to 7 days.
Freezer: Freeze for up to 3 months. Thaw overnight in the refrigerator before using.
For the smoothest sauces, use freshly prepared or refrigerated cheese when possible.
Fuel Profile — Estimated Per Serving
Serving Size: ¼ cup
Calories: 120 kcal | Protein: 7 g | Carbohydrates: <1 g | Net Carbs: <1 g | Fiber: 0 g | Fat: 10 g
Nutrition is estimated and will vary depending on the specific cheeses and brands used.
Kitchen Wisdom
“Great cheese isn't about choosing the best single cheese—it's about blending each one so every bite is richer than the last.”
Firehouse Pickled Red Onions
Performance Pantry (Future Website Recipe)
Tangy, slightly sweet, and layered with savory Firehouse flavor, these quick-pickled onions add brightness and crunch to tacos, carnitas, burgers, sandwiches, rice bowls, and salads.
Every rich, smoky meal deserves something fresh to balance it—and these onions do exactly that.
Yield: About 1 Quart | Prep Time: 10 Minutes | Rest Time: Overnight (Best Flavor)
Ingredients
538 g red onion, thinly sliced
516 g apple cider vinegar
258 g water
43 g Swerve Brown Sugar Replacement
32 g kosher salt
12 g Firehouse Seasoning
2 garlic cloves, smashed
1 teaspoon Mexican oregano
¼ teaspoon ground cumin
2 bay leaves
Instructions
Prepare the Onions
Thinly slice the red onions and place them into a large mason jar or other heat-safe container.
Make the Brine
Combine the apple cider vinegar, water, Swerve Brown Sugar Replacement, kosher salt, Firehouse Seasoning, smashed garlic cloves, Mexican oregano, ground cumin, and bay leaves in a saucepan.
Heat over medium heat just until the salt and sweetener have dissolved.
Do not bring the mixture to a boil.
Pickle
Carefully pour the warm brine over the onions, making sure they are completely submerged.
Allow to cool to room temperature.
Cover and refrigerate overnight before serving.
Performance Notes
Better Every Day
These onions continue to develop flavor over the first 24–48 hours and become even better after resting overnight.
Perfect for Smoked Meats
The tangy brine balances rich meats like smoked carnitas, pulled pork, brisket, and grilled chicken while adding fresh crunch.
More Than Tacos
They're equally at home on burgers, wraps, sandwiches, burrito bowls, salads, and even scrambled eggs.
Performance Tip
Always make these at least one day before serving. The extra time transforms sharp raw onions into a mellow, flavorful topping that complements almost any savory meal.
Fuel Profile — Estimated Per Serving
Calories: 20 kcal | Protein: 0 g | Carbohydrates: 5 g | Net Carbs: 4 g | Fiber: 1 g | Fat: 0 g
Based on an approximately ¼-cup (40 g) serving of drained pickled onions. Nutrition is estimated and will vary depending on how much brine is retained and the specific ingredient brands used.
Bayou Fire Seasoning
Bold Southern flavor with just the right kick.
Bayou Fire Seasoning is a homemade, salt-free blend of peppers, herbs, garlic, and spices inspired by classic Creole flavors. It's built to bring plenty of flavor without relying on added salt, making it easy to control the seasoning in everything from smoked meats and vegetables to soups, beans, and holiday sides.
Yield: About ½ cup
Prep Time: 5 minutes
Storage: Airtight container in a cool, dry place
Ingredients
3 Tbsp paprika
1 Tbsp garlic powder
1 Tbsp onion powder
2 tsp dried oregano
2 tsp dried thyme
2 tsp ground black pepper
1½ tsp cayenne pepper
1 tsp white pepper
1 tsp smoked paprika
Instructions
Add all ingredients to a small bowl.
Whisk thoroughly until the spices and herbs are evenly distributed.
Transfer to an airtight spice jar or container.
Label and store in a cool, dry place away from direct sunlight.
Shake or stir before using.
🌶️ Adjust the Heat
Mild: Use ½ teaspoon cayenne pepper.
Medium: Use 1½ teaspoons cayenne pepper.
Hot: Increase the cayenne to 2–2½ teaspoons.
How to Use Bayou Fire
Start with approximately 1 teaspoon per pound of meat or vegetables, then adjust to taste.
Try it on chicken, turkey, shrimp, fish, roasted vegetables, potatoes, beans, soups and stews, or smoked side dishes.
It's especially good anywhere you'd normally reach for Creole seasoning.
Why Salt-Free?
Bayou Fire intentionally contains no added salt. Many recipes already contain salty ingredients such as bouillon, smoked meats, sausage, cheese, or other seasoning blends.
Keeping Bayou Fire salt-free lets you build bold flavor first and control the final salt level separately.
🔥 From the Smoker
For an extra layer of flavor, Bayou Fire pairs especially well with foods cooked over pecan, hickory, or oak.
Use it before smoking as part of a dry seasoning blend, or add it to smoked beans, vegetables, and braising liquids.
Fuel Profile — Estimated Per Serving
Calories: 6 kcal | Protein: 0 g | Carbohydrates: 1 g | Net Carbs: 1 g | Fiber: 0 g | Fat: 0 g
Based on a 1-teaspoon serving. Nutrition is estimated and will vary depending on the specific spices and ingredient brands used.
Firehouse Seasoning
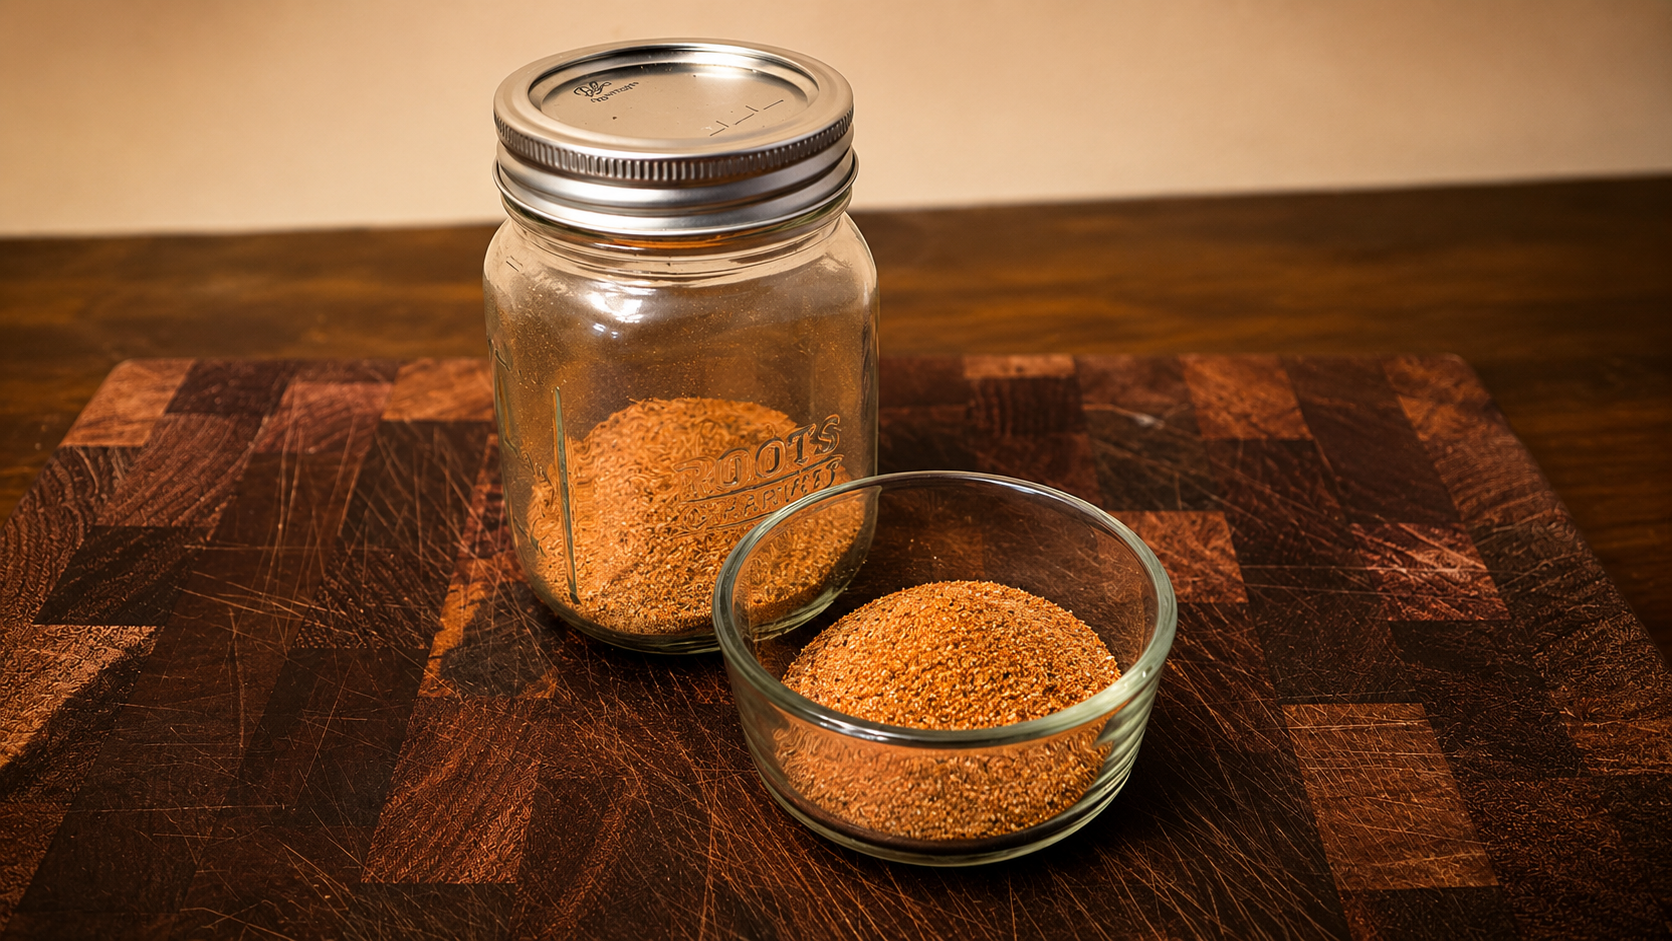
One blend. Almost everything you cook.
Every kitchen needs one seasoning you can reach for without thinking twice. Firehouse Seasoning was created to be that blend—a bold, all-purpose mix with layers of savory garlic and onion, mild heat, and just enough sweetness to round everything out.
Use it on burgers, steaks, chicken, pork, vegetables, eggs, potatoes, or anything headed for the grill or smoker. It's even good on popcorn.
Instead of reaching for five different bottles every time you cook, start with Firehouse.
Yield: About 1½ cups
Prep Time: 10 minutes
Cook Time: None
Storage: Up to 6 months
Ingredients
¼ cup kosher salt
¼ cup coarse-ground black pepper
¼ cup granulated garlic
2 Tbsp granulated onion
2 Tbsp paprika
1 Tbsp ground mustard
1 Tbsp chili powder
1 Tbsp jalapeño powder
1 Tbsp golden monk fruit sweetener
Instructions
1. Combine
Add all ingredients to a large mixing bowl.
Whisk thoroughly until the spices are evenly distributed and no clumps remain.
2. Store
Transfer the seasoning to an airtight spice jar or shaker.
Store in a cool, dry place away from direct sunlight for up to 6 months.
Shake well before each use.
How to Use Firehouse Seasoning
Firehouse was built to be an everyday seasoning, so don't overthink it.
Use it anywhere you want a combination of savory flavor, pepper, gentle heat, and a hint of sweetness.
Try it on:
Beef and burgers
Chicken and turkey
Pork
Seafood
Eggs
Potatoes
Roasted or grilled vegetables
Smoked meats
Popcorn
For meats and vegetables, season lightly at first and add more as needed. Because Firehouse contains salt, remember to account for other salty ingredients in the recipe.
Performance Notes
🔥 Built for Everything
Firehouse Seasoning works across beef, chicken, pork, seafood, vegetables, eggs, and potatoes, so you don't need a different seasoning blend for every meal.
🌶️ Layered Flavor
Garlic, onion, paprika, mustard, chili powder, and jalapeño powder create layers of savory flavor and gentle heat, while golden monk fruit adds just enough sweetness to balance the blend without adding sugar.
🧂 Season First, Salt Second
Firehouse already contains kosher salt. When using it in recipes containing bouillon, smoked meats, cheese, sauces, or other salty ingredients, taste before adding additional salt.
🔥 Performance Tip
A great all-purpose seasoning should simplify your cooking, not complicate it.
Start with Firehouse, then build the rest of the dish around it.
Quick Build: Firehouse Cajun Blend
Turn your Firehouse Seasoning into a bolder Cajun-inspired blend with just three additional spices.
Perfect for shrimp, fish, chicken, smoked meats, vegetables, potatoes, fries, and Southern-inspired sides.
Yield: About ½ cup
Prep Time: 2 minutes
Ingredients
20 g Firehouse Seasoning
6 g smoked paprika
3 g cayenne pepper
2 g garlic powder
Instructions
Combine all ingredients in a small bowl or spice jar.
Whisk or shake thoroughly until evenly blended.
Transfer to an airtight container and store in a cool, dry place for up to 6 months.
Shake before each use.
Fuel Profile — Estimated Per Serving
Calories: 6 kcal | Protein: 0 g | Carbohydrates: 1 g | Net Carbs: 1 g | Fiber: 0 g | Fat: 0 g
Based on a 1-teaspoon serving. Nutrition is estimated and will vary depending on the specific spices, monk fruit sweetener, and ingredient brands used.