
Firehouse Bacon Jalapeño Cheddar Bread
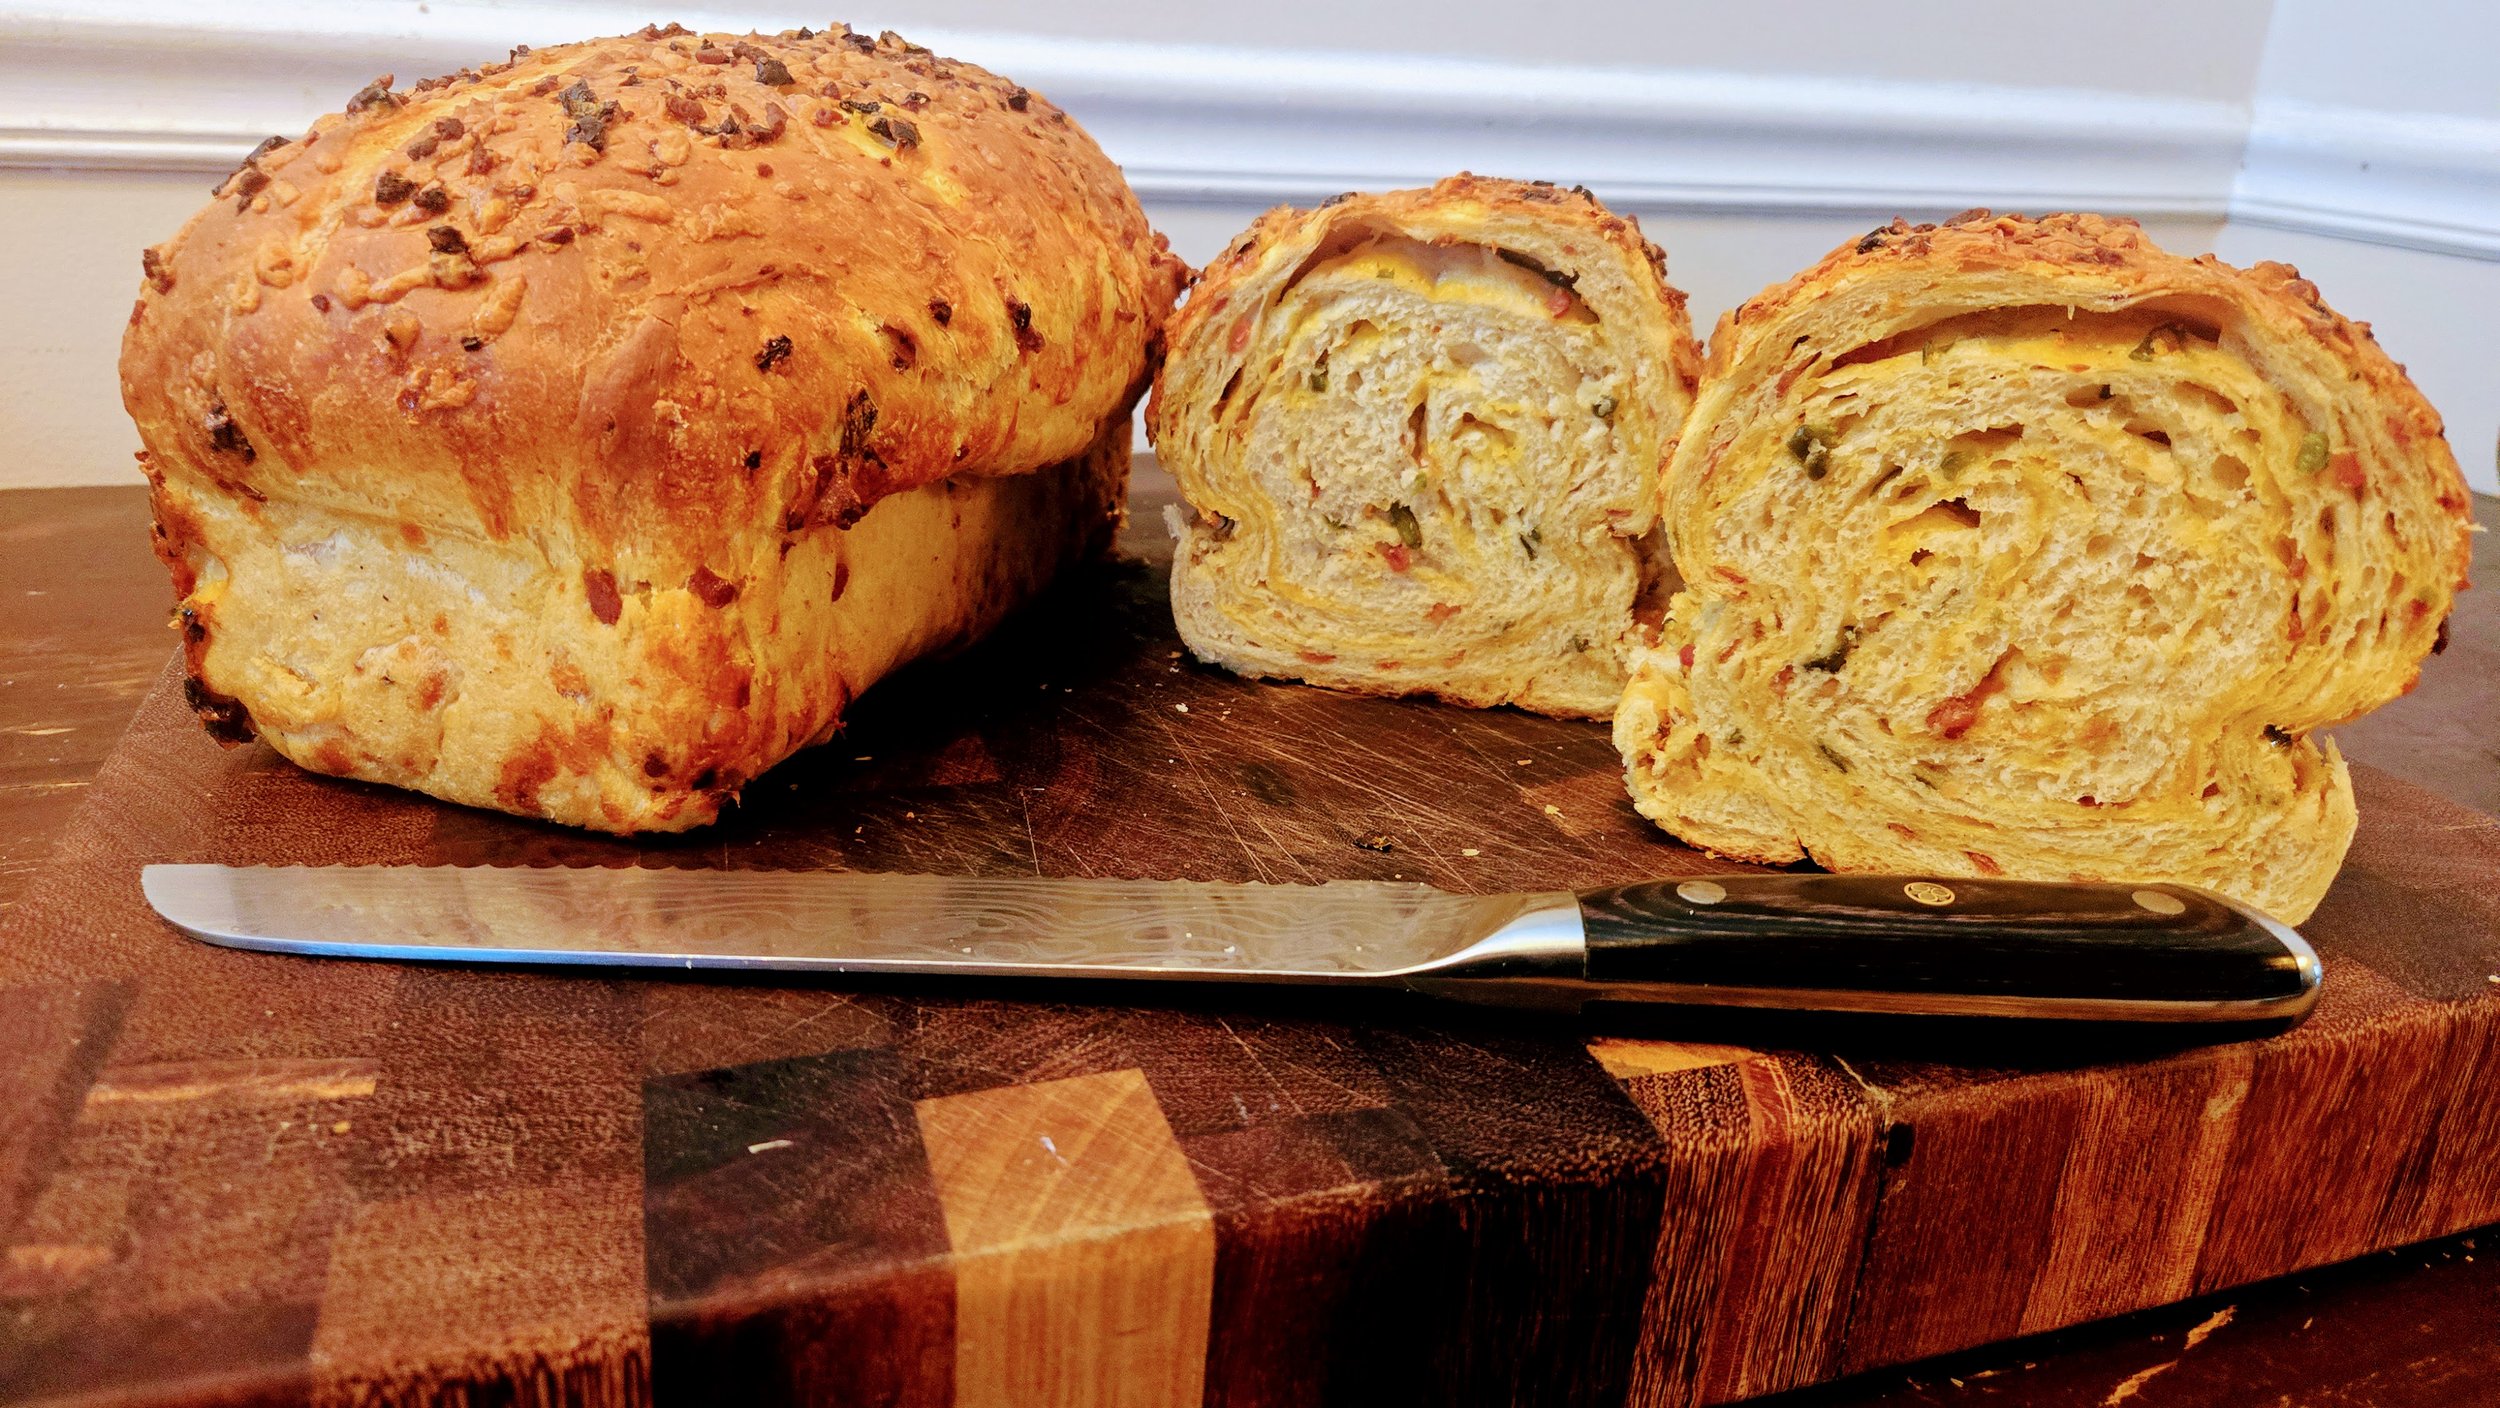
Smoky bacon. Sharp cheddar. Jalapeño heat. Fresh bread with a little Firehouse attitude.
A savory yeast bread loaded with sharp cheddar, smoky bacon, jalapeños, and Firehouse Seasoning. Baked until golden with a tender, chewy interior and pockets of melted cheese, bacon, and peppers throughout every slice.
This recipe makes two full loaves, because if you're going through the trouble of making homemade bread, you might as well have another one waiting.
Bread should be worth breaking out the butter for.
There are plenty of ways to make homemade bread more complicated.
This isn't one of them.
Firehouse Bacon Jalapeño Cheddar Bread starts with a simple yeast dough seasoned with Firehouse Seasoning before folding in sharp cheddar, smoky bacon, and plenty of jalapeños.
Fresh jalapeños work beautifully, but frozen jalapeños work just as well when properly thawed and drained. That makes this a great way to put peppers from the garden or freezer to work.
For the bacon, use fully cooked bacon crumbles for convenience or cook and crumble your own.
The dough can be mixed with a spiral mixer, a standard stand mixer, or completely by hand. The loaves can be baked in stainless steel, standard metal, or glass loaf pans using either conventional or convection heat.
And when you want another layer of flavor, fire up the smoker.
Serve it alongside dinner, toast a slice for breakfast, turn it into a sandwich, make an incredible grilled cheese, or just eat it warm with butter.
Recipe at a Glance
Yield: 2 loaves
Estimated Slices: 12 per loaf / 24 total
Serving Size: 1 slice
Prep Time: About 30 minutes
First Rise: 60–90 minutes
Second Rise: 30–60 minutes
Bake Time: Approximately 30–50 minutes depending on bakeware and oven mode
Bakeware: Stainless steel, standard metal, or glass loaf pans
Oven Temperature: 325–400°F depending on bakeware and oven mode
Finished Internal Temperature: 195–200°F
Ingredients
🍞 Bread Dough
1,000 g bread flour
650 g warm water, approximately 105–110°F
14 g active dry yeast
20 g honey
12 g kosher salt
2 Tbsp Firehouse Seasoning (20g)
30 g unsalted butter, melted and slightly cooled
🧀 Bacon Jalapeño Cheddar Filling
300 g sharp cheddar cheese, freshly shredded
120 g cooked crumbled bacon
150 g jalapeños, fresh or frozen
Reserve for Topping
From the amounts above, reserve:
50 g shredded sharp cheddar
20 g crumbled bacon
A small amount of prepared jalapeño
The remaining filling will be folded into the dough.
🥓 Choose Your Bacon
Quick Option: Pre-Cooked Bacon Crumbles
Use 120 g fully cooked bacon crumbles.
Pre-cooked bacon makes this bread considerably easier to prepare while still providing plenty of smoky bacon flavor.
Homemade Bacon Crumbles
Start with approximately 170–200 g raw bacon.
Cook in a skillet over medium heat until browned and crisp.
Transfer to a paper-towel-lined plate and allow the excess grease to drain completely.
Once cooled, crumble or finely chop.
Measure 120 g cooked bacon for the bread.
Kirby Rule: Bacon going into bread should already be fully cooked and well drained. Excess bacon grease can create heavy, greasy pockets inside the loaf.
🌶️ Prepare the Jalapeños
Fresh Jalapeños
Finely dice the peppers.
For less heat, remove the seeds and inner membranes.
For more heat, leave some or all of them intact.
Frozen Jalapeños
Thaw the jalapeños completely.
Transfer them to a fine-mesh strainer and allow the excess liquid to drain.
Spread the peppers onto clean kitchen towels or paper towels and gently press away additional moisture.
For even better results, place the drained jalapeños in a dry skillet over medium heat for 2–3 minutes, stirring occasionally.
The goal isn't to brown them. You're simply driving off some of the excess moisture released during freezing.
Transfer to a plate and cool completely before adding them to the dough.
Kirby Rule: Frozen peppers aren't the problem. The water they release is. Get rid of the excess moisture before it gets anywhere near the bread dough.
Instructions
1. Activate the Yeast
Add the warm water, honey, and active dry yeast to your mixing bowl.
Stir gently.
Allow the mixture to stand for 5–10 minutes, until the yeast begins to look foamy.
Kirby Rule: Warm water wakes up the yeast. Hot water can kill it. Aim for approximately 105–110°F.
2. Build the Dough
Add:
Bread flour
Firehouse Seasoning
Kosher salt
Melted and slightly cooled butter
Choose one of the three mixing methods below.
🌀 Mixing Option 1: Spiral Mixer
Begin mixing on low speed until the flour is fully hydrated and the ingredients come together into a rough dough.
Once no significant dry flour remains, increase to medium speed.
Continue mixing until the dough becomes smooth, elastic, and begins pulling cleanly away from the sides of the bowl.
The finished dough should feel slightly tacky but not wet.
Check the gluten development by gently stretching a small piece of dough between your fingers.
It should stretch into a thin membrane before tearing.
Kirby Rule: Watch the dough, not just the clock. Flour, humidity, water temperature, and room temperature can all change how quickly gluten develops.
⚙️ Mixing Option 2: Standard Stand Mixer
Fit a KitchenAid or similar stand mixer with the dough hook.
Mix on low speed until the flour is incorporated and a rough dough forms.
Increase to medium-low speed and knead for approximately 8–10 minutes.
The dough is ready when it is:
Smooth
Elastic
Slightly tacky
Pulling away from the sides of the bowl
Able to stretch without immediately tearing
If the dough still looks rough after several minutes, continue kneading rather than immediately adding more flour.
Kirby Kitchen Tip: Avoid running a standard stand mixer too aggressively with a heavy bread dough. Medium-low speed gives the dough time to develop without unnecessarily stressing the mixer.
✋ Mixing Option 3: By Hand
Mix the ingredients with a sturdy wooden spoon or dough whisk until a shaggy dough forms.
Turn the dough onto a lightly floured work surface.
Knead by hand for approximately 10–12 minutes.
Push the dough away with the heel of your hand, fold it back over itself, rotate, and repeat.
Continue until the dough becomes smooth and elastic.
Use additional flour sparingly.
A little tackiness is normal. Adding too much flour during kneading can create a dense, dry loaf.
The Windowpane Test
Regardless of which mixing method you choose, you're looking for the same finished dough.
Take a small piece and gently stretch it between your fingers.
If it can stretch thin enough for light to begin passing through before tearing, the gluten structure is sufficiently developed.
This is commonly called the windowpane test.
Don't Add the Filling Yet
The cheddar, bacon, and jalapeños do not go into the mixer during kneading.
Develop the dough first.
The filling will be incorporated by hand after the first rise.
This protects the bacon, cheese, and peppers from being pulverized and helps create distinct pockets throughout the finished bread.
Kirby Rule: Build the bread first. Fold in the good stuff second.
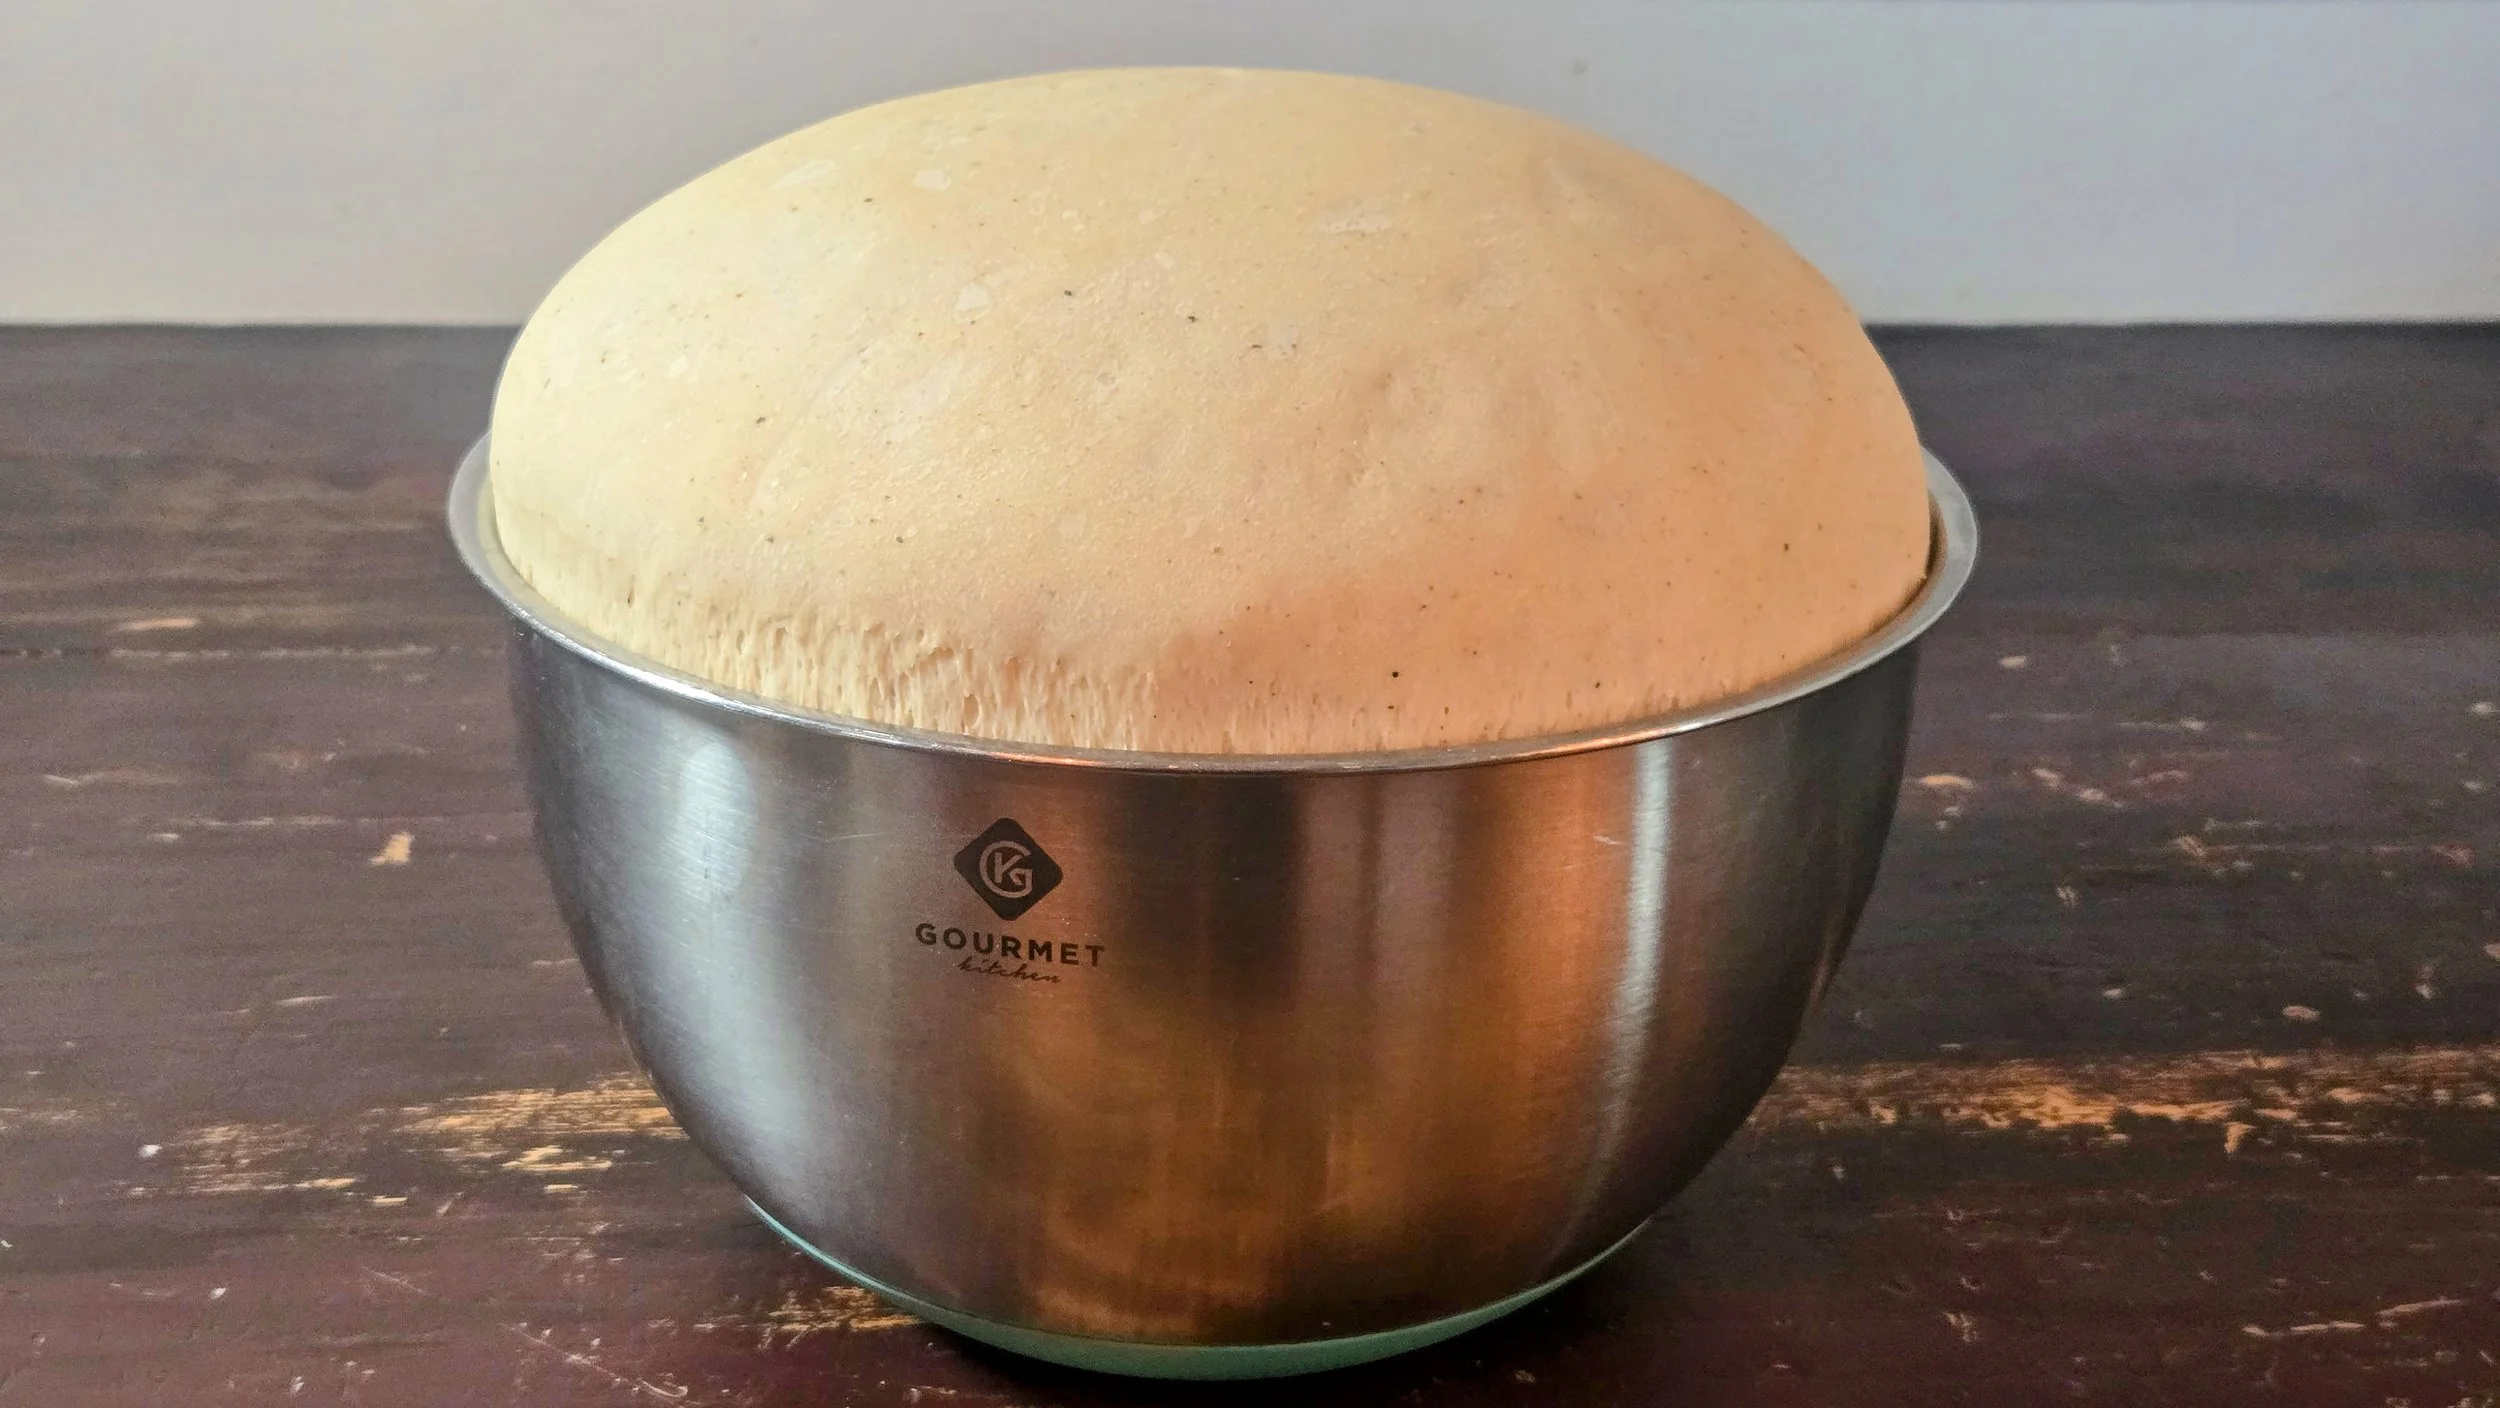
3. First Rise
Lightly grease a large bowl.
Shape the dough into a ball and place it in the bowl.
Cover and let rise in a warm area for approximately 60–90 minutes, or until roughly doubled in size.
4. Prepare the Filling
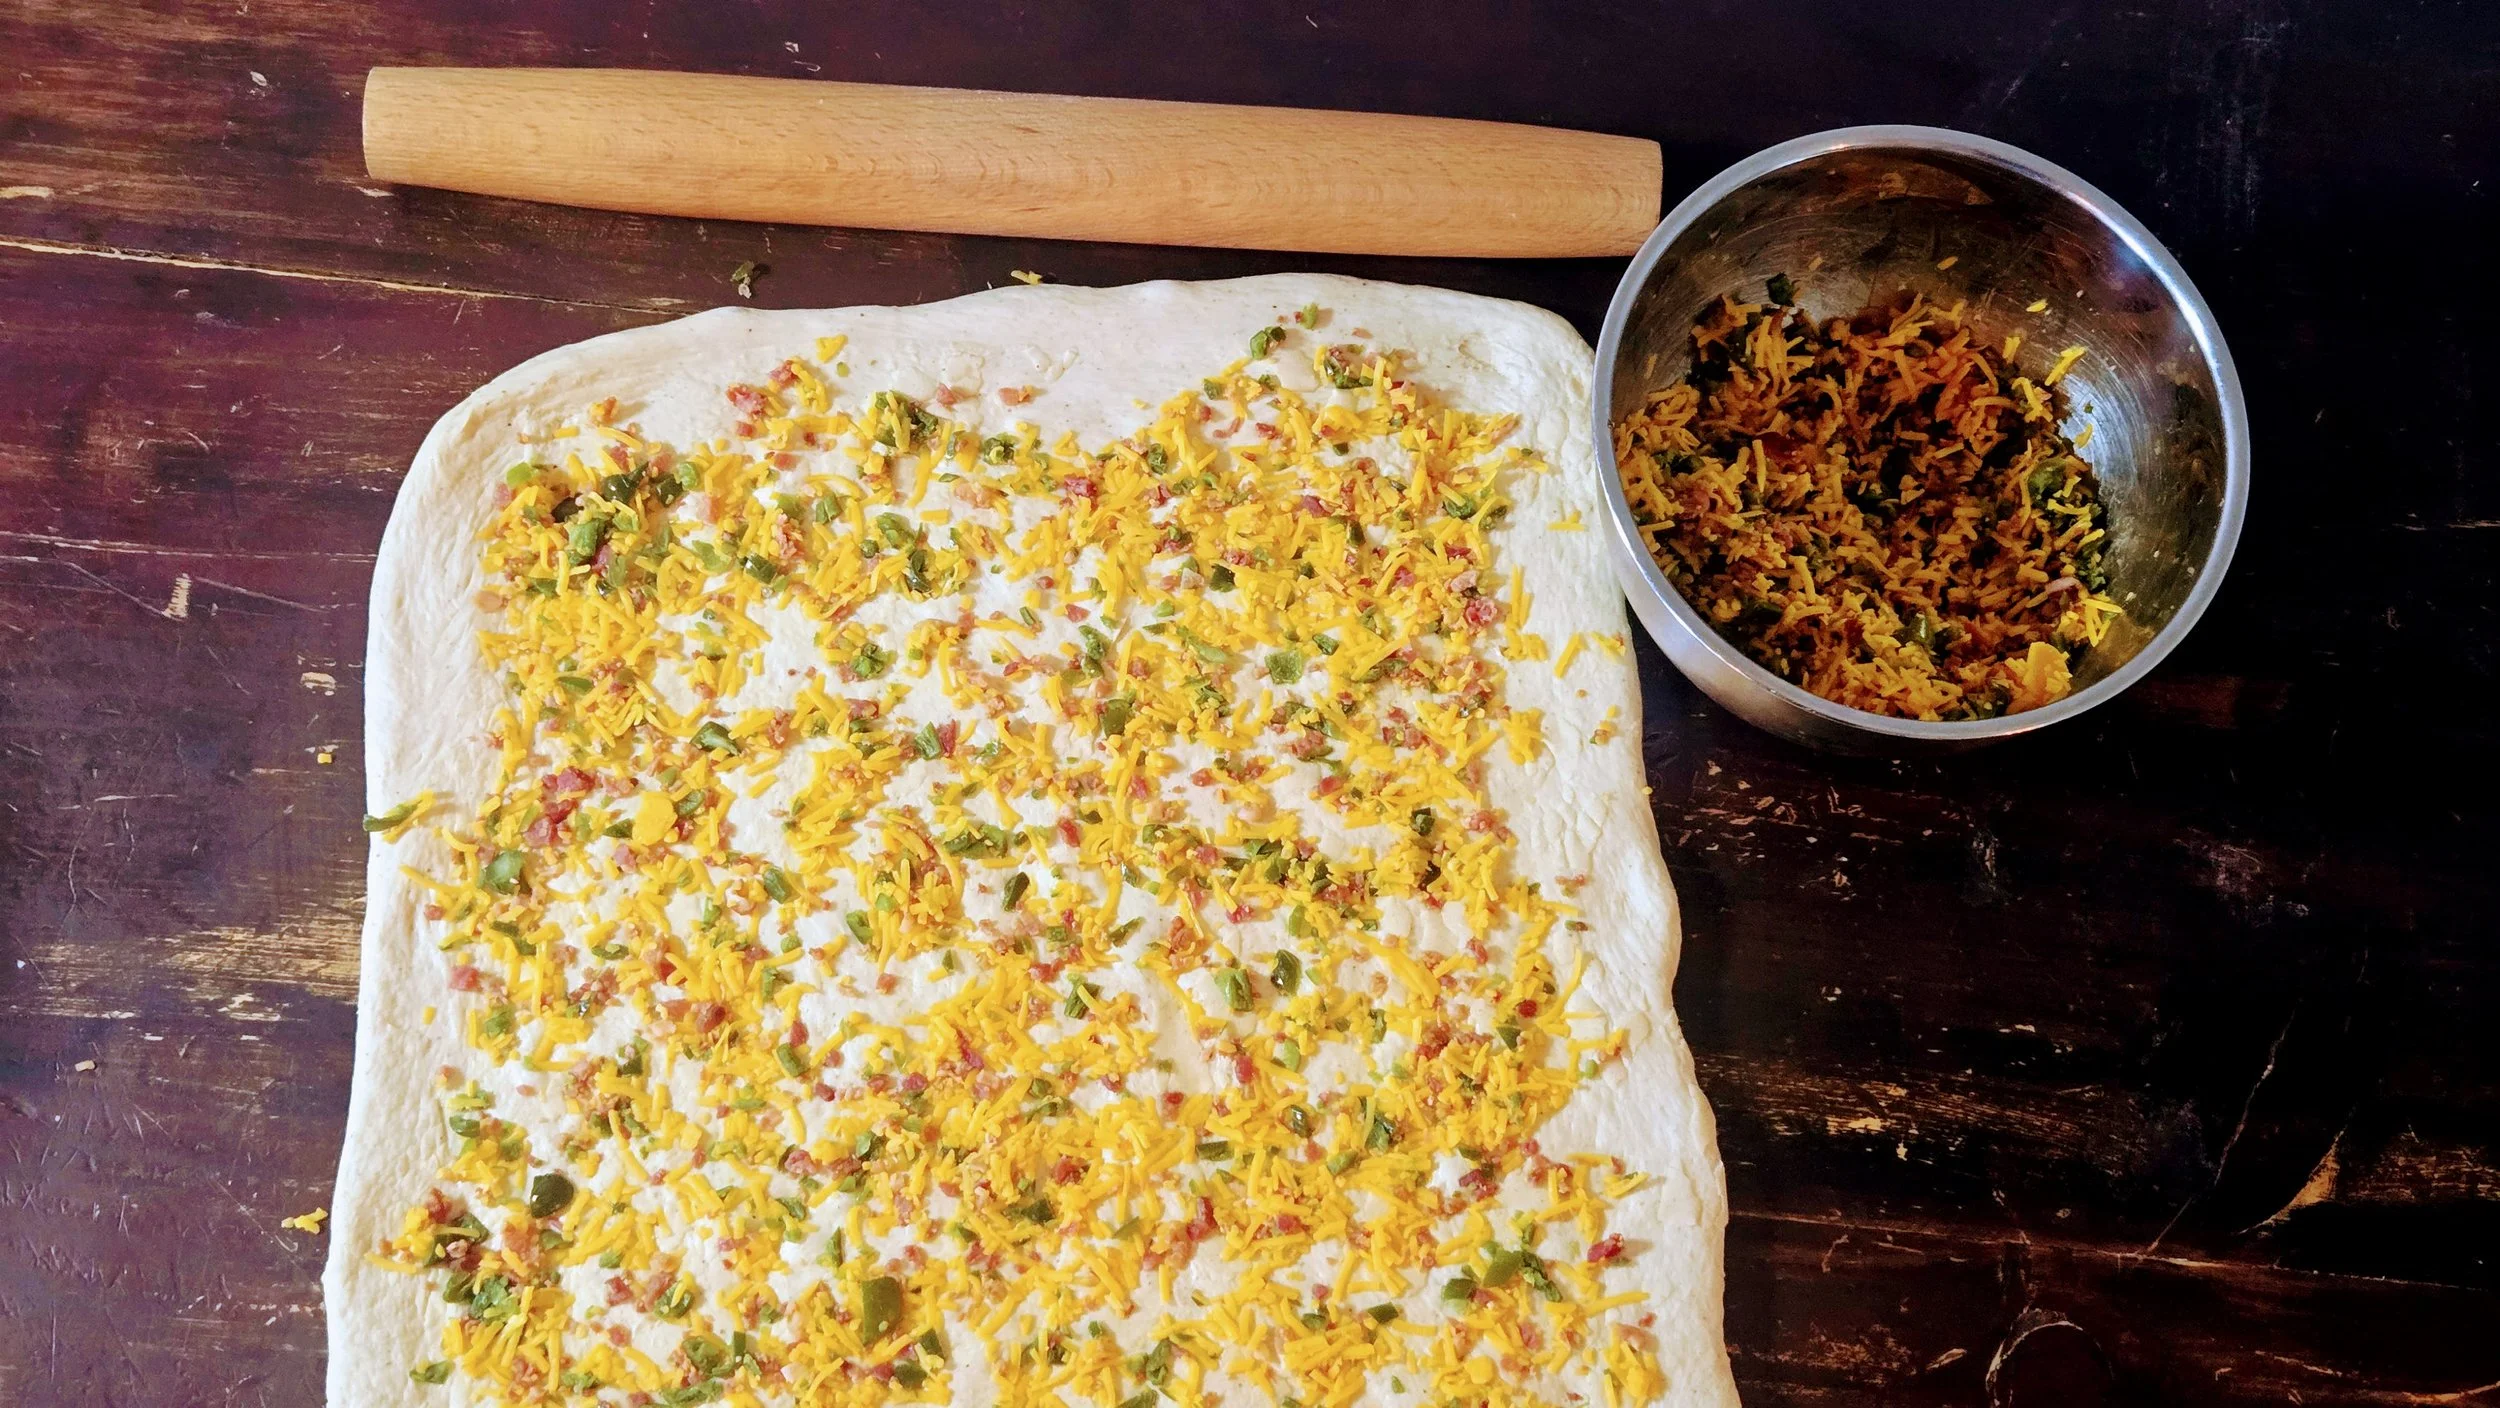
After reserving the topping ingredients, combine:
250 g shredded sharp cheddar
100 g cooked bacon crumbles
The remaining prepared jalapeños
Keep the reserved cheddar, bacon, and jalapeños separate for finishing the loaves.
5. Fold in the Filling
Turn the risen dough onto a lightly floured work surface.
Gently stretch it into a large rectangle.
Scatter approximately one-third of the filling evenly over the dough.
Fold the dough over itself.
Rotate the dough and gently stretch again.
Add another third of the filling and fold.
Repeat with the final third.
Gently fold only as much as necessary to distribute the cheddar, bacon, and jalapeños.
Don't worry about making everything perfectly uniform.
Pockets of cheddar, bacon, and jalapeño are part of the point.
6. Prepare the Loaf Pans
Prepare 2 loaf pans according to the material you're using.
🥈 Stainless-Steel Loaf Pans
Lightly grease the pans.
Cut parchment paper into a strip wide enough to cover the bottom and two long sides of each pan, leaving enough parchment extending above the sides to create handles.
Lightly grease the parchment as well.
Kirby Kitchen Tip: Parchment is strongly recommended when using stainless-steel pans. Melted cheddar can work its way against the pan during baking and make the finished loaf surprisingly difficult to release. The parchment handles make lifting the bread out considerably easier.
🍞 Standard Metal Loaf Pans
Lightly grease with softened butter, avocado oil, or nonstick spray.
Parchment is optional but can be used for easier removal.
🥛 Glass Loaf Pans
Lightly grease thoroughly with softened butter or nonstick spray.
A parchment sling can also be used if desired.
Then I'd change the cooling/removal instructions slightly:
7. Divide & Shape
Divide the filled dough into 2 equal portions.
Gently press one portion into a rectangle approximately the width of your loaf pan.
Starting from one short end, roll the dough into a tight log.
Pinch the final seam closed and tuck the ends underneath.
Place the loaf seam-side down in the prepared pan.
Repeat with the second loaf.
Kirby Rule: Don't aggressively degas the dough while shaping. Press out the largest air pockets, but leave enough structure behind for a light, tender loaf.
8. Second Rise
Cover the loaf pans loosely with a clean kitchen towel or lightly greased plastic wrap.
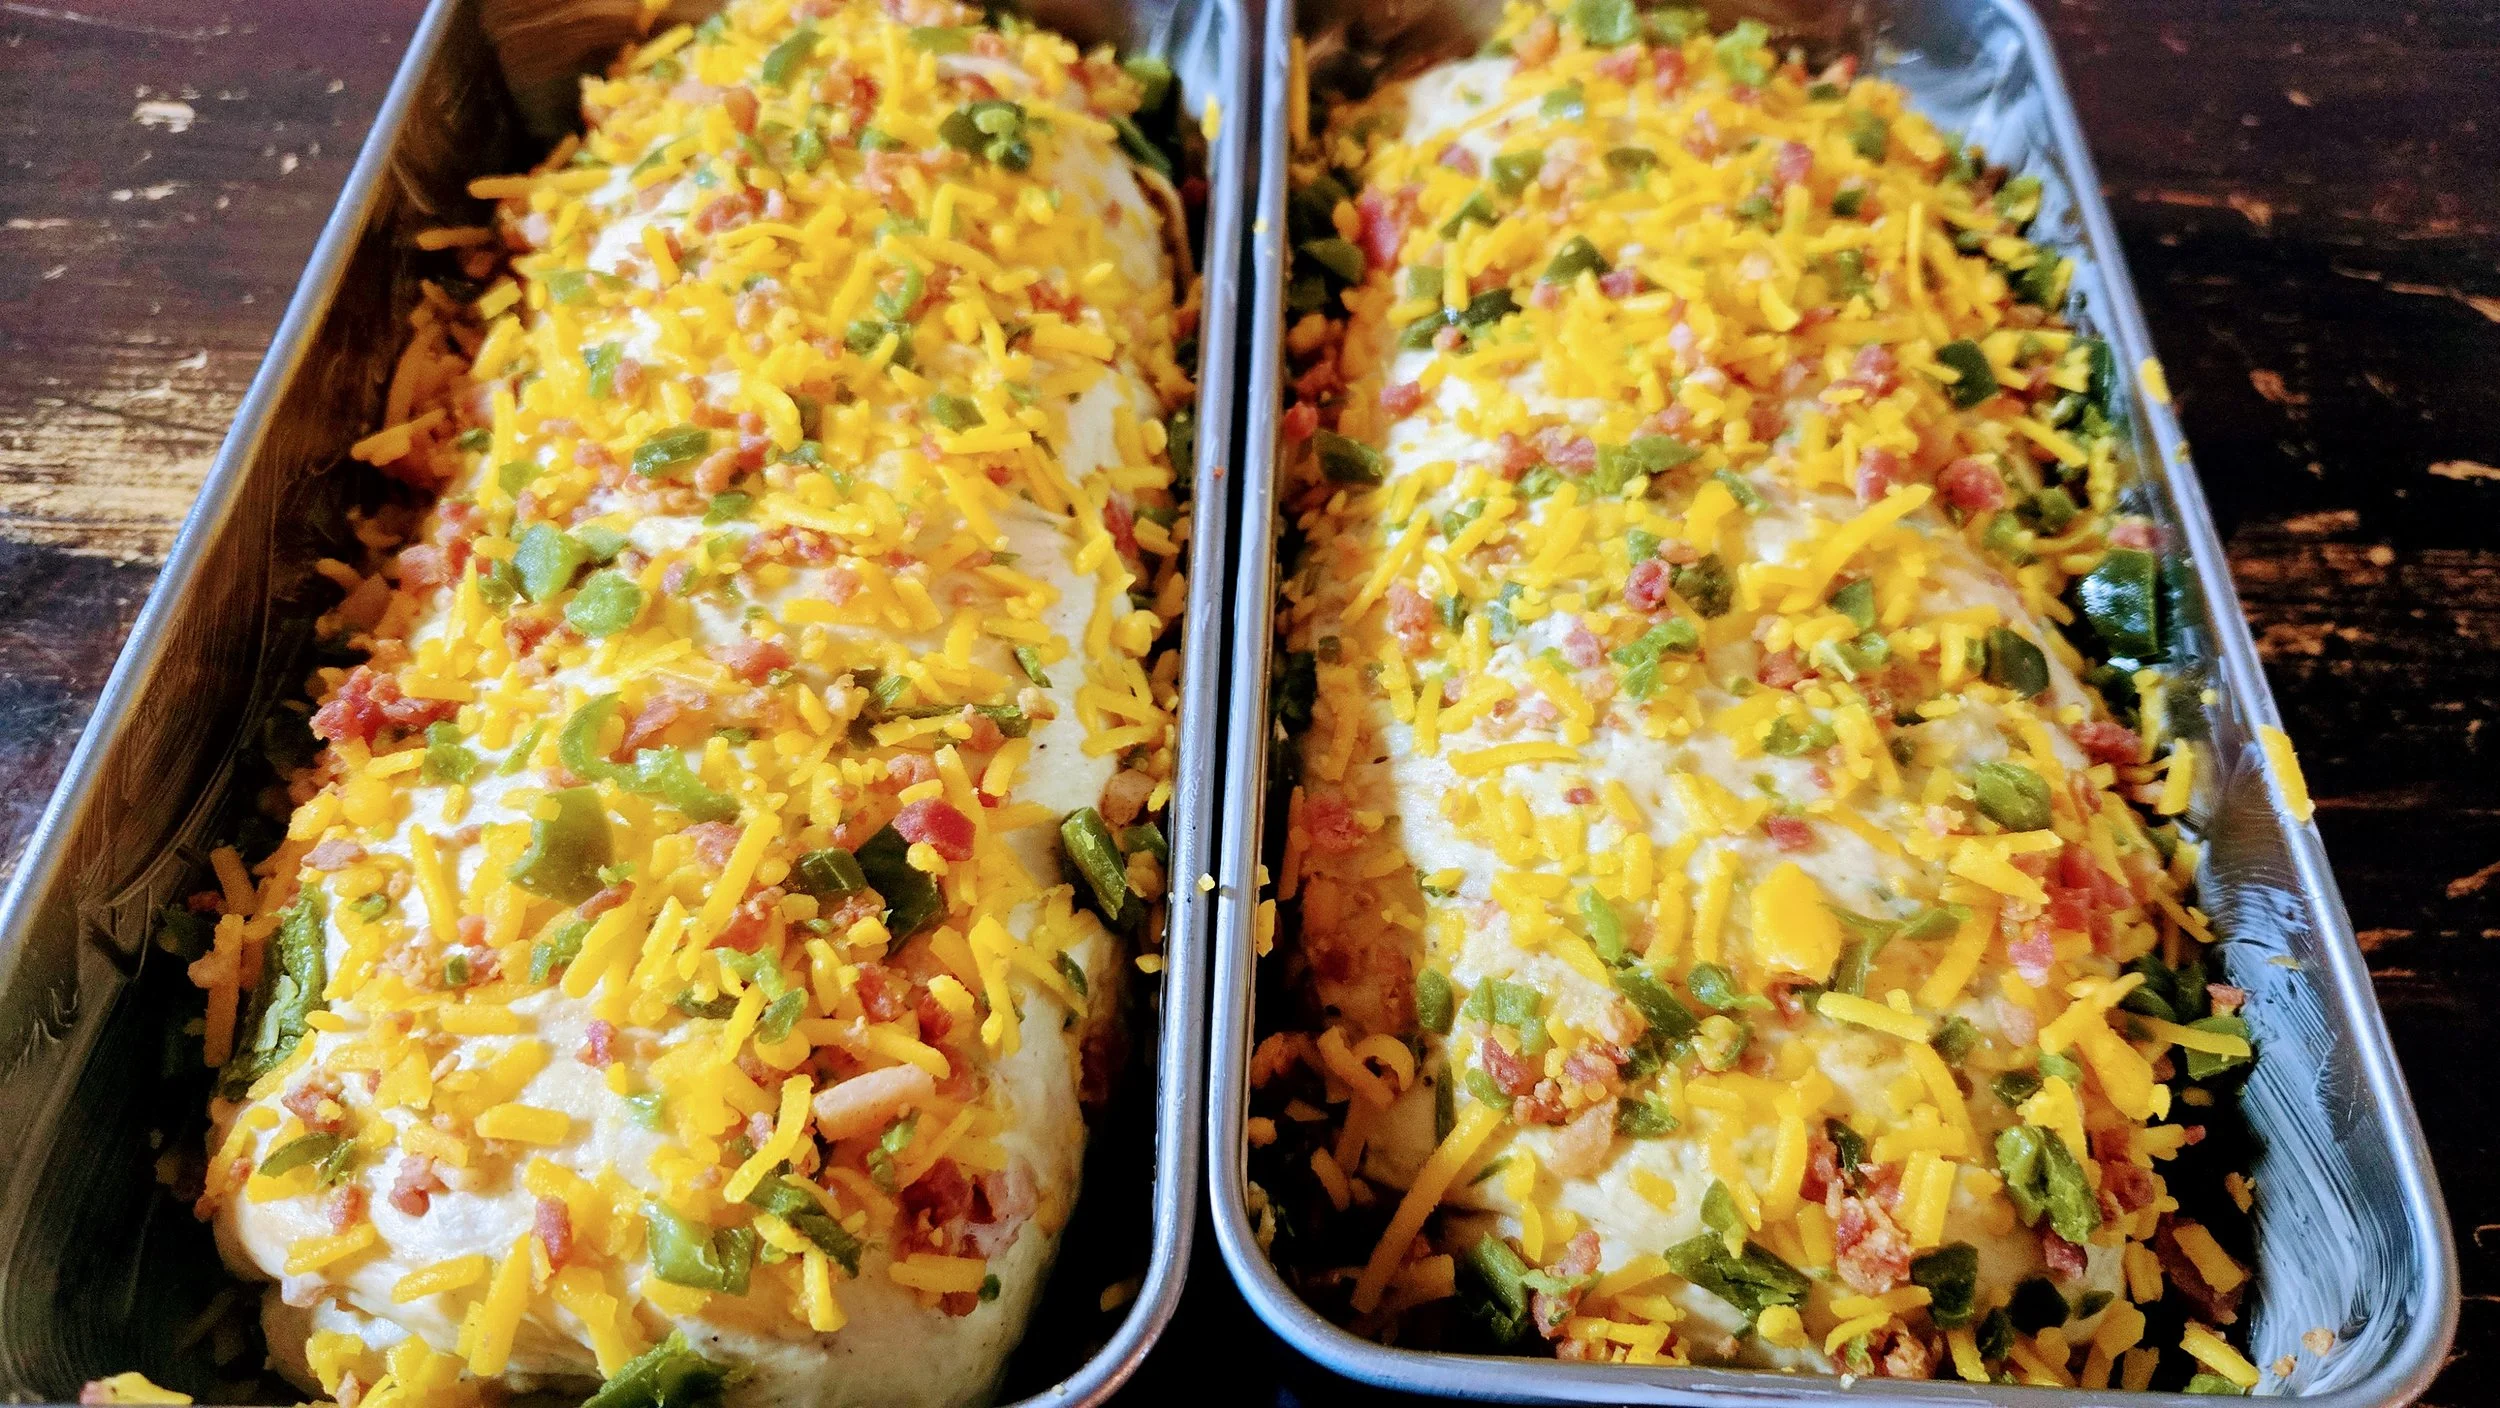
Allow the dough to rise for approximately 30–60 minutes.
The loaves should become noticeably puffy and rise to approximately 1 inch above the rim of the pans.
Use the appearance of the dough rather than the clock as your final guide.
9. Choose Your Baking Method
🥈 Stainless-Steel Loaf Pans
Conventional Bake
Temperature: 400°F
Rack Position: Lower third of the oven
Stainless steel heats evenly but may not transfer as much heat into the bottom of a heavy loaf as darker bakeware.
For the best bottom crust, place a pizza steel or heavy baking sheet on the lower oven rack while the oven preheats.
Once fully heated, place the stainless-steel loaf pans directly onto the hot pizza steel or baking sheet.
If neither is available, place the loaf pans directly on the lower oven rack.
Convection Bake
Temperature: 375°F
Rack Position: Lower third
Use the same pizza-steel or preheated-baking-sheet method when available.
Begin checking the bread approximately 5–10 minutes earlier than with conventional heat.
Kirby Rule: With stainless steel, don't judge the bread by the top alone. A beautifully browned top doesn't necessarily mean the bottom is finished.
🍞 Standard Metal Loaf Pans
Conventional Bake
Temperature: 375°F
Rack Position: Center
Standard aluminum, aluminized-steel, and nonstick loaf pans generally transfer heat into the sides and bottom more readily than stainless steel.
Convection Bake
Temperature: 350°F
Rack Position: Center
Begin checking approximately 5–10 minutes earlier.
If you're using particularly dark nonstick pans, watch the sides and bottom carefully because they may brown faster.
🥛 Glass Loaf Pans
Conventional Bake
Temperature: 350°F
Rack Position: Center
Glass holds heat differently than metal and may require additional baking time.
Convection Bake
Temperature: 325°F
Rack Position: Center
Conventional heat is preferred for glass, but convection can be used.
Avoid placing cold glass bakeware onto a preheated pizza steel, hot baking sheet, or other extremely hot surface.
Avoid sudden temperature changes that could cause thermal shock.
🔥 Smoker Method
Temperature: 400°F**
Use stainless-steel or standard metal loaf pans for the smoker.
Position the pans low enough to receive good heat from below while maintaining airflow around them.
Wood Choices
Pecan — Preferred. Nutty, balanced, and a natural match for bacon and cheddar.
Apple — Mild and slightly sweet.
Cherry — Mild with a slightly richer fruitwood character.
Hickory can be used for a stronger smoke profile.
Kirby Kitchen Tip: A smoker may use a fan, but don't automatically apply the 25°F convection-oven reduction. Smoker airflow and heat behavior vary considerably between cookers.
10. Score & Top
Once the second rise is complete, make one shallow lengthwise score down the center of each loaf.
Divide the reserved:
50 g cheddar
20 g bacon
Jalapeño pieces
between the two loaves.
Concentrate most of the toppings along the center.
Finish each loaf with a very light sprinkle of Firehouse Seasoning.
11. Bake
Use the temperature corresponding to your chosen pan and cooking method.
Stainless Steel
Conventional: 400°F for approximately 30–40 minutes
Convection: 375°F and begin checking around 25–30 minutes
Standard Metal
Conventional: 375°F for approximately 35–45 minutes
Convection: 350°F and begin checking around 30–35 minutes
Glass
Conventional: 350°F for approximately 40–50 minutes
Convection: 325°F and begin checking around 35–40 minutes
Smoker
400°F for approximately 30–45 minutes, checking the loaves as they approach the lower end of the range.
How to Tell When It's Done
Regardless of the pan or cooking method, the bread is ready when:
The top is deeply golden
The cheddar is melted and browned
The bacon is crisp
The loaf has begun pulling slightly away from the sides of the pan
The bottom feels firm and properly baked
The center of the bread reaches 195–200°F
Insert the thermometer into the bread crumb near the center, avoiding a large pocket of melted cheese.
Kirby Rule: Time and oven temperature get you close. Internal temperature tells you when the bread is actually finished.
If the cheddar and bacon begin browning too quickly before the center is finished, loosely tent the top with aluminum foil and continue baking.
12. Remove From the Pans & Cool
Allow the finished loaves to rest in their pans for 5–10 minutes.
For stainless steel, run a thin knife or spatula carefully along the two exposed ends of the loaf if necessary.
Use the parchment handles to gently lift the bread from the pan.
Transfer immediately to a wire rack.
For standard metal or glass pans, carefully loosen the edges if necessary and turn the loaf out onto a wire rack.
Don't leave the bread in the pans until completely cool. Trapped steam can soften the bottom and sides.
Allow the bread to cool for at least 45–60 minutes before slicing.
Kirby Rule: Cheese inside the bread is great. Cheese permanently attached to the loaf pan isn't. Line stainless steel and save yourself the fight.
Performance Notes
🧀 Use Sharp Cheddar
Sharp cheddar provides enough flavor to stand up against the bacon, jalapeños, Firehouse Seasoning, and smoke.
Freshly shredding the cheese also gives it a better melt than most pre-shredded cheese.
🥓 Bacon Without the Extra Work
Pre-cooked bacon crumbles make this recipe considerably faster.
If you'd rather start with fresh bacon, cook it until crisp and drain it thoroughly before adding it to the dough.
Either version works.
🌶️ Frozen Jalapeños Are Welcome
Frozen jalapeños work perfectly well in this bread.
The important part is managing their moisture.
Thawing, draining, drying, and briefly heating them in a skillet keeps excess water from affecting the dough while preserving plenty of jalapeño flavor.
🔥 Firehouse in the Dough
Firehouse Seasoning goes directly into the bread dough rather than simply being sprinkled on top.
That distributes garlic, pepper, paprika, jalapeño, and subtle sweetness throughout every slice.
Because bacon, cheddar, and Firehouse Seasoning all contribute salt, the amount of additional kosher salt is intentionally restrained.
🌀 Three Ways to Make the Dough
A spiral mixer, standard stand mixer, or your own hands can all develop excellent bread dough.
Regardless of the method, the goal is the same: develop a smooth, elastic dough before introducing the bacon, cheddar, and jalapeños.
🍞 Your Pan Matters
Stainless steel, standard metal, and glass all transfer and retain heat differently.
That's why the recipe provides different temperatures and rack positions instead of pretending every loaf pan behaves the same way.
The internal temperature of the bread remains the final judge.
🌬️ Conventional or Convection
Convection circulates hot air around the bread and generally browns the exterior faster.
Reducing the temperature by approximately 25°F helps keep the cheddar and bacon from becoming too dark before the center finishes baking.
🌳 Smoke the Bread, Don't Bury It
Bread takes on smoke surprisingly well.
Pecan provides enough character to complement the bacon and jalapeño without overwhelming the loaf.
The smoke should be another layer, not the only thing you taste.
Ways to Use It
Firehouse Bacon Jalapeño Cheddar Bread is excellent:
Warm with butter
Alongside chili
With beef stew
With chicken and dumplings
Alongside smoked meats
With eggs for breakfast
As sandwich bread
Toasted with cream cheese
As the base for grilled cheese
For breakfast sandwiches
Alongside soup
Straight from the cutting board
Make It Your Own
More Heat: Leave more of the jalapeño seeds and membranes intact.
Milder: Remove the seeds and membranes before chopping.
More Cheese: Increase the cheddar or replace some with Pepper Jack.
More Smoke: Use hickory instead of pecan.
No Smoker: Choose the appropriate oven method for your bakeware.
Cheddar Crust: Add a little extra cheddar during the final 10 minutes of baking.
Fresh Bacon: Cook and crumble your own instead of using pre-cooked bacon.
Fuel Profile — Estimated Per Serving
Calories: ~230 kcal | Protein: ~9 g | Carbohydrates: ~32 g | Net Carbs: ~30 g | Fiber: ~2 g | Fat: ~8 g
Based on approximately 24 slices total from two loaves using bread flour, sharp cheddar, 120 g cooked bacon, jalapeños, butter, honey, and Firehouse Seasoning. Nutrition is estimated and will vary depending on the bacon, cheddar, flour, slice size, and ingredient brands used.
Storage
Room Temperature
Store tightly wrapped or in an airtight container for up to 2 days.
Refrigerator
For longer storage, refrigerate for up to 5 days.
Warm or toast before serving for the best texture.
Freezer
Allow the bread to cool completely.
Freeze whole or slice first and place parchment between the slices.
Wrap tightly and freeze for up to 3 months.
Individual frozen slices can be reheated directly in a toaster, oven, or air fryer.
Performance Tip
“Some bread is meant to sit beside the meal. Some bread makes you forget what else was on the plate.”